Showing posts with label whipped cream. Show all posts

Saturday, July 11, 2015

frozen yogurt tarts


I've been on a bit of a tarts kick as of late.  Can you tell?  I really wanted a healthier version, both for me, and for an easy snack for the kids.  These tarts are MUCH healthier than my previous recipe, and are mini sized (perfect for snacking!).

I got the recipe for the crust from Deliciously Ella.  I love her!  She's a super cute healthy girl from London.  A bit hippy for me sometimes, but great for easy, filling, low sugar, veggie recipes.  I had to alter her tart crust recipe a bit to suit me (and to account for the US measurements).

These tarts take about 45 minutes to make (plus freezing time), but you can make them the night or morning before you want them so easily.


These tart crusts only use 4 ingredients.  So simple.  Almonds, dates, coconut oil, and water.  That's it.  Really.  I like mine a little coarse, but you can grind them finer if you like.  I find the easiest way to make these is to cut the dates into small pieces and soak them in a small bowl with the water and (melted) coconut oil until they have softened a bit.

While the dates are soaking pulse the almonds in a food processor until fine.  Pour the almond pieces out into a medium sized bowl.  Now pulse the dates in the water and coconut oil until there are no remaining chunks.  Pour this out into the bowl with the almonds and stir together with a wooden spoon.

Preheat the oven to 325 degrees F and lightly grease a mini muffin tin.

Ball up pieces the size of half your thumb (as a rough estimate) and press them down in each mini muffin mold, pushing the crust out gently up near the tops of the mold.  I ended up with about 21 tarts.  Bake for 15 minutes, then move and let sit about 10 minutes.  Remove carefully and place on a wire rack to cool completely.

I know the darker than average crust color might concern some of you, but almonds and dates are dark before baked.  Don't worry.  Nothing is burned.


Place the tarts on a large plate or tray to prep for the freezer.


I had the PERFECT amount of yogurt in one container to exactly fill all my tarts.  Just spoon a dollop into the center of each tart.


Place the tarts in the freezer until the yogurt has firmed.  Freezing the tarts makes them so refreshing on a hot day, and there's WAY less mess for the kiddos!
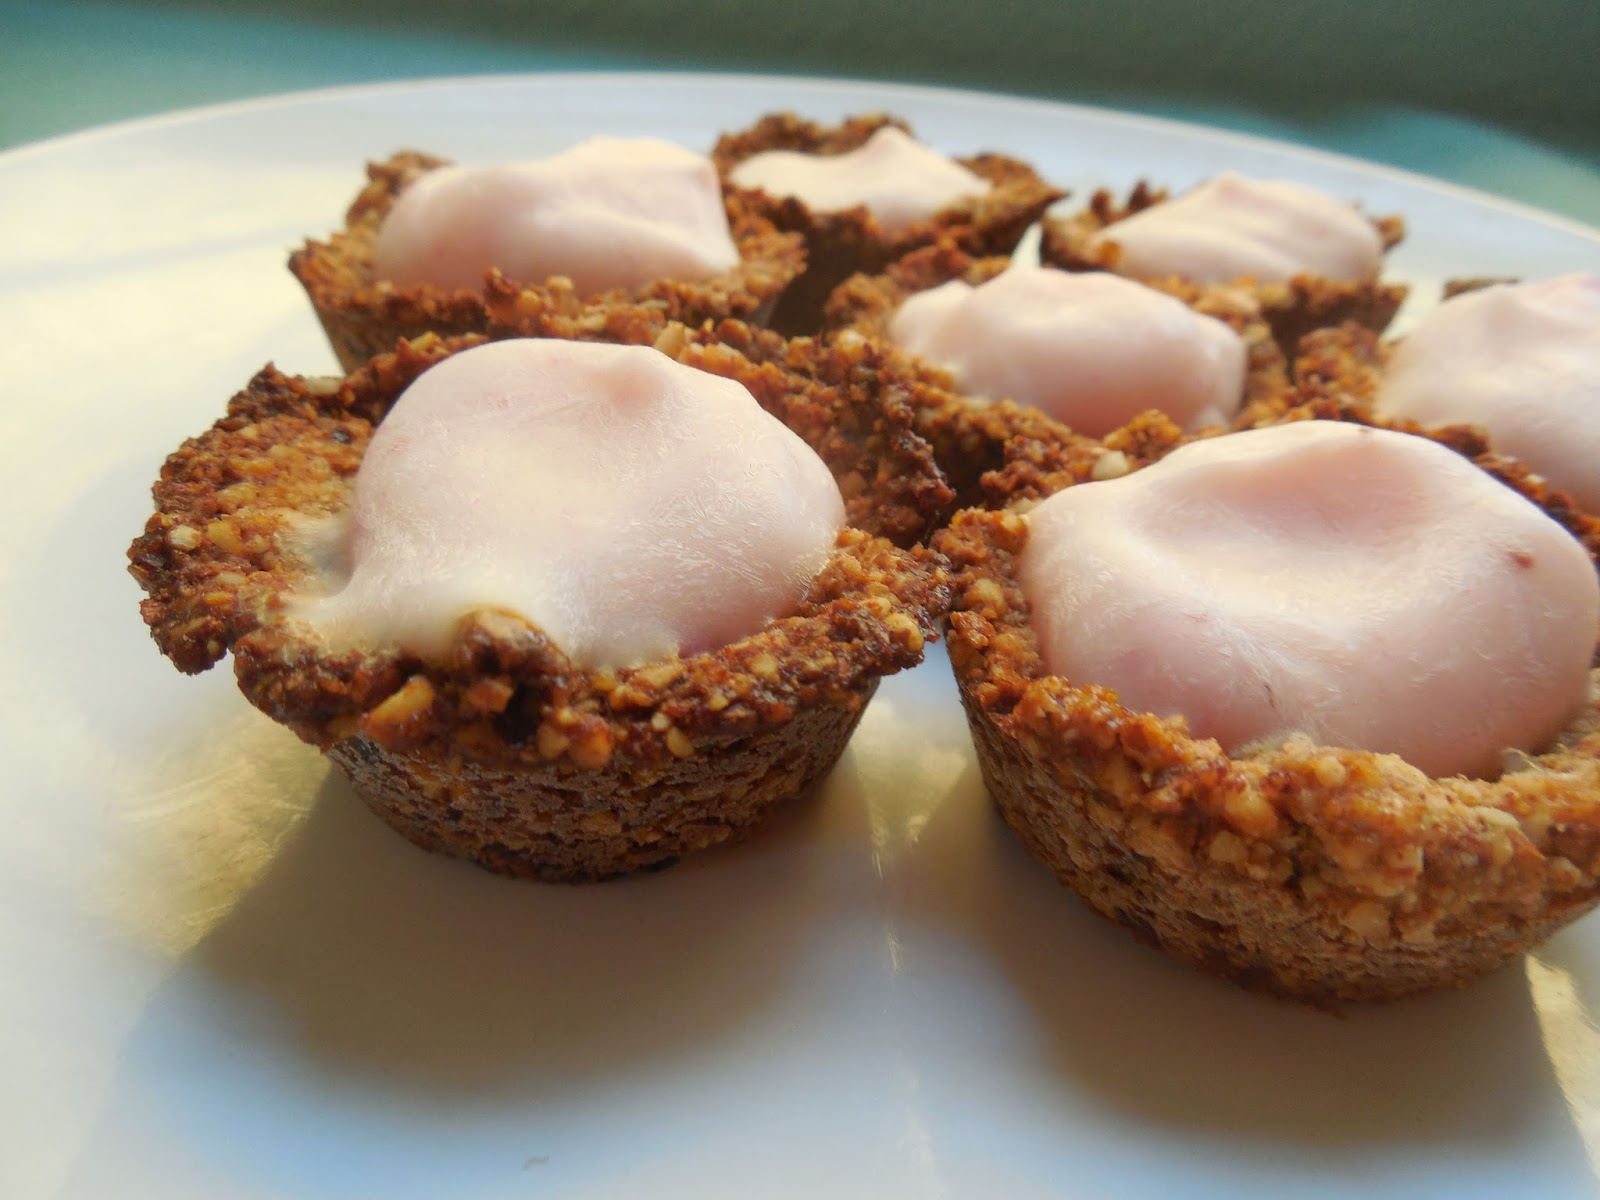

Look at how pretty and simple these are.  You could eat them like this.  Or...


...you could spoon a nice dollop of lite cool whip on top of each tart.  Really, it makes all the difference in the world.  Now you have a still pretty healthy dessert that is great for hot days, good for kids, not messy, and perfectly bite sized.

Not enough reason to make these?  Well, they are also super easy to make, required very few ingredients, can be made in advance  Shall I go on?


In short these tarts are sweet, tart, nutty, chewy, refreshing, and creamy.  What's not to love?

You could even go one step further in telling yourself to make these by remembering that the ingredients include whole almonds and yogurt.  Very good sources of protein you know.

And cool whip not included, I happened to have all the other ingredients necessary already in stock.
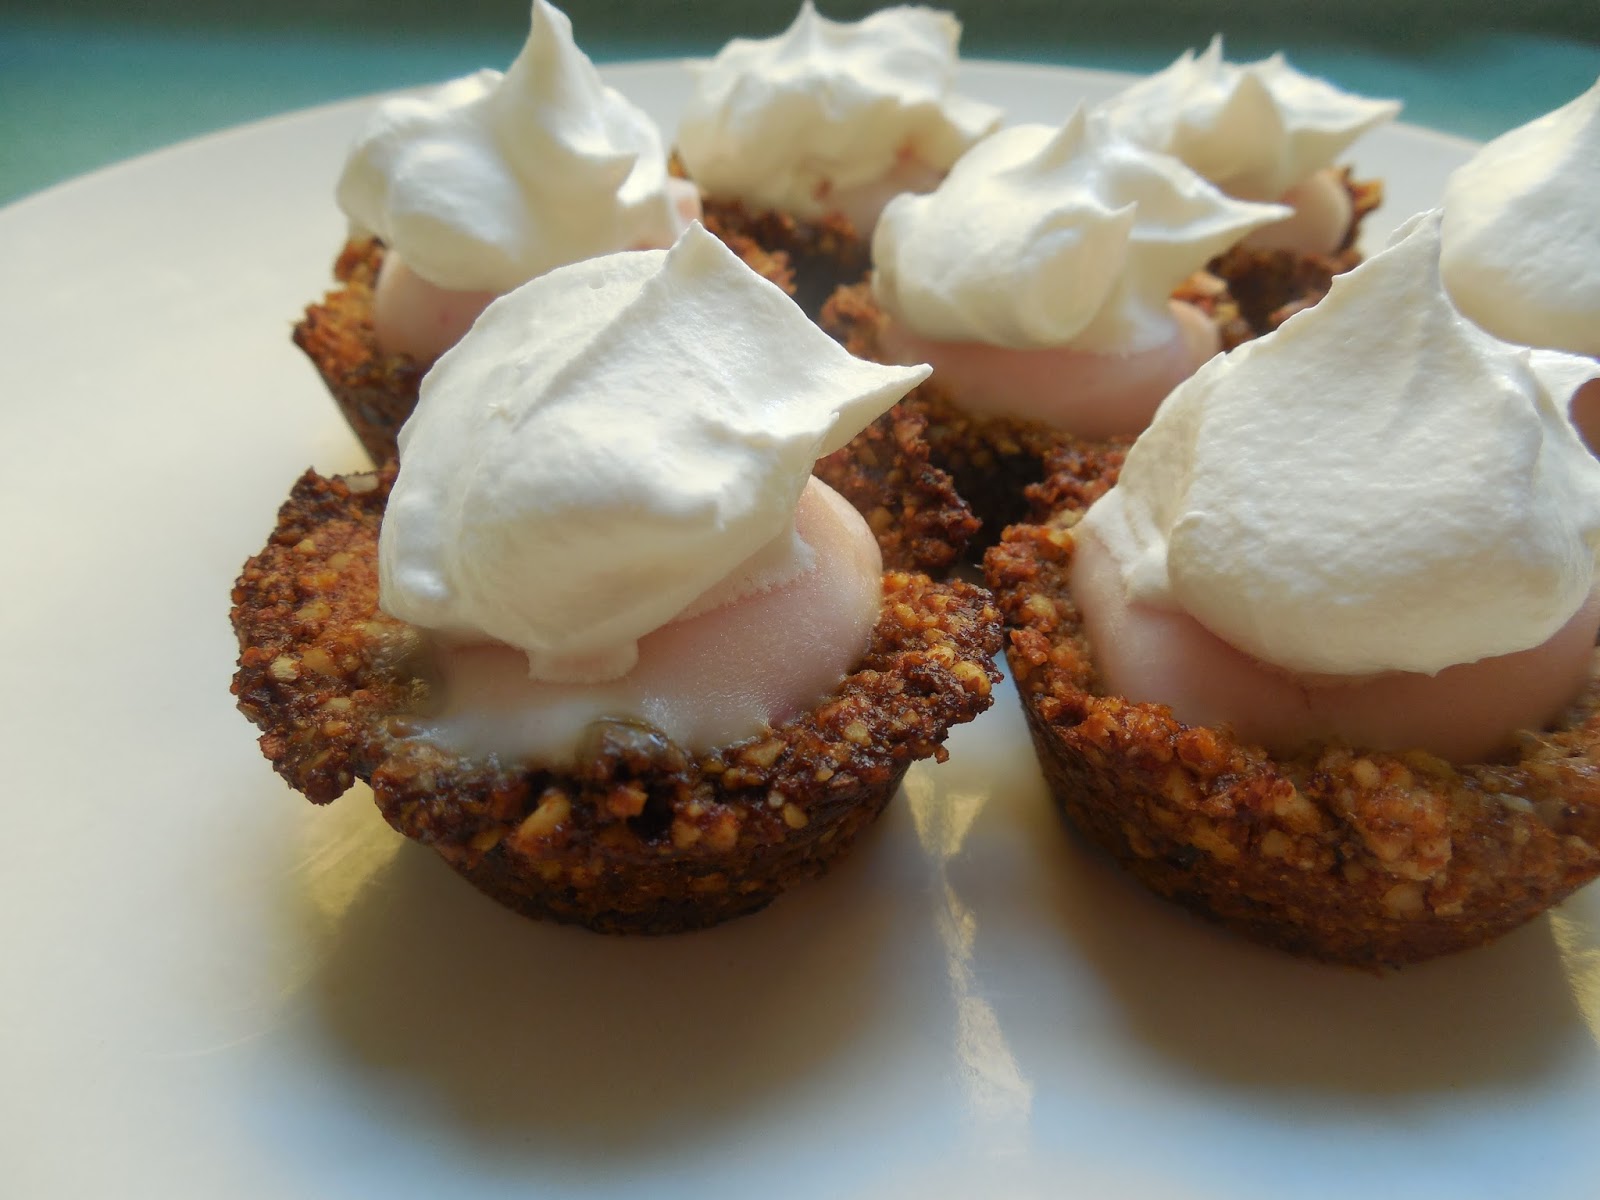

frozen yogurt tarts
makes 20-22 mini muffin sized tarts

ingredients:

  • 7 ounces of whole almonds
  • 3 tbsp coconut oil
  • 2 tbsp water
  • 10 medjool dates
  • 1 container of strawberry yogurt (I used yoplait original)
  • lite cool whip
directions:
  1. Cut the dates into small pieces and place into a small bowl to soften with the coconut oil and the water.  While they soak grind the almonds in a food processor (coarse or fine, up to you).  Pour the ground almonds out into a medium bowl.
  2. Pour the date mixture into the food processor and puree.  Pour the mix out into the almond bowl and stir to combine with a wooden spoon.
  3. Preheat the oven to 325 degrees F and oil a mini muffin tin (24 muffin capacity).
  4. Grab crust pieces about half the size of your thumb and gently push into the base of each mini mold, then push up the sides evenly.
  5. Bake for 15 minutes, or until edges have darkened a bit.
  6. Remove from oven and let rest for 10 minutes before removing from the mold and letting cool completely on wire racks.
  7. Place crusts on a large plate or tray and gently spoon strawberry yogurt into the center of each tart.  Freeze the tarts.  
  8. Remove from the freeze and top each tart with a large dollop of lite cool whip.  Serve.


The crust recipe is a lightly edited version from Deliciously Ella.


Monday, July 6, 2015

mini tart cups


These mini tart cups are so cute and easy.  They are the perfect snack size, and can be made in so many flavors and varieties!  All you need is any sugar cookie, cracker, or shortbread dough that can be rolled out.  I used a biscuit cutter with a scalloped edge because it makes the tart edges prettier.


Gather up your favorite dough recipe (that can be rolled out), a muffin tin, and a biscuit cutter slightly bigger than the muffin tin base.

Roll out your dough fairly thin because it will puff up a bit when it bakes, and you want plenty of room for tart filling!  I should have rolled this batch a bit thinner, but they still worked fine.  Just don't roll your dough CRAZY thin, because you want the tart crust sturdy enough to support the weight of your filling.


Use your biscuit cutter and cut out the dough in slightly bigger circles than the bottom of the muffin tin openings.  Spray the muffin tin well with cooking spray before you lightly press the dough in and they'll pop out easily after they're baked.  Grab a fork and poke 3-4 times on the tart bottoms to prevent them from puffing up too much.


I baked this batch for 18 minutes, then let them sit for about 2 minutes before I removed the tart cups to a wire rack to cool completely.

You can easily make these a day before you need them if you store them in a cool dry place.  I made these ahead of time, and I made the custard filling the day before as well.  I piped the custard into the cups right before I needed them and topped them with strawberries and blueberries.  So easy!  I love these tarts.  They taste yummy (seriously, I need an intervention to stop eating them all!), they were really easy, you can make them in advance, and they look super fancy.


Tarts are great for parties because you can just grab them and you don't need a fork or even a plate.  I love grab and go foods!  I've already got a bunch of tart variations I want to make too.  One the top of my list?

  • shortbread cup + chocolate pudding + whipped cream dollop
  • graham cracker cup + chocolate ganache or pudding + toasted marshmallow
  • chocolate sugar cookie cup + strawberry Greek yogurt
  • sugar cookie cup + strawberries + whipped cream dollop
  • peanut butter cookie cup + Reese's peanut butter cup


mini tart cups

ingredients:

  • 2 cups AP flour
  • 2 tbsp sugar
  • 1 tsp salt
  • 1/2 butter, cut into small pieces
  • 1 egg
  • 3 tsp milk

directions:

  1. In a food processor, blend the flour, sugar, salt, and butter until it resembles coarse sand.   Pulse in the egg, then add in the milk and pulse until the dough comes together.
  2. Wrap the dough in plastic wrap and refrigerate for 30 minutes.
  3. Preheat the oven to 350 degrees F.  Flour you counter and roll on the dough fairly thin.  Use a biscuit cutter slightly larger than the muffin tin base and cut out your dough.  Gently press into the greased muffin tin and lightly stab 3-4 times with a fork.
  4. Bake for 18 minutes, until the edges are lightly golden.  Remove from the oven and let sit for 2 minutes before removing the cups onto a wire rack to cool completely.
  5. Once cooled, fill cups and serve, or set unfilled cups aside in airtight container in a cool dry area.  Cups can always be filled and served the next day.  Once filled try to consume the cups within 3 days or the cups will start becoming soggy on the inside.

Sunday, June 28, 2015

no bake chocolate cheesecake mousse


Let's just say I'm glad this mousse is served in 4 individual cups, because otherwise I'd want to eat it all in one sitting.  I would die from richness and sugar, but it might be worth it.


 This is a great dessert to make ahead if you have company, or if you want to have dessert planned out for yourself for 4 days!  Not that I would do that...

This really is an awesome dessert though.  It's pretty darn quick to make (not counting chill time), its easy to make, and it requires only a tiny amount of ingredients.

You can change it up too.  Sometimes Jeff prefers classic cheesecake mousse, which involves cancelling the last tablespoon of whipping cream and the cocoa powder.

You could also make a fruit topping over the top, or add in a different flavor extract.  Lemon, mint, I could go on.

Also, Jeff loves his mousse semi-frozen.  He sticks his in the freezer for about 30 minutes before eating.


recipe adapted from Cooking Classy

no bake chocolate cheesecake mousse
serves 4
Total time: 2 hours 20 minutes

ingredients:


mousse:

  • 8 oz. cream cheese
  • 2/3 cup powdered sugar
  • 2 tablespoons cocoa powder
  • 2/3 cup + 1 tablespoon heavy whipping cream
  • 1/2 tsp corn syrup
  • 1 tsp vanilla extract
crust:
  • 1 package graham crackers (about 8), crushed
  • 1 tbsp packed brown sugar
  • 1/4 cup melted coconut oil

directions:
  1. In a medium bowl use a hand mixer  on high speed to whip the heavy whipping cream until soft peaks form.  Add in the corn syrup and whip again until stiff peaks form.  Set aside.
  2. In a stand mixer with a whisk attachment whisk the cream cheese for about 3 minutes, until fluffy and light.  Add in the powdered sugar, cocoa powder, and vanilla.  Whisk until well mixed.  
  3. Mix in the whipped cream mixture in two batches, until just combined. Set aside.
  4. Put the graham crackers in a sealed freezer bag and crush with your fists, a mallet, etc.
  5. Add the brown sugar into the bag and shake to combine.
  6. Pour in the coconut oil and seal the bag.  Massage with your fingers to mix well.  
  7. Divide the crust into 4 cups or small bowls and pack down with your fingers, a large spoon, etc.
  8. Pour the mousse evenly into the 4 cups and refrigerate for at least 2 hours, up to a few days.  Enjoy!

Saturday, November 22, 2014

peach shortcake


This is one of my favorite "make anytime" desserts.  What's that?  Well, everything in this recipe is a pantry, fridge, or freezer staple that I have 98% of the time.  I can make peach shortcake any time year round in about 30 minutes.  Sweet.


You can use any biscuit or cake you want for this.  I like using Bisquick drop biscuit recipe with  some sugar and cinnamon added.  This is my go-to biscuit for this recipe for ease, and lack of many ingredients.  Plus, prep through pulling out of the oven biscuit making takes only 15 minutes.


When the biscuits go in the oven start working on the peaches.  You can use fresh or frozen peaches depending on availability and season.  They both work well.  Add one pound of sliced peaches into a medium pot and cook over medium heat.


When the peaches have mostly thawed (if using frozen) stir in the brown sugar and cinnamon.


The juice from the peaches mixed with the sugar and cinnamon make a great sauce.  Stir occasionally until the peaches are soft (not mushy), and the sauce has thickened.  Remove from heat until just warm.


Let the biscuits cool a bit once they come out of the oven.


If you start making the peaches once the biscuits go in the oven they should be ready around the same time.  Let them sit out until they cool.  This is why say this recipe takes 30 minutes instead of 15.  You have to take cooling time into account.


Cut the biscuit in half.  Scoop some peaches out over the bottom biscuit half and drizzle some of the sauce over top.  Cover with the top biscuit half and finish off with a dollop of whipped cream.  Fresh homemade is preferable, but cool whip works too.  :)


Peach shortcake:
serves 4

ingredients:

biscuit:

  • one recipe of biscuit drop biscuits
  • 2 tsp granulated sugar
  • 1 tsp cinnamon

peaches:

  • 1 pound sliced peaches (fresh or frozen)
  • 1/4 tsp nutmeg
  • 1 tsp cinnamon
  • 1/4 cup brown sugar, packed

whipped cream:

  • 1 cup whipping cream
  • 2 tsp granulated sugar
  • 1/4 tsp cream of tartar


directions:
1.  Make a batch of Bisquick drop biscuits according to their directions.  While mixing add in the sugar and cinnamon.  Bake and set aside to cool.
2.  When the biscuits go into the oven begin making the peaches.  Put a pound of fresh or frozen peaches into a medium sized pot on medium heat.  If frozen allow to heat and thaw mostly.  Add in the nutmeg, cinnamon, and brown sugar.  Stir in well and continue to stir occasionally until the peaches are soft, but not mushy, and the sauce has thickened.  Remove from heat and set aside until just warm.
3.  When the biscuits and peaches are almost cool enough, start making the whipped cream.  Dump the whipping cream, sugar, and cream of tartar into a mixing bowl and beat on high with a hand mixer until thick and fluffy.
4.  Finally, time to put it all together.  Slice a biscuit in half and cover the bottom half with 1/4 of the peaches and some sauce.  Top with the remaining biscuit half and top with a dollop of whipped cream.  Serve immediately.  If there are leftovers store all three components separately in airtight containers (whipped cream and peaches in the fridge, and biscuits on the counter).

Note:  Leftover peaches in the sauce (or heck, a full batch of it) are DELICIOUS mixed into oatmeal the next morning.  So good!

Monday, November 10, 2014

caramel apple cake


I know caramel apple isn't a traditional choice for a birthday cake, but I really wanted to try something new (and if I make a cake when people are coming over anyway it means Jeff and I don't end up eating the whole thing by ourselves!).  So for Jack's first birthday I made this...


Start off by peeling and shredding two Granny Smith apples.  Set them aside.


Cream together the butter and brown sugar.


Beat in the eggs one at a time until fluffy.


Alternate mixing in the remaining wet and dry ingredients (minus the grated apples) until smooth and creamy.


Add in the apples.  The batter WILL be lumpy due to the apples.  It's fine.


Thoroughly prep your pans with cake release because this is a very moist cake and will otherwise try to stick to the pan.  When you pour the cake into your two 9" pans be sure to smooth out the tops.


The cakes will come out of the oven fairly flat (which makes frosting so much simpler).  Let them cool before removing them from the pans.


The cakes will shrink a bit while they cool.  This is normal.  At this point turn the cakes out onto cooling racks and set aside to let cool completely.


In the meantime you can make the caramel sauce.  If you have store bought caramel sauce, that's fine.  I prefer to make my own.  This version is by The Pioneer Woman and is great because it is quick and easy.The recipe can be found here.


It takes about ten minutes to make and tastes delicious.  Let it cool a bit and set half of it aside.


Cut one of the cakes in half.  Place one half on a cake plate.  Spread out half a container of caramel sauce (1/4 the total sauce) over top of the cake.  Try to spread it evenly.


Place the other half of the cut cake on top.  Sorry, mine looks a bit ugly.  I'm much better at taste than appearance.  Not so great for photos...  :)


Spread a thick even layer of apple butter on the top of the cake.  I bought mine at a farmer's market.  If you want to make your own I'm sure a great recipe can be found somewhere.  But I don't have one.


Cut the second cake in half and place half on top of the apple butter.


Spread the remaining first half of the caramel sauce over top the cake.


Place the last cake half on top.


Honestly, it really is okay that this looks crazy messy.  Frosting covers all.  I just wanted to show all four cake layers plus the two layers of caramel sauce, and the layer of apple butter.


The cake is now done.  Just leave it alone.  Begin the frosting.  The CARAMEL BUTTER CREAM FROSTING.  Yeah, that's right.  Caramel butter cream.

Begin by whisking sugar, flour, milk, and cream on the stove until it is smooth and thick.  Remove from heat and add into the bowl of a stand mixer.


Mix on hight until the frosting has cooled.


Add in cubed butter and vanilla and mix on low until fluffy and smooth.


Like this.


Remember the other half of the caramel sauce you set aside.  Yeah, add it in to the frosting and mix it in well.


You cake is ready to frost.  If the frosting is too soft, place it in the fridge for a few minutes to firm up.  If it is too firm, place it somewhere warm to soften for a few minutes.  Otherwise, frost away.  You should have more than enough frosting to cover the cake.


The best part about this cake (besides the taste!) is that you can make it the day before.  It will firm up a bit making it easier to cut, and the cake is so moist you don't have to worry about it drying up too much.  There is nothing worse than stressing out because you are running behind and need to finish your cake, clean up, finish getting ready for whatever, etc.


As soon as he saw the flame Jack became totally slack-jawed.  I guess I have another fire loving boy.


I gave him a tiny sliver of a piece because of all the sugar, but I know he liked it because for the first time ever, he picked his plate up and licked it spotlessly clean!


Caramel Apple Cake
makes two 9" cake pans

Ingredients:
Cake:

  • 1 cup of unsalted butter, softened
  • 2 cups brown sugar, packed
  • 3 eggs
  • 3 cups AP flour
  • 3 tsp baking powder
  • 1/4 tsp salt
  • 1 tsp cinnamon
  • 1/4 tsp allspice
  • 1/2 tsp ginger
  • 1/2 tsp nutmeg
  • 2 granny smith apples, peeled and grated
  • 2 tsp vanilla
  • 1 cup milk
  • 1 c heavy whipping cream
  • 1 tsp lemon juice


caramel sauce:

  • 1 cup brown sugar
  • 1/2 cup half and half
  • 4 tbsp butter, unsalted
  • pinch salt
  • 1 tbsp vanilla


apple butter

frosting:

  • 1 1/2 cups sugar
  • 1/3 cup AP flour
  • 1 1/2 milk
  • 1/3 cup heavy cream
  • 1 1/2 cups unsalted butter, cubed
  • 2 tsp vanilla
  • 1/2 caramel sauce


Directions:
1.  Preheat the oven to 350 degrees F.  Peel and grate the apples and set aside.  Cream together butter and sugar.
2.  Mix in the eggs one at a time until fluffy and smooth.
3.  In a bowl add in the dry ingredients (flour, baking powder, salt, cinnamon, allspice, ginger, and nutmeg).  Pour the milk, vanilla, and cream into a cup together.  Alternate mixing in the wet and dry ingredients into the batter.
4.  When the batter is smooth and creamy mix in the grated apples and lemon juice.
5.  Grease two 9" cake pans thoroughly.  Pour batter out into the pans and smooth the tops.  Place in oven for 45-50 minutes, or until a toothpick comes out clean.  Take the cakes out and let them cool.  They will shrink a bit when they cool.  Remove them from the pans onto cooling racks.  Set aside.
6.  Start making the caramel sauce.  Put all the caramel ingredients except the vanilla in a small pot on the stove.  Over medium-low heat whisk until combine, then continue to whisk gently until mixture thickens.  Add the vanilla and stir for another minute.  Take off heat and evenly pour into two small containers.  Allow to cool.
7.  Begin cake assembly.  Cut the two cakes in half.  Place on half on a cake stand and smooth on half a container of cooled caramel sauce.  Top with another cake half.  Thickly coat with a layer of apple butter.  Top with another cake layer.  Smooth on the remainder of the first caramel sauce container.  Top with the last cake half.  Set the cake aside to make the frosting.
8.  In a medium pot on the stove whisk the sugar, flour, milk, and cream together.  Whisk occasionally until the mixture boils and thickens.
9.  Pour the mixture into a stand mixer bowl with a paddle attachment and beat on high until cool.  Turn down to low and add in cubed soft butter and vanilla.  When smooth turn mixer to to medium-high until the frosting is fluffy.  Add in the second container of caramel and mix well.  When the frosting is the desired consistency turn the mixer off and frost your cake.