Showing posts with label protein. Show all posts

Tuesday, February 23, 2016

Peach Crisp Overnight Oats


I think I've made it pretty clear how much I like a sweet breakfast, especially one I can grab as I'm running out the door in the morning.  This peach crisp overnight oats recipe is my new favorite.  Its perfect for this gorgeous early spring weather and makes me so happy when I eat it!  

I love the serious peachy flavor from the oats and at less than 300 calories per serving, plus 14 grams of protein this little jar will keep me going all morning.  It tastes like dessert, makes me happy, and doesn't make me hangry halfway through the morning like some other quick breakfast can.  

I like putting my overnight oats in cute jars so they're easy to grab the next morning, but it also helps with portion control.  Yeah, I'd probable eat more of it because its so good, but its really the kids I portion it for. They can be little rage monsters if I don't give them the right amount, but if its already in a little jar?  Crisis averted.  Yay!

I love making overnight oats because it takes ingredients I keep in stock anyway, one big bowl, and 5 minutes the night before to make.  You can't beat it.  Sometimes I'll double the batch or make single batches of different flavors.  My other favorite is chocolate.  


Peach Crisp Overnight Oats
serves 3

Ingredients:
  • 1/2 Cup unsweetened apple sauce
  • 6 oz. peach yogurt (1 yoplait container)
  • 1/2 Cup vanilla whey protein powder
  • 1 1/3 Cups old-fashioned oats, uncooked
  • 1 teaspoon cinnamon
  • 1/2 Cup unsweetened vanilla almond milk
  • 1-3 teaspoons sugar (optional)
Directions:
  1. Mix all ingredients in a large bowl until fully incorporated. 
  2. Portion into 3 airtight containers (mason jars, tupperware, etc.)
  3. Refrigerate overnight.  Enjoy cold.  
Note: These containers last at least a week in the fridge so don't worry if you want to make several batches at a time.


Tuesday, January 26, 2016

Panna Cotta


Doesn't this just look so fancy?  Yeah, it took me a whooping 5 minutes to make.

Panna cotta is such a great dessert.  It's quick to make, it requires very few ingredients, it looks so fancy, it isn't messy to eat, you can make it a day ahead of time.  Shall I go on?  Oh, and obviously, it tastes great too.  If you aren't familiar with panna cotta, it's like a vanilla pudding, and means "cooked cream."

Since this is such a simple dessert you can change it up every time you make it.  You can either serve the panna cotta in a pretty glass or turn the dessert out from a fancy mold and serve on a plate.  There are many sauce and flavoring options as well.  Jeff is a big fan of strawberry, I love orange and cranberry.


I know my panna cotta is ready when I can turn the glass over and nothing moves.  It totally reminds me of getting a Blizzard at Diary Queen as a kid.  That was always my favorite part.  Wow!  It didn't fall out!  Hi.  I'm a grown up and still fascinated by that.


I love all things orange creamsicle.  This panna cotta isn't super pretty with the thin color on the top but I really don't care.  I wanted to infuse the orange flavor throughout so after about an hour and a half in the fridge I poured about a tablespoon of orange curd over the panna cotta and allowed it to sink to the bottom.  This way I had the layer of orange covering the bottom, but also got a hint of orange through.  Yummy!

I made my orange curd, but store bought is fine.  You could also try lemon curd, strawberry jam, a fruit compote, fresh fruit, chocolate sauce, etc.


This go around I used a cranberry pomegranate curd on the top, which I spread on after 4 hours.  I just love that bright color!


I like using a wide glass for the panna cotta so I get my fruity topping in every bite.

Panna Cotta
serves 6

Ingredients:

  • 1/2 Cup milk
  • 1 1/2 packets of unflavored gelatin
  • 2 Cups heavy cream
  • 1/3 Cup granulated sugar
  • 1 tsp vanilla paste or extract
  • fruit topping of your choice

Directions:
  1. Combine the milk and gelatin in a medium saucepan off the heat and allow to absorb for 5 minutes.
  2. Add the cream, sugar, and vanilla and whisk continually on medium heat until sugar has fully dissolved and steam begins to rise over the pot.
  3. Remove from heat and pour into 6 glasses.  Let cool on the counter for several minutes, then place in the fridge for at least 4 hours.  Add your choice of sauce, jam, compote, etc. in a thin layer on top of the panna cotta after 4 hours to keep it from sinking.

Note: This dessert can be made a day ahead of time and kept in the fridge until needed.  If you want to make panna cotta in molds and tip them out make sure to rub the inside of your molds in coconut oil before pouring the dessert in.  To remove the panna cotta simply run the outside of the molds briefly in hot water.

Also, I prefer my panna cotta on the thick side.  If you don't, use one gelatin packet instead of 1 1/2.  No problem.

Tuesday, September 1, 2015

chocolate covered cherry smoothie


Sorry my blog posts have been a bit few and far between lately.  At least it feels that way.  From a few weeks ago through almost Thanksgiving is crazy for me.  My day planner seriously looks ridiculous.  I keep not having time to cook and/or post.  And its driving me crazy.

Since I haven't had much free time lately I've been creating new smoothie recipes.  I love a quick breakfast I can take on the go that's also healthy and delicious.  This smoothie is all of the above, plus only contains 4 ingredients!  It's a yummy no-brainer.

My frozen cherries are nice and sweet (without added sugar).  This smoothie is perfectly sweet even though the only sweetness comes from the cherries.  Make sure your cherries aren't too tart or you might want to add a bit of vanilla yogurt for the sweetness.  Can I say sweetness a bit more?  Yeah, I guess I can.  :)


I like to toss a frozen cherry or two on top.  They sink down and I eat them last.  I love cherries, these are better than normal because they're nice and cold and have a layer of chocolate smoothie covering them.  Yum...


Jack is going through a phase where he INSISTS on using a spoon for every meal.  Yes, even smoothies.  He's very civilized (read: nerd).  Although, I gotta say, watching a kid eat things like crackers and cheese with a spoon is pretty entertaining.


This smoothie is Jack approved.

Chocolate Covered Cherry Smoothie
serves 2

ingredients:

  • 1 scoop vanilla whey protein powder
  • 1 cup frozen cherries
  • 2 tbsp unsweetened cocoa powder
  • 1 cup almond milk
  • ice cubes (optional)
directions:
  1. Dump all ingredients in the blender and puree.  Optional ice cubes will make the smoothie thicker and icier.  Drink immediately.  Enjoy!

Thursday, August 27, 2015

pumpkin carrot cake


This cake is awesome.  Do you like carrots, coconut, walnuts, pumpkin, vanilla, and pineapple?  Even if you only like one of those things you'll probably still love this cake.  It stays moist and delicious several days later (I'm really amazed we still have any left).  I love the flavor, it's a lovely mix of everything.  Jeff hates carrot cake, and nuts in baked goods and even he really liked this cake.  I love cakes like this.  It needs minimal hardware to make, and is so easy to make, it's almost impossible to screw it up.  Who doesn't love an easy cake?

Even with whole wheat flour, cornmeal, and protein powder in the batter this cake stays soft and sweet.  Yes, there is a lot of sugar, it is a cake after all.  But pretty much everything else in the cake has decent nutrients.  This is probably the most nutrient dense cake that you'll ever taste (and enjoy).  

This recipe is definitely a keeper.  I plan on making again soon.  It isn't sickeningly sweet, but is sweet enough to make the though of frosting completely unnecessary. 

Disclaimer: This is not my original recipe.  I tweaked it a bit from the original recipe found here at the Gold Medal flour site.
Pumpkin Carrot cake
 Ingredients:

  • 1 1/2 cups whole wheat flour
  • 1/2 cup vanilla whey protein powder
  • 1/4 cup yellow cornmeal
  • 2 cups sugar
  • 1 tsp salt
  • 3 tsp baking soda
  • 1 tsp baking powder
  • 1 tbsp cinnamon
  • 3 large eggs
  • 1/2 cup coconut oil
  • 2 tsp vanilla extract
  • 2 cups grated fresh carrots
  • 1 cup crushed pineapple
  • 1 cup pure pumpkin
  • 1/2 cup chopped walnuts
  • 1-1/2 cups flaked coconut
 Directions:
1. Preheat oven to 350°F. Grease a bundt pan. Set aside.
2. In a medium bowl, combine the flour, protein powder, cornmeal, sugar, salt, baking soda, baking powder and cinnamon.
3. In a large bowl, beat together the eggs, oil and vanilla until smooth. Gradually add the dry ingredients to the egg mixture. The dough will be very thick at this point.
4. Fold in the pineapple and pumpkin until well combined. Fold in the carrots and then the nuts and coconut until just combined.
5. Pour batter into the prepared cake pan and bake for 50-60 minutes until the cake is browned on top and a toothpick inserted in the center comes out clean.
6. Let the cake cool in the pan on a wire rack for 30 minutes. Turn it out onto the wire rack and let cool completely.
  
Notes:
Keep leftover cake refrigerated.

Tuesday, August 18, 2015

Buddha bowl


Can I just say, Buddha bowls are THE BEST?!  What's a Buddha bowl you ask?  Well, its essentially a bowl full (like a Buddha belly) of veggies, greens, beans, and grains.  It is a delicious  single bowl balanced meal, full of color and flavor.  All you need mixed together in a beautiful melody of food.

If you were very lazy you could throw in some chopped raw veggies, but I like to roast as much as possible to bring out flavor and texture.

Even if you are being lazy, this recipe is so simple a monkey could make it.  Really.  Cut up some veggies, sprinkle with salt, pepper, and olive oil, and throw them in the oven.  That's the most difficult part of this whole recipe.  Seriously.

The combination shown here is my favorite, but you could easily prep tons of veggies, grains, and beans and mix n' match a week's worth of meals, easy.

Buddha bowls are great because you can make them with whatever you have on hand.  No rice?  Use quinoa, couscous, barley, etc.  So many possibilities!

There are many options for protein too.  Buddha bowls are generally plant based, so I use beans mostly.  Garbanzos, white beans, lentils.... I could go on and on.

Last on the list are the greens.  I like lettuce.  Something fresh with a nice crunch.  Broccoli, brussel sprouts, kale, etc.  all good options too.


Roast some veggies.  I like to make plenty for us.  Leftovers are my friend. :)  Cauliflower is always my go-to roasted veggie.  It is so versatile and can blend in with any seasoning you choose.


Sweet potatoes, red onion, and red bell peppers.  Yum.


A batch of roasted BBQ garbanzo beans fits right in with the bowl.  A bit of heat, sweetness, and a touch of savory flavor too.


 This bowl is so chock full of yum you can't even see the rice or the red onion.

Some Buddha bowls have a gentle sauce drizzled over top.  It isn't necessary, and with all the seasonings in the garbanzos I didn't see the need for one.  A lack of sauce saves calories, and prevents everything from getting too goop-y.  IT's also tidier for kids to eat.  They make enough of a mess on their own!  :)


 Buddha bowl
serves 4

Ingredients:

  • 2 cups brown rice, cooked
  • 1 head of cauliflower, in florets
  • 1/3 red onions, chopped
  • 1 red bell pepper, chopped
  • 1 medium sweet potato, chopped
  • 1/2 small head of butter lettuce, chopped
  • salt
  • black pepper
  • 2 tsp olive oil
  • 1 batch roasted BBQ garbanzo beans

Directions:

  1. Make a batch of roasted BBQ garbanzo beans.  Set aside.
  2. Preheat the oven to 425 degrees F.  Cut up the cauliflower, red onion, bell pepper, and sweet potato and place on parchment covered baking sheets.  Sprinkle lightly with salt, black pepper, and olive oil.  Bake for 40-45 minutes, rotating the pans halfway through for even cooking.
  3. Meanwhile, make a batch of brown rice, set aside. 
  4. Chop the lettuce and set aside.
  5. When all pieces are ready, fill the bowls evenly with a little of everything.  Dig in and enjoy!
note:  If you have any leftovers, place everything but the lettuce in tupperware together and refrigerate.  Reheats really well in the microwave.

Thursday, August 13, 2015

double chocolate fig muffins


Try as I might, I just can't do these muffins in photos.  It's always difficult to capture the true yumminess of something when the chocolate makes them so dark.  I love these muffins.  They are dark, chocolatey, and fruity.


Want to hear something even better?  They're chock full of protein!  Each muffin has about 6 grams of protein in it.  This muffins are healthy (yes, they're still full of chocolate), yummy, and filling.  They are also approved by everyone at our house.

There is a very slight protein after taste, so if you REALLY are against that, just use more flour, less protein powder.  It's an even substitution.


Double Chocolate Fig Muffins
makes about 16 muffins

Ingredients:

  • 1 cup unbleached flour
  • 1 cup vanilla whey protein powder
  • 1 tbsp baking powder
  • 1 tsp baking soda
  • 1/2 tsp salt
  • 1 1/2 tbsp cocoa powder
  • 1 cup granulated sugar
  • 6 tbsp unsalted butter
  • 1 large egg
  • 2 tsp vanilla extract
  • 1 1/4 cup plain Greek yogurt
  • 1/2 cup mini semi-sweet chocolate chips
  • 3 large figs, diced
Directions:
  1. Preheat oven to 400 degrees F.  Grease your muffin tin.  
  2. In a medium bowl stir together the flour, protein powder, baking powder, baking soda, salt, and cocoa powder.  Set aside.
  3. Cream together the butter and sugar in a stand mixer.  Add in the egg and vanilla and mix again.  Mix in the Greek yogurt, then slowly add in the dry ingredients while mixing on low.  Do not over-mix.  The batter should be fluffy and light.  Gently stir in the chocolate chips and the diced figs.
  4. Evenly spoon the batter into the muffin cups and bake for about 20 minutes, or until an inserted toothpick comes out clean.  Let cool for 10 minutes, then remove from the muffin tin and let cool completely on a wire rack.
note: these muffins make a great healthy snack for kids.  If you want to make the recipe using mini muffins, bake for 16 minutes instead of 20.

Thursday, August 6, 2015

chocolate protein smoothie


I NEVER remember to eat breakfast.  I make it for everyone else, but mornings are when I wander around the house getting everything done.  It's gotten to the point where I had to put a sticky note on top of the coffee maker reminding me to eat breakfast.  Because of course I would never forget my morning coffee.

My best bet for breakfast is a grab and go option.  I love things like cinnamon rolls (obviously), but I'm either busy or I don't want anything too filling.  This drink is perfect.  Filling, easy to grab, and delicious.


To make this drink even easier and quicker in the morning I dump all the ingredients into tupperware in the fridge the night before.  That way the chia is easier to blend (having had all night to plump up), and all I have to do in the morning is dump one container's contents in the blender.  Simple.

I normally end up making a double batch though.  Everyone always asks for "just a few sips", and that adds up quickly!

I love having a super thick smoothie that fills me up and gives me hours of energy, especially when it feels and tastes like I'm drinking a chocolate shake (for breakfast.  Yay!)


This is the average meal for Jack and me on days when Liam is at preschool and Jeff is at work.  They almost always end up with bits of sandwich, plus a train (or two) and a cat on the table with us.  Plus Jack always decides that whatever I'm eating is what he wants.  We'll be eating THE SAME THING, but mine is in a different container than his, so...


If I'm using a cup, plate, bowl, etc. that looks like he could easily break it then Jack wants it even more.  And heaven forbid I try to help him hold it.  Nope.


He stills makes me a little nervous, but he hasn't broken any dinnerware yet *sigh of relief*.  I'm happy to share.  :)


Chocolate Protein Smoothie
makes 1 large or 2 small servings

Ingredients:

  • 2 cups unsweetened vanilla almond milk
  • 3 tbsp chia seeds
  • 1 heaping tbsp cocoa powder
  • 1 scoop protein powder (I prefer vanilla flavored whey)
  • sugar to taste
  • 1 banana, frozen
  • ice (optional)
Directions:
  1. For best results combine all ingredients overnight in the fridge.  In the morning pour out into a blender.  Blend thoroughly.  Enjoy immediately.
note: Ice is only needed if you do not use a frozen banana, or if you want an extra cold and icy smoothie.

If you make the smoothie entirely in the morning it might take a little more blender time to break up the chia seeds.

Saturday, July 11, 2015

frozen yogurt tarts


I've been on a bit of a tarts kick as of late.  Can you tell?  I really wanted a healthier version, both for me, and for an easy snack for the kids.  These tarts are MUCH healthier than my previous recipe, and are mini sized (perfect for snacking!).

I got the recipe for the crust from Deliciously Ella.  I love her!  She's a super cute healthy girl from London.  A bit hippy for me sometimes, but great for easy, filling, low sugar, veggie recipes.  I had to alter her tart crust recipe a bit to suit me (and to account for the US measurements).

These tarts take about 45 minutes to make (plus freezing time), but you can make them the night or morning before you want them so easily.


These tart crusts only use 4 ingredients.  So simple.  Almonds, dates, coconut oil, and water.  That's it.  Really.  I like mine a little coarse, but you can grind them finer if you like.  I find the easiest way to make these is to cut the dates into small pieces and soak them in a small bowl with the water and (melted) coconut oil until they have softened a bit.

While the dates are soaking pulse the almonds in a food processor until fine.  Pour the almond pieces out into a medium sized bowl.  Now pulse the dates in the water and coconut oil until there are no remaining chunks.  Pour this out into the bowl with the almonds and stir together with a wooden spoon.

Preheat the oven to 325 degrees F and lightly grease a mini muffin tin.

Ball up pieces the size of half your thumb (as a rough estimate) and press them down in each mini muffin mold, pushing the crust out gently up near the tops of the mold.  I ended up with about 21 tarts.  Bake for 15 minutes, then move and let sit about 10 minutes.  Remove carefully and place on a wire rack to cool completely.

I know the darker than average crust color might concern some of you, but almonds and dates are dark before baked.  Don't worry.  Nothing is burned.


Place the tarts on a large plate or tray to prep for the freezer.


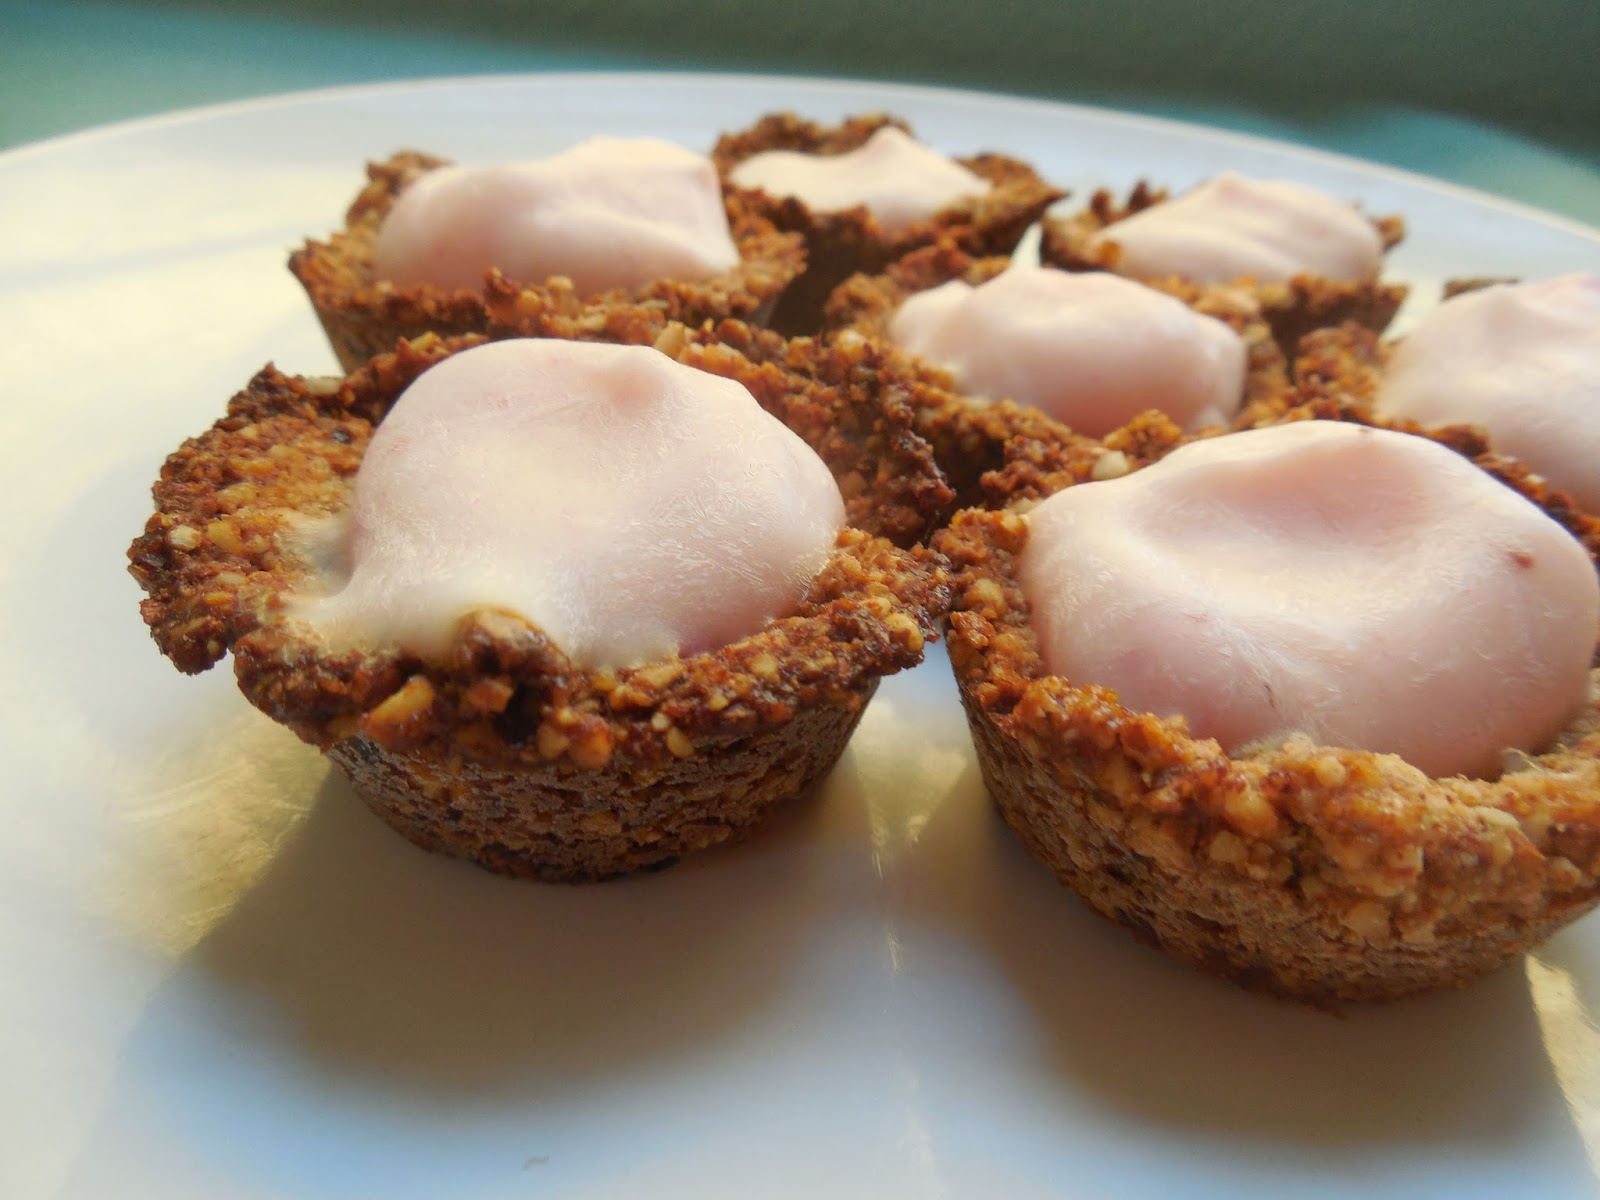
I had the PERFECT amount of yogurt in one container to exactly fill all my tarts.  Just spoon a dollop into the center of each tart.


Place the tarts in the freezer until the yogurt has firmed.  Freezing the tarts makes them so refreshing on a hot day, and there's WAY less mess for the kiddos!


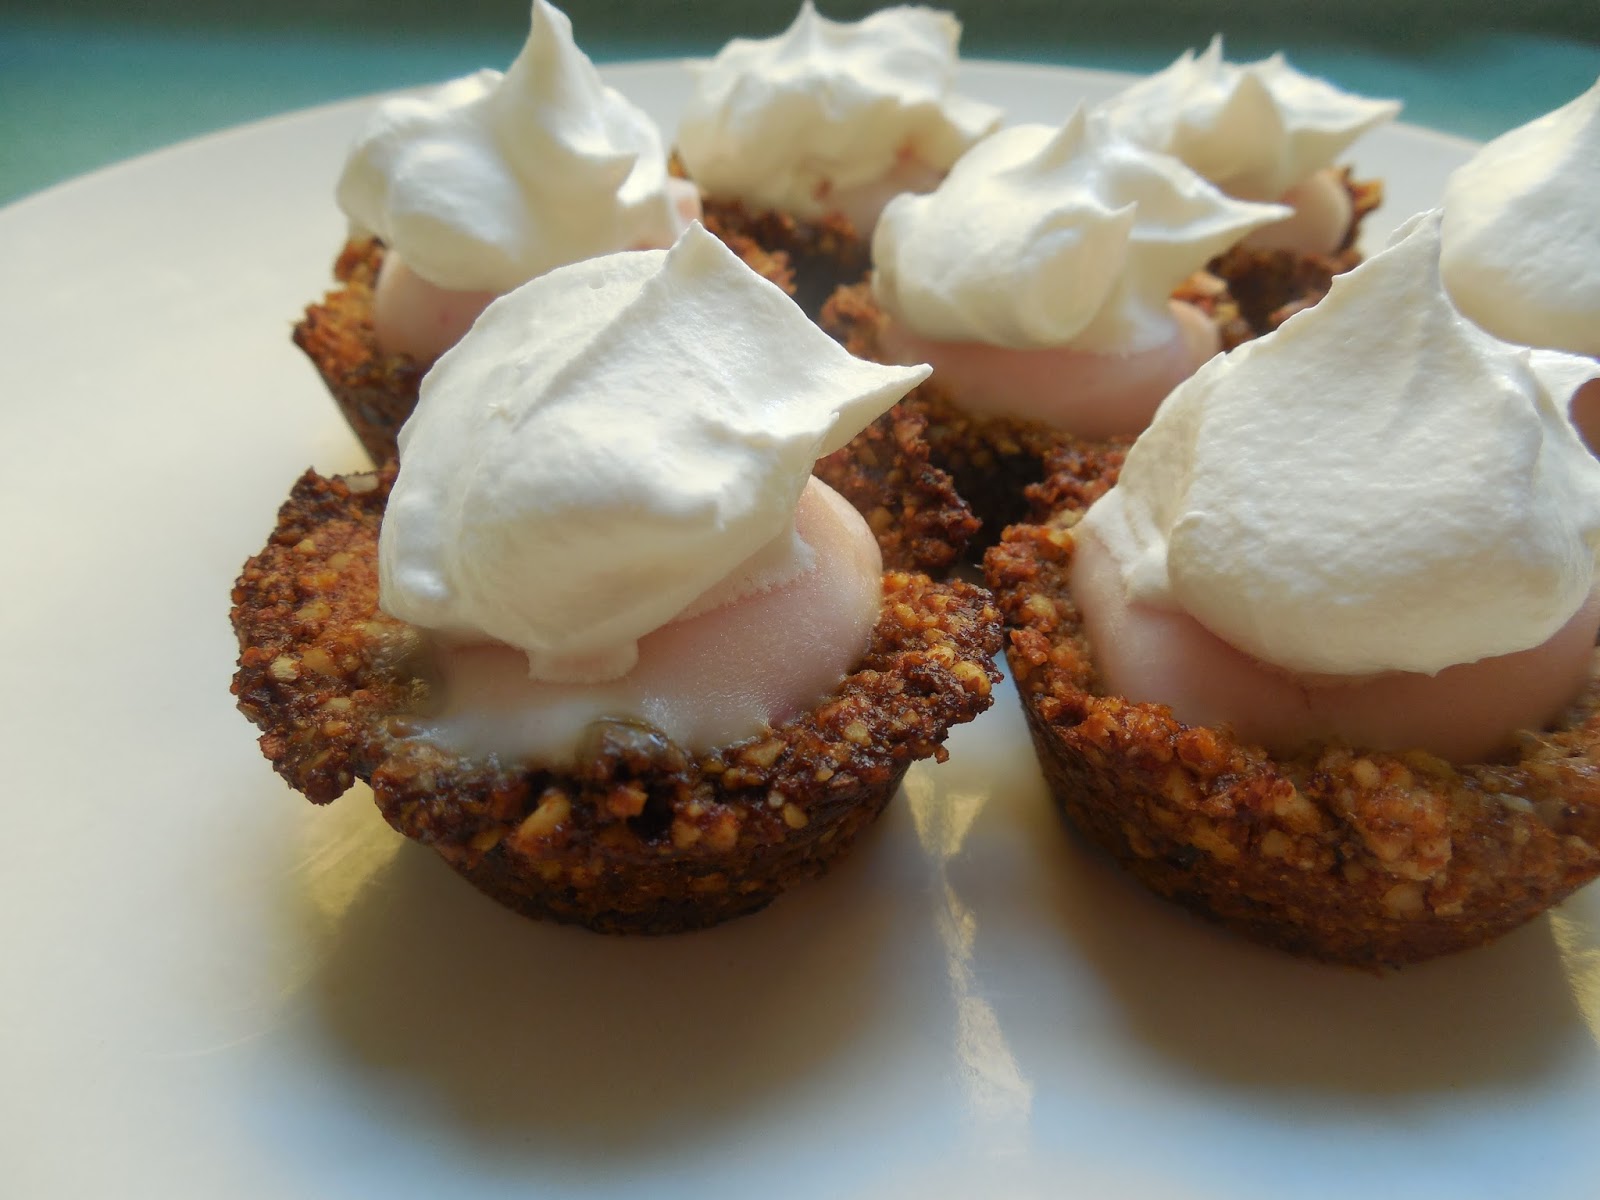
Look at how pretty and simple these are.  You could eat them like this.  Or...


...you could spoon a nice dollop of lite cool whip on top of each tart.  Really, it makes all the difference in the world.  Now you have a still pretty healthy dessert that is great for hot days, good for kids, not messy, and perfectly bite sized.

Not enough reason to make these?  Well, they are also super easy to make, required very few ingredients, can be made in advance  Shall I go on?


In short these tarts are sweet, tart, nutty, chewy, refreshing, and creamy.  What's not to love?

You could even go one step further in telling yourself to make these by remembering that the ingredients include whole almonds and yogurt.  Very good sources of protein you know.

And cool whip not included, I happened to have all the other ingredients necessary already in stock.


frozen yogurt tarts
makes 20-22 mini muffin sized tarts

ingredients:

  • 7 ounces of whole almonds
  • 3 tbsp coconut oil
  • 2 tbsp water
  • 10 medjool dates
  • 1 container of strawberry yogurt (I used yoplait original)
  • lite cool whip
directions:
  1. Cut the dates into small pieces and place into a small bowl to soften with the coconut oil and the water.  While they soak grind the almonds in a food processor (coarse or fine, up to you).  Pour the ground almonds out into a medium bowl.
  2. Pour the date mixture into the food processor and puree.  Pour the mix out into the almond bowl and stir to combine with a wooden spoon.
  3. Preheat the oven to 325 degrees F and oil a mini muffin tin (24 muffin capacity).
  4. Grab crust pieces about half the size of your thumb and gently push into the base of each mini mold, then push up the sides evenly.
  5. Bake for 15 minutes, or until edges have darkened a bit.
  6. Remove from oven and let rest for 10 minutes before removing from the mold and letting cool completely on wire racks.
  7. Place crusts on a large plate or tray and gently spoon strawberry yogurt into the center of each tart.  Freeze the tarts.  
  8. Remove from the freeze and top each tart with a large dollop of lite cool whip.  Serve.


The crust recipe is a lightly edited version from Deliciously Ella.


Sunday, June 28, 2015

no bake chocolate cheesecake mousse


Let's just say I'm glad this mousse is served in 4 individual cups, because otherwise I'd want to eat it all in one sitting.  I would die from richness and sugar, but it might be worth it.


 This is a great dessert to make ahead if you have company, or if you want to have dessert planned out for yourself for 4 days!  Not that I would do that...

This really is an awesome dessert though.  It's pretty darn quick to make (not counting chill time), its easy to make, and it requires only a tiny amount of ingredients.

You can change it up too.  Sometimes Jeff prefers classic cheesecake mousse, which involves cancelling the last tablespoon of whipping cream and the cocoa powder.

You could also make a fruit topping over the top, or add in a different flavor extract.  Lemon, mint, I could go on.

Also, Jeff loves his mousse semi-frozen.  He sticks his in the freezer for about 30 minutes before eating.


recipe adapted from Cooking Classy

no bake chocolate cheesecake mousse
serves 4
Total time: 2 hours 20 minutes

ingredients:


mousse:

  • 8 oz. cream cheese
  • 2/3 cup powdered sugar
  • 2 tablespoons cocoa powder
  • 2/3 cup + 1 tablespoon heavy whipping cream
  • 1/2 tsp corn syrup
  • 1 tsp vanilla extract
crust:
  • 1 package graham crackers (about 8), crushed
  • 1 tbsp packed brown sugar
  • 1/4 cup melted coconut oil

directions:
  1. In a medium bowl use a hand mixer  on high speed to whip the heavy whipping cream until soft peaks form.  Add in the corn syrup and whip again until stiff peaks form.  Set aside.
  2. In a stand mixer with a whisk attachment whisk the cream cheese for about 3 minutes, until fluffy and light.  Add in the powdered sugar, cocoa powder, and vanilla.  Whisk until well mixed.  
  3. Mix in the whipped cream mixture in two batches, until just combined. Set aside.
  4. Put the graham crackers in a sealed freezer bag and crush with your fists, a mallet, etc.
  5. Add the brown sugar into the bag and shake to combine.
  6. Pour in the coconut oil and seal the bag.  Massage with your fingers to mix well.  
  7. Divide the crust into 4 cups or small bowls and pack down with your fingers, a large spoon, etc.
  8. Pour the mousse evenly into the 4 cups and refrigerate for at least 2 hours, up to a few days.  Enjoy!

Saturday, June 13, 2015

plum ice cream


I love fruit in general, and plums are no exception.  They are sweet and tart, and a very convenient tiny size.  However, I can really only make so many plum tarts and pies before I get REALLY bored, and I have a ton of plums right now, thanks Jenna!  Have I mentioned before how awesome it is to have generous relatives with fruit trees?  Anyway, I was searching for new plum recipe ideas on Pinterest (of course!) and I saw plum ice cream.  None of the recipes were exactly what I wanted, so I made up my own.  I'm so glad I did!  It turned out great.  Sweet, tart, a beautiful consistency, and the most gorgeous color pink I've ever seen.


I just LOVE this color!  No food coloring necessary.  Puree all the ingredients and refrigerate for 2 hours. THen just churn in an ice cream maker, and freze.  Soo easy!


I love the consistency of this ice cream.  Some ice creams have to sit on the counter for 5 minutes before they are soft enough to scoop, and some ice creams are so soft they they are practically liquid.  This ice cream is a perfect medium.  Soft enough to serve immediately out of the freezer, but holds it shape post scooping for plenty of time before melting.


plum ice cream
makes 1 1/2 quarts

ingredients:

  • 2 cups of plum puree
  • 3/4 cup sugar
  • 1 tsp vanilla extract
  • 1 cup strawberry yogurt
  • 1 1/2 cup heavy whipping cream
directions:
  1. Puree all the ingredients together in the blender.  
  2. Refrigerate the puree for 2 hours.
  3. Churn in an ice cream maker according to its directions.  Mine needed 25 minutes and perfectly filled the 1 1/2 quart capacity.
  4. Scoop ice cream out into a freezer safe container with an air tight lid.  Freeze at least 1 hour.
note: I pureed lots of plums by themselves.  I poured out the excess after the needed 2 cups and froze for smoothies later.  I then added in the rest of the ice cream ingredients and pureed.