Monday, February 9, 2015

graham crackers


The kids wanted something snacky and we were all out of crackers, fruit, you name it.  I didn't want to make them anything really unhealthy, so I thought, why not graham crackers.

Turns out, I might have to keep a stash of them handy on a regular basis.


I found a graham cracker recipe I wanted to try from Pinterest (my time-killing weakness), but ended up altering it a bunch, and I love the results!

This recipe uses a food processor instead of a mixing bowl and spoon, and since everything is mixed while enclosed, there's less mess.  If you want, you can even have a child help push the food processor's buttons.  Even rolling out the dough is relatively mess-free.  The recipe creator had the brilliant idea of rolling out the dough between two pieces of wax paper.  This dough is tacky enough that regular rolling would have involved cups of flour, and changed the texture.


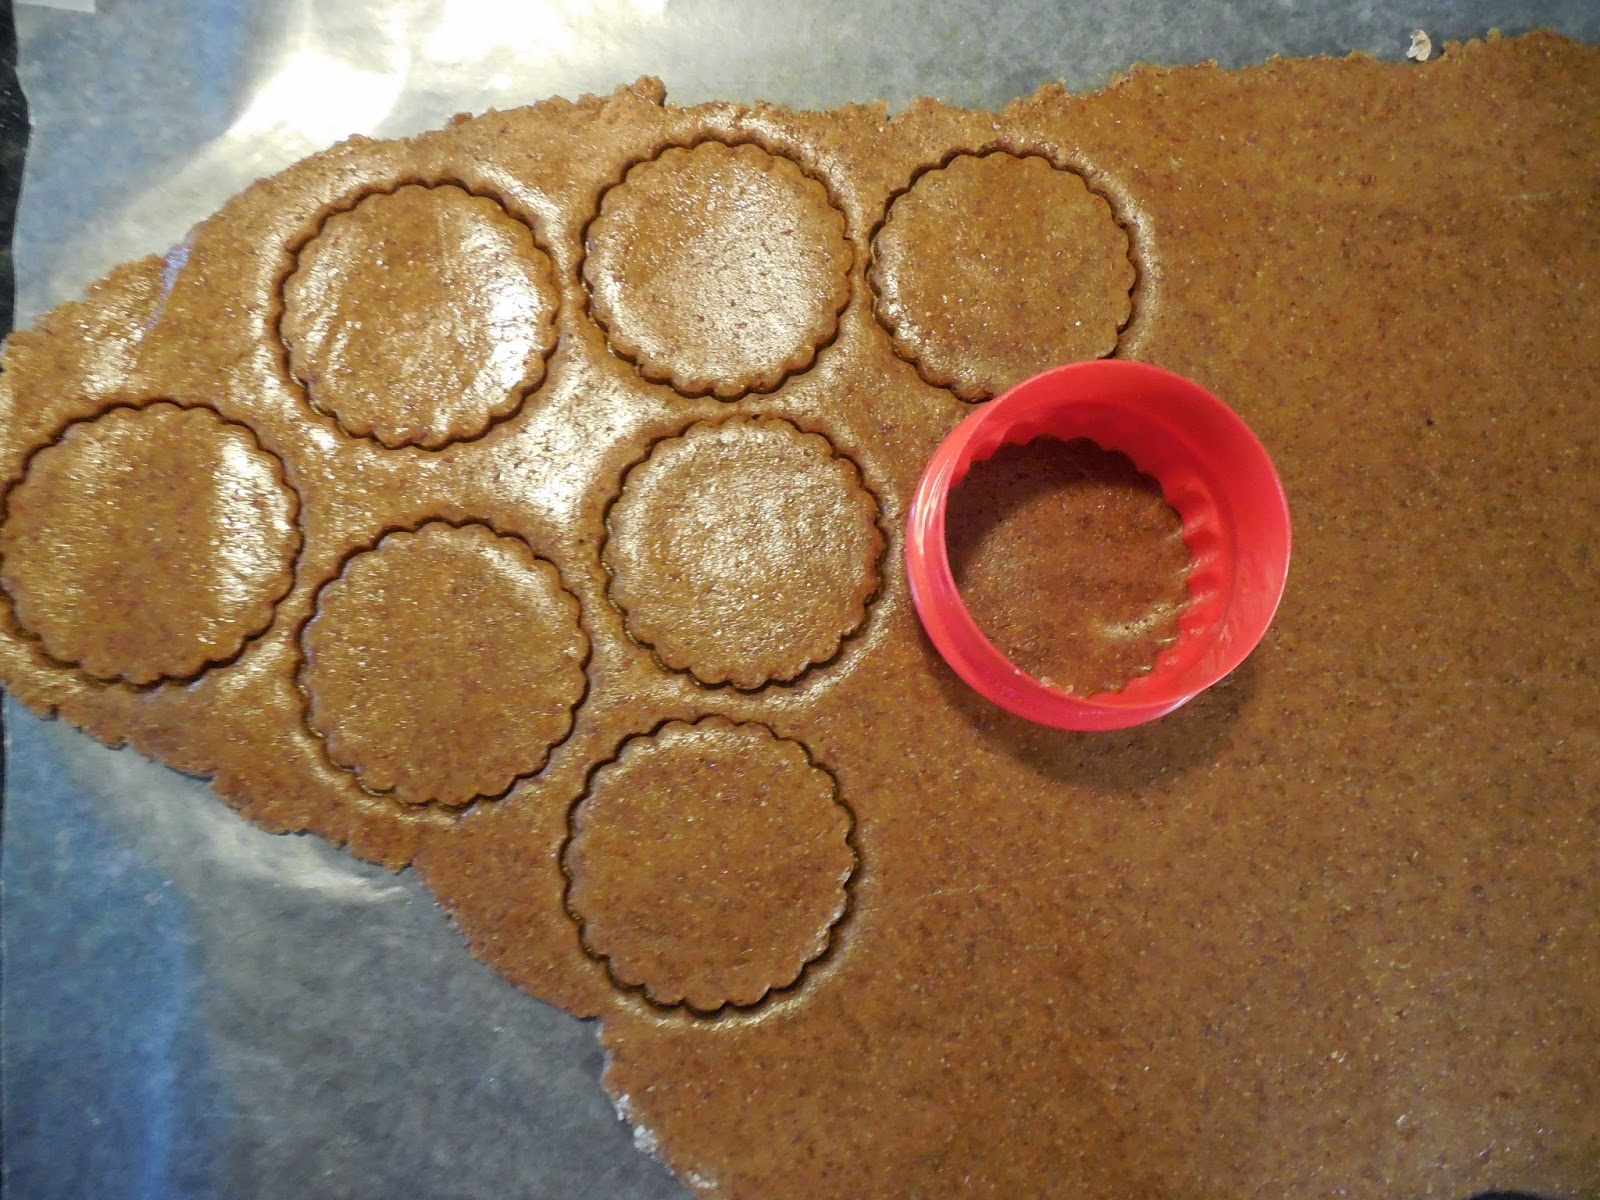
You can use any size of shape cookie cutter you want, I used a two inch circular cutter and ended up with about seventy crackers.  It was difficult to nail down a total cracker count because Jeff and the boys were eating them like they were starving.  These crackers are great, crunchy but soft, sweet but not too sweet.  Of course, being a mom, the real test is how crumbly they are.  These passed the crumb test.  A few crumbs, yes, but only when eaten by a 15 month old shoving the whole thing in his face.


When you roll out the dough separate it into two sections and roll out one at a time.  The dough is going to be tacky and firm, not too sticky.


These don't spread much at all, but force of habit made them spread them out.

Note: My graham crackers might be darker than yours because the honey I used in the recipe was chocolate infused and is a very dark brown color.


The crackers might look a little soft when the oven timer goes off, but do not overcook them.  They firm up quicker once they've cooled and set.


Let the crackers cool completely, then store in an airtight container in a dry cool place.


Don't be afraid to roll these a little thin.  They are sturdy enough that I haven't had any break yet.


Graham Cracker
makes about 70 2 1/2" crackers

Ingredients:

  • 1 cup whole wheat flour
  • 1 1/2 cups AP flour
  • 1 cup flax seed
  • 1/2 cup brown sugar, lightly packed
  • 1/2 tsp salt
  • 1 tsp cinnamon
  • 1 tsp baking soda
  • 1/2 cup butter, cold and cubed (1 stick)
  • 1/4 cup honey (I used chocolate infused honey)
  • 1/4 cup water
  • 1 tsp vanilla


Directions:

  1. Preheat the oven to 350 degrees F.  In a food processor mix both flours, flax seed, brown sugar, salt, cinnamon, and baking soda.
  2. Cube the butter while still cold and pulse until it until it looks like coarse sand.
  3. Add in the honey, water, and vanilla and mix until fully smooth and combined.
  4. In two batches roll the dough out between two pieces of wax paper until thin (about 1/4").  Cut into shapes using a knife (standard graham squares) or cookie cutters.  Continue to roll out dough until all gone.  
  5. Place the dough shapes onto parchment lined baking sheets and bake for 15 minutes.  Do not over bake.  Cool completely.

Tuesday, February 3, 2015

cheesy omelet muffins


There is a story that goes with these muffins.  Yesterday morning the boys wanted breakfast, so Liam helped me make pancakes.  I made it the cheater way with Bisquick mix, sugar, an egg, and some milk.  I make pancake batter in a large measuring cup so I can measure, mix, and easily pour all in one cup.  We ate all the pancakes, cleaned everything up, and played for a while.  The boys were happy playing by themselves so I told them to keep playing and I'd go take a quick shower.

Shortly after I finished getting ready for the day I came out to find Jack quietly playing in Liam's room (as always), and I walked out to the kitchen to find... Liam cooking.


Liam had poured all our remaining Bisquick mix into a large clean measuring cup just like I had, taken the pancake recipe out and laid it on the counter for reference (even though he can't read yet), and put the empty Bisquick container back in the pantry.  Then he had taken out the sugar and scooped some out with a large wooden spoon just like I had before putting the container away (I know because he left out the sugary spoon).

When I walked out he was in the process of adding eggs.  Yes, EGGS.  My recipe used one egg.  Liam was halfway through cracking number six!  I was actually pretty impressed how tidy his work space was.  He only spilled a tiny bit of egg white on the counter, and I had only taught him how to crack an egg recently.  I'm really glad I came into the kitchen when I did, because he had five more eggs set out, ready to crack open!  He had literally emptied the egg carton form the fridge and put it back in empty.  When he saw me he perked up and announced, "I'm making pancakes!  We ate the other ones already so we need more!"  Then he hopped off his table to go grab the milk.  Happy and totally nonchalant about the whole thing.

I was gobsmacked.  I couldn't figure out first whether to take photos, be pissed about so many eggs getting wasted, or be impressed that he took initiative, that he's a great cook, or remembered perfectly how I made pancakes (minus the number of eggs used).


Okay, I was mad impressed, and thought he was adorable, but I still made it clear that I was annoyed at how many eggs he used.  He was so cute, and I HATE wasting food, so I tried to think of some way to save the egg-y batter.


Enter in the cheesy omelet muffins.  So named because when Jeff came home from work that night and tried one, that's what he said they tasted like.  I tried my best to scoop out the small amount of sugar in them, then added some milk and a handful of shredded cheese.  They bake really well, and turned into a perfect breakfast.  Jeff never has much time in the morning, so I like to have a speedy breakfast option available.  These can be pulled from the fridge and microwaved for a minute, then eaten in the car.  Perfect.  Sometimes culinary accidents make some interesting finds!

I told Liam he was getting to be a good cook and he replied, "Grandma says when I cook at her house I am a chef."  Sounds about right.


My batch made eleven, but I could have filled them each a little less and still had twelve good sized muffins.  Just don't fill them too high, because eggs puff up quite a bit when they cook.


perfect egg-y cheesy muffins.


Cheesy Omelet Muffins
makes about 12
bake time: 20-25 minutes

ingredients:

  • 1 cup Bisquick mix
  • 6 large eggs
  • 1/2 cup milk
  • large handful of shredded cheese (cheddar or 3 cheese blend)
  • pinch of black pepper


directions:

  1. Preheat oven to 375 degrees.  Spray 12 muffin tin pan.
  2. Mix all ingredients together well and pour into muffin tins. 
  3. Bake 20-25 minutes, until golden brown on top.
  4. Remove from oven and let sit 10 minutes before removing.  Eat warm.
  5. Refrigerate to store, microwave 1 minute to reheat.

Thursday, January 29, 2015

chocolate truffles


Truffles are awesome.  Valentine's Day and Christmas are such great excuses to make them.  I would make them much more often then that because they are yummy and super easy, but I'd rather not keep something that tempting in the house.  I like making them and giving them out instead.


Butter!  Okay, this picture is kind of scary, but all my photos depict a DOUBLE batch of truffles, and a single batch is plenty for a normal person.  I often make a double batch of truffles (because I'm crazy), which makes at least 100 truffles, plus more to keep in a bowl in the fridge for Jeff to eat with a spoon for the next few months.  Oh, does no one else do that?  So yes, you will get plenty of truffles, and they last for a long time.


Grab a double boiler.  If you don't have one then do what I do and fake it.  Find a metal bowl that completely covers the pot beneath it (you DO NOT want any water boiling up and hitting the contents of the bowl or your truffles will be ruined.  Seriously though, this recipe is very easy.  If heat weren't an issue, I'd let my 3 year old make them.

Make sure to only fill up your bottom pot 1/2 full with water.  Enough to boil quickly and stay boiling without worrying about evaporation, but low enough to keep the water from spilling out.


Put the butter and heavy cream in the double boiler and stir occasionally until fully liquefied and incorporated.  I don't usually keep the butter in one block like this, it is quicker to cut the butter into dice sized cubes before adding, I just wanted to better illustrate the crazy amount of butter here.  This is a Costco sized stick btw.  Crazy.  Can you see why I don't eat these everyday?  :)


Once the butter and cream have mixed keep stirring, turn the heat off and slowly stir in the chocolate chips.  Make sure you keep stirring until every chip has melted.


I'm always amazed how lightly colored the chocolate starts out.  This is with about half the chocolate stirred in.  The filling doesn't look like chocolate syrup until all the chocolate is mixed in.


Perfect.  Getting to this step only takes a few minutes.  What a big difference.


Stir briefly to make sure all the chocolate is fully melted.  Then cover the bowl (or top half of your double boiler.  If you have a huge double boiler then pour the chocolate into a smaller bowl.) tightly with plastic wrap and refrigerate until firm.

There is no rush moving to the next step.  If you want to do the next step tomorrow or later, or just keep some of this filling in the bowl in the fridge, that's fine.  It lasts a long time.  We still have some in our fridge that Jeff snacks on a spoonful at a time.


This is where you can go two ways.

  1. roll truffles in cocoa powder, crushed nuts, coconut shavings, etc. in store in a very cool place like the fridge.
  2. roll truffles into balls and dip them in melted chocolate.  Store in dry, cool place like the counter.
Either way, they taste great and last for a while.  You can easily make them a week or so in advance and give them out on Valentine's Day, Christmas, etc.  Perfect for if you're totally swamped the day before.


I prefer to dip the truffles in chocolate.  If I'm giving these as gifts I don't want to worry about them melting.  Jeff is our resident chocolate dipper (seriously), and we use a little candy melting pot that I got on amazon.  They seriously do sell everything.  I love it because it's the perfect size for this.  No waste.  I know most people probably don't own one of these, so other good options include a small double boiler, a fondue pot, or the tricky melting chocolate to the perfect temperature in the microwave many times.


In addition to a bouble boiler, fondue pot, etc. you'll need a plate or parchment paper to set the finished truffles on, a spatula to stir the chocolate, a fork for dipping the chocolate, and a toothpick.

Start the whole process by melting chocolate chips, stirring often to help regulate the temperature and melt quicker.  Have a plate of pre-balled truffles waiting in the fridge.  You can roll the truffles into any size, but I prefer large bite size.  Bring the plate out and one at a time place a truffle on your fork and drop it into the melted chocolate.  Immediately scoop it up and check to make sure it is entirely coated in chocolate.  Use the toothppick to help nudge the truffle off teh fork and onto the waiting plate or parchment paper.  Allow the truffle to dry and move on the the next ball.  Try to do this quickly.  The un-dipped balls of truffle filling will melt out of the fridge, so start by only bringing out a few at a time.  Once the truffles have been dipped in chocolate DO NOT put them in the fridge!  If you do they will sweat and become sticky.  Let them sit out on the counter until they have dried.  It shouldn't take long.

This process is very simple, especially if you are making truffles in a cool, dry environment.  Humidity, moisture, water drops, heat, none of these are good when working with chocolate.  Try to make sure your kitchen is dry and cool please.


Quick note:  when you've removed the chocolate from the pot give the truffles on the fork a firm tap or two on hte edge of the pot to get rid of any extra chocolate.  Otherwise you might have some chocolate dripping off.


That's it!  You've made truffles.  Good thing you'll have a lot, because you'll want to eat them all.  I like to decorate mine with chocolate jimmies.  If you want to as well, sprinkle them on immediately after dipping them in chocolate.  The truffles dry quickly and you want the jimmies to stick.  Another decorating option is drizzling chocolate (either lighter or darker) over top.


Once the truffles dry you can break off any excess chocolate drips attached to the bottoms.  Place the truffles in mini muffin wrappers and store in an airtight container on the counter.  The truffles will last for several months.

Chocolate Truffles:

ingredients:

  • 16 oz. chocolate chips (extra if dipping)
  • 3/4 cup heavy cream
  • 1/2 lb. unsalted butter
  • cocoa powder (optional, for rolling)
directions:
1. In a double boiler melt butter and heavy cream, stirring occasionally until fully mixed.  Turn heat off and slowly stir in chocolate chips until smooth.  Pour mixture into bowl and seal with plastic wrap.  Refrigerate until firm.
2.  Roll chocolate mixture into large bite sized ball and place on a plate.  Store the plate in the fridge.
3.  Roll the chocolate balls around in cocoa powder, crushed nuts, coconut shavings, etc. OR
4.  In a candy melting pot, small double boiler, fondue pot, etc. melt chocolate chips until they fill the pot at least 2" deep.  Prep by setting out a fork, toothpick, and sheet of parchment paper, or a large plate.
5.  One at a time drop a chocolate ball into the pot.  Quickly scoop up the the fork, making sure ball is coated fully.  Tap the fork firmly once or twice on the edge of the pot to remove any excess chocolate.  Use the toothpick to help nudge the truffle off the fork and onto the parchment or plate. Sprinkle with jimmies immediately (if using). Continue until the chocolate in the pot needs to be filled more and melted, or until you run out of chocolate balls.
6.  Allow truffles to dry on the counter.  Do not put them in the the fridge once dipped.  Once dry they should be shiny and firm.  Break off any excess chocolate attached the the base and place in a mini muffin wrapper.  Store in an airtight container on the container in a cool, dry spot.  The truffles will last for several months.


Wednesday, January 21, 2015

a proud mommy moment

Okay, these pictures aren't great, but I just grabbed the closest camera (my phone) because I had to document the cuteness.  

Liam woke me up this morning by jumping on my bed and asking me to open the jar of peanut butter that he then thrust into my face.  As I groggily woke up and loosened the lid Liam rambled on about how he had already grabbed a knife, but "do not worry because I got the kind that is not pointy so it won't hurt me."  I would have liked to go back to sleep but Liam reminded me that it was now daytime so I had to get up now.  Plus he opened the curtains.

I walked out to the kitchen where Liam was climbing up to his little plastic table that he uses to reach the counter.  He had already grabbed a loaf of bread and the aforementioned butter knife, and had sliced a piece of bread in half.  He quickly spread peanut butter on his bread and started to clean everything up so he could eat his sandwich.  You've never seen a kid more excited about a peanut butter sandwich than Liam.

All I did in the entire process was loosen a lid and offer to put the bread away for him.  

Wow.

When did my little baby grow up?  I have always let the kids know that as long as they follow a few simple rules (no sharp knives yet, clean up, no sitting on the counter) they can have fairly free rein in the kitchen, and I want them to be comfortable cooking, but wow. ... Time goes by fast.

And frankly, I'm just happy that he wanted a sandwich for breakfast and not a huge bowl of fishie crackers!  That's why crackers go on the top shelf.  :)


I'll be back soon with an actual recipe.  This was just cute and I just had to post.  :)

Monday, January 19, 2015

cinnamon vanilla protein scones


I love scones.  You can make them in pretty much any flavor you like, they have a great consistency, and although you can make them any size you want, I LOVE my cast iron scone pan.  It makes 16 scones to a batch (the perfect size for a toddler to grab, fyi).  I have a basic recipe that I love and this is a variation on it.


If you're not a robot I know you've gotta have had a morning where you just need some form of baked good.  I know I have!  Scones are great for that.  At least little ones like these.  They aren't fried like donuts, and they don't come in a huge stack like pancakes or waffles.  You really only need one scone to curb that craving.

More bonuses: they are easy to stick into a sandwich bag and take to work, and they are the perfect size for toddlers (plus they don't crumble all over the place).  Sounds good to me!


Even if you are the worst baker on the planet you cannot mess up this recipe.  It only needs a few ingredients, a wooden spoon,and a medium sized bowl.  This is the only recipe I know of that comes out better WITHOUT using a stand mixer.  It makes them too light and fluffy, and you really need a bit more density in a proper scone.

Note: this is a difficult post to write as I have to do it one handed while cradling Luna (our cat) in the other arm while she hugs me, glaring and purring like a lawnmower.  Life is weird).


These scones are good enough to eat plain,and the vanilla protein powder is tasty and filling, but if you really want a spread,may I recommend some caramel apple butter?  Imagine what Heaven tastes like and you're getting closer.  I got my batch at a farmer's market, but I'm working on my own recipe, so that post will hopefully come soon.

If you don't know what apple butter is then I am sorry.  You poor sad person.  It is like a eggless lovechild of applesauce and an apple version of lemon curd.  And this version contains caramel. *Insert my drool here*.


 Cinnamon Vanilla Protein Scones
makes 16 scones (if you make them larger up the bake time by 1-2 minutes)
20 minutes total time

Ingredients:

  • 2 cups AP flour
  • 1/4 cup granulated sugar
  • 1 tbsp baking powder
  • 1/2 tsp salt
  • 6 tbsp unsalted butter, softened
  • 1/2 cup milk
  • 2 large eggs
  • 1 tbsp vanilla
  • 1 tsp cinnamon
  • 1 scoop vanilla whey protein powder


Directions:

  1. Preheat oven to 450 degrees F.
  2. Add all ingredients into a medium sized bowl and mix with a wooden spoon until just incorporated.
  3. Spray a scone pan or baking sheet and scoop out batter in 1-3 tbsp sized bowls, according to your size preference.
  4. Bake 12-15 minutes, until tops are golden.  Remove from oven and let cool before removing.


Store scones in an airtight container and they will last a week.

Tuesday, January 13, 2015

pea-sto pasta


You ever have one of those days where it seems like everyone in the house is sick, or has crazy busy schedules, and you haven't been to the grocery store in what seems like a month?  Welcome to the last month at our house.

Finally I can see the light at the end of the tunnel.  Liam is the only left with a light cough, Christmas chaos is far behind, and I finally have time to grocery shop.

In the meantime I can make pea-sto pasta.  I've been making it for ages, but I really appreciate it now.  Quick, hearty, comforting, with pretty healthy and sparse ingredients.  Yes please!


This is one of those recipes that I've been making for years, but somehow totally forgot about when it came to blogging. Its great.  The ingredient list is minimal, the pea-sto sauce can be made quickly in a blender while the pasta is cooking,

This is total comfort food.  Warm, creamy, filling, and you can get your veggies and protein all in one dish.  Bonus, the kids love it.  I'm pretty sure that the brighter color a food is, the more the kids will like it.


I like to use my baby bullet blender for this because it is the PERFECT size.  You can use any blender or food processor, I just don't want like to use one that's too big because I feel like I lose too much sauce even if I use a spatula to scoop out as much as I can.

You might wonder (or not) why I use garlic powder in this recipe instead of garlic cloves.  The real garlic would be very strong raw, and one of the best parts about this recipe is how quick it is to make.  I didn't want to spend so much extra time roasting or sauteing garlic.

I completely forgot to set out the pine nuts in the above photo, but not counting the pasta, this is all you need.  Really.


I like to use frozen peas because they taste the freshest.  Don't try to blend them still frozen.  Just don't.  Microwave them for about 2 minutes until warm,   Add the peas, pine nuts, parmesan, garlic, olive oil, pepper, and basil to the blender (food processor, etc.) and blend.  I like mine a bit chunky, but feel free to completely puree.


My favorite three things about this recipe are so random:

  1. perfect if you're craving pesto, but are a bit short of basil and want to fill the sauce out a bit more.
  2. you can always prep the sauce ahead of time and freeze or refrigerate it separately to have instantly.
  3. the creamy sweet texture from the peas makes this dish feel so fatty and decadent without adding a million calories.
The pea-sto sauce can also be used as a good sauce over chicken, or you can bake and cut up a chicken breast and mix it in with this pasta.  I am SUCH a fan of a balanced (ish, at least) meal you can eat out of a bowl.  I love mixing things together!


Pea-sto pasta
2 large servings
total time: 15 minutes

ingredients:

  • 1 1/2 cups frozen peas, warmed
  • 1 large handful basil
  • 1/4 tsp black pepper
  • 3/4 tsp garlic powder
  • 1 1/2 tbsp parmesan
  • 2 tbsp pine nuts
  • 4 tbsp olive oil
  • 4 oz. dry pasta


directions:

  1. Boil a pot of water and add the pasta. Cook al dente.  Drain.  Set aside.
  2. Start making the sauce as soon as you add the pasta to the pot.  Toss the rest of the ingredients (peas, basil, pepper, garlic, parmesan, pine nuts, and olive oil) into a small blender or food processor.  Stop when your sauce is a chunky or pureed as you prefer.  If you want to thin the sauce out a bit add a bit of water or olive oil (1/2 tbsp at a time).  Scoop out the sauce and add it to the drained pasta.  Enjoy!

Saturday, January 10, 2015

Happy 2015 a little late...

Okay, yes I know it is over a week into 2015.  When the whole family gets a terrible cold at alternating times (read: never ending vicious cycle), it makes blogging a bit difficult.

This year for New Years I wanted to think of at least one good resolution.  Not an unrealistic one (look like a supermodel", besides, loosing weight is an ongoing thing for me), but one I could actually do.  I finally decided on two resolutions.


  1. make a perfect French macaron
  2. finish this book list


So far I've already read 3 1/2 books this year.

Anyone have any other good resolutions for this year?