Monday, February 23, 2015

the most decadent chocolate peanut butter oatmeal you've ever had under 300 calories


 I could eat this oatmeal every morning for the rest of my life and be just fine with that.  It's so satisfying!  Warm, sweet, and filling.  My favorite kind of breakfast.  This recipe makes two servings, but it can be cut in half, added to, or if you're making it for just yourself, you can refrigerate half of it for later.


In a medium sized pot on medium heat, add in 1 3/4 cups water, a cup of old fashioned oats, a pinch of salt, and a tablespoon each of cocoa powder, PB2 (peanut butter powder), and sugar.


 Stir occasionally until fairly thick, and oats are soft.  Remove from heat and stir in the milk.  Top with banana slices.  The whole process takes less than 10 minutes!  Perfect for busy weekday mornings.


Jack is my little chocolate fiend and he always inhales this oatmeal!  If I make a batch for just the two of us on mornings when Jeff and Liam are out of the house, he eats his half, and then moves on to eat part of mine too!

This is my favorite guilt free way to eat chocolate in the morning.  What's yours?

Nutrition Facts

User Entered Recipe
  2 Servings
Amount Per Serving
  Calories251.6
  Total Fat4.6 g
     Saturated Fat0.8 g
     Polyunsaturated Fat1.2 g
     Monounsaturated Fat1.5 g
  Cholesterol0.0 mg
  Sodium142.4 mg
  Potassium261.1 mg
  Total Carbohydrate49.7 g
     Dietary Fiber7.1 g
     Sugars14.8 g
  Protein7.7 g
  Vitamin A3.7 %
  Vitamin B-1212.5 %
  Vitamin B-617.2 %
  Vitamin C9.0 %
  Vitamin D6.3 %
  Vitamin E13.4 %
  Calcium12.2 %
  Copper8.7 %
  Folate3.0 %
  Iron14.1 %
  Magnesium8.7 %
  Manganese10.7 %
  Niacin1.9 %
  Pantothenic Acid    1.6 %
  Phosphorus    3.2 %
  Riboflavin11.4 %
  Selenium1.5 %
  Thiamin1.9 %
  Zinc3.9 %


*Percent Daily Values are based on a 2,000 calorie diet. Your daily values may be higher or lower depending on your calorie needs.


Ingredients: serves 2
  • 1 cup old fashioned oats
  • 1 3/4 cups water
  • 1 dash of salt
  • 1 tbsp unsweetened cocoa powder
  • 1 tbsp PB2
  • 1 tbsp sugar
  • 1 medium banana, sliced
  • 1/2 cup unsweetened vanilla almond milk

Friday, February 20, 2015

chewy vanilla granola bars


I loved those chewy granola bars as a kid.  They tasted so yummy, but really, they didn't help at all if you were hungry.  Eating 20 of them in a sitting would make you sick, but still wouldn't fill you up.  Not that I ever did that.  These granola bars have a similar taste, but they also have protein powder in them, so they can help those hunger pains during snack time.  I made these super simple, but you can always add mini chocolate chips or whatever else you want.  Want to know the best part about these?  They only take 30 minutes to make.  Plus, they're no bake, and a great snack to have kids help make.


The ingredients are easy items that you probably have in your kitchen anyway.  Vanilla protein powder, oats, vanilla extract, honey, butter, flax, and sugar.


In a small saucepan toss in the honey, sugar, and butter.  Stir them on medium heat just until they have liquefied and melted together.  Take off the heat and stir in the vanilla extract.


Liam insists on helping me cook regularly.  He's a pro at kitchen safety.


Pour all the dry ingredients into a large bowl and gently mix together.  Add in the wet ingredients and mix well.  It should be sticky enough to hold together, but not a wet gooey mess.


See above:  It should be just wet enough to hold together.  Note:  This makes great granola if you pop it into the oven on low on parchment paper to dry out a bit.


Lightly spray a 9 x 13 inch casserole dish with cooking spray.  Dump out the granola into it and firmly press it all down evenly.  Refrigerate for 20 minutes.  If you forget about it, that's fine.  20 minutes is just the minimum time.

Note:  Once you've pressed down the bars if you wanted to add mini chocolate chips, sprinkles, chopped nuts, coconut, etc. Now is the time to add it.  Just press down your topping of choice onto the bars and refrigerate.


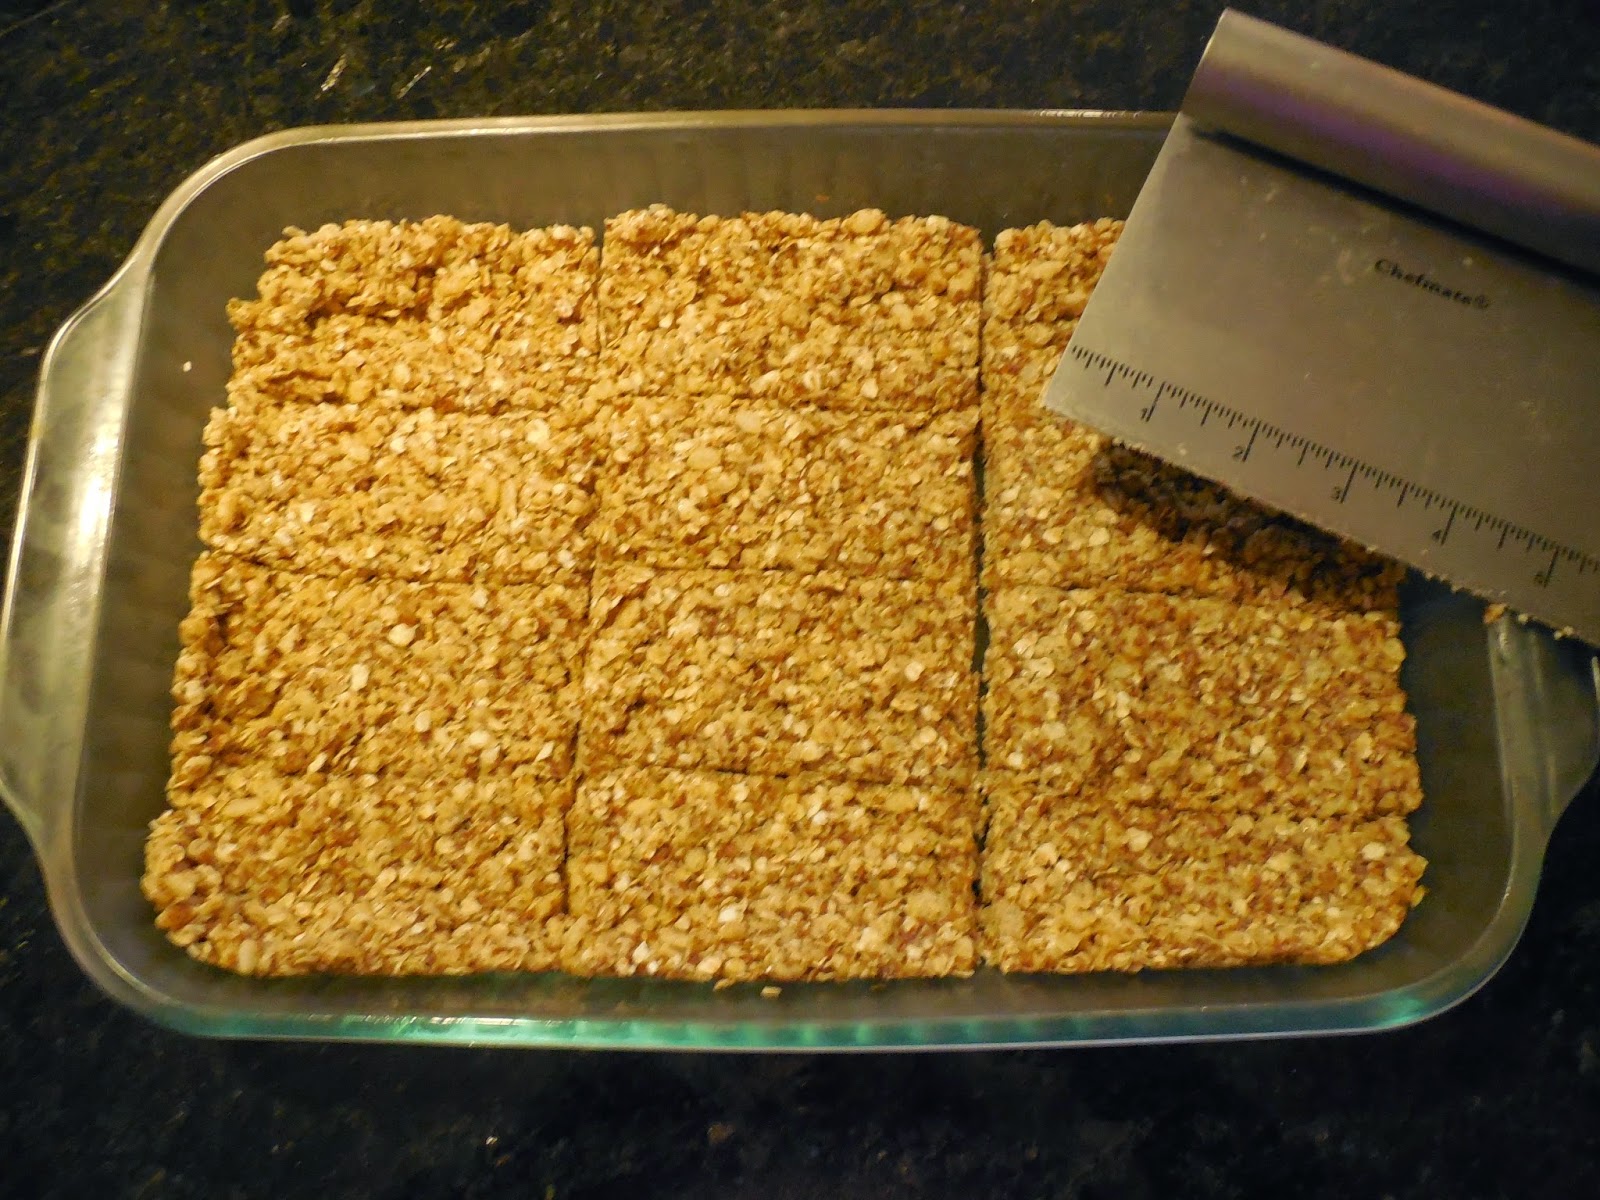
Take out the pan and cut into 12 bars.


These granola bars fit perfectly into separate snack sized ziploc bags.


Package the bars and store them in the fridge if you want them to stay firmer and keep together better, or store on the counter if you want them a bit softer.


These do not last long at our house.  Jeff and Liam would eat them all in a single day if I'd let them.


Chewy Vanilla Granola Bars
makes 12

Ingredients:

  • 1/4 cup butter (if using unsalted, add a pinch of salt to the wet ingredients)
  • 1/4 cup + 3 tbsp honey
  • 1/4 cup sugar
  • 2 cups oats
  • 1 scoop vanilla protein powder
  • 1/2 cup flax
  • 1 cup crispy rice cereal
  • 1 tsp vanilla extract
Directions:

  1. In a small saucepan on medium heat stir together the butter, honey, and sugar.  Once they have melted together take the pot off the heat and stir in the vanilla extract.
  2. Mix dry ingredients together in a large bowl, then add the wet ingredients from the pot.  Make sure everything is well mixed, and sticky enough to hold together without being a gooey mess.
  3. Lightly spray a 9 x 13 casserole dish with cooking spray and empty bowl contents into it.  Press mix down firmly.  Add optional topping and press down firmly.
  4. Refrigerate pan for 20 minutes.
  5. Remove from the fridge and cut into 12 bars (3 x 4).  A single bar will fit perfectly into a snack sized ziploc bag.  Store the granola bars in the fridge if you want them to be firmer and hold together firmly.  Bars are fine stored out of the fridge, they will just be softer and might break apart.

Monday, February 9, 2015

graham crackers


The kids wanted something snacky and we were all out of crackers, fruit, you name it.  I didn't want to make them anything really unhealthy, so I thought, why not graham crackers.

Turns out, I might have to keep a stash of them handy on a regular basis.


I found a graham cracker recipe I wanted to try from Pinterest (my time-killing weakness), but ended up altering it a bunch, and I love the results!

This recipe uses a food processor instead of a mixing bowl and spoon, and since everything is mixed while enclosed, there's less mess.  If you want, you can even have a child help push the food processor's buttons.  Even rolling out the dough is relatively mess-free.  The recipe creator had the brilliant idea of rolling out the dough between two pieces of wax paper.  This dough is tacky enough that regular rolling would have involved cups of flour, and changed the texture.


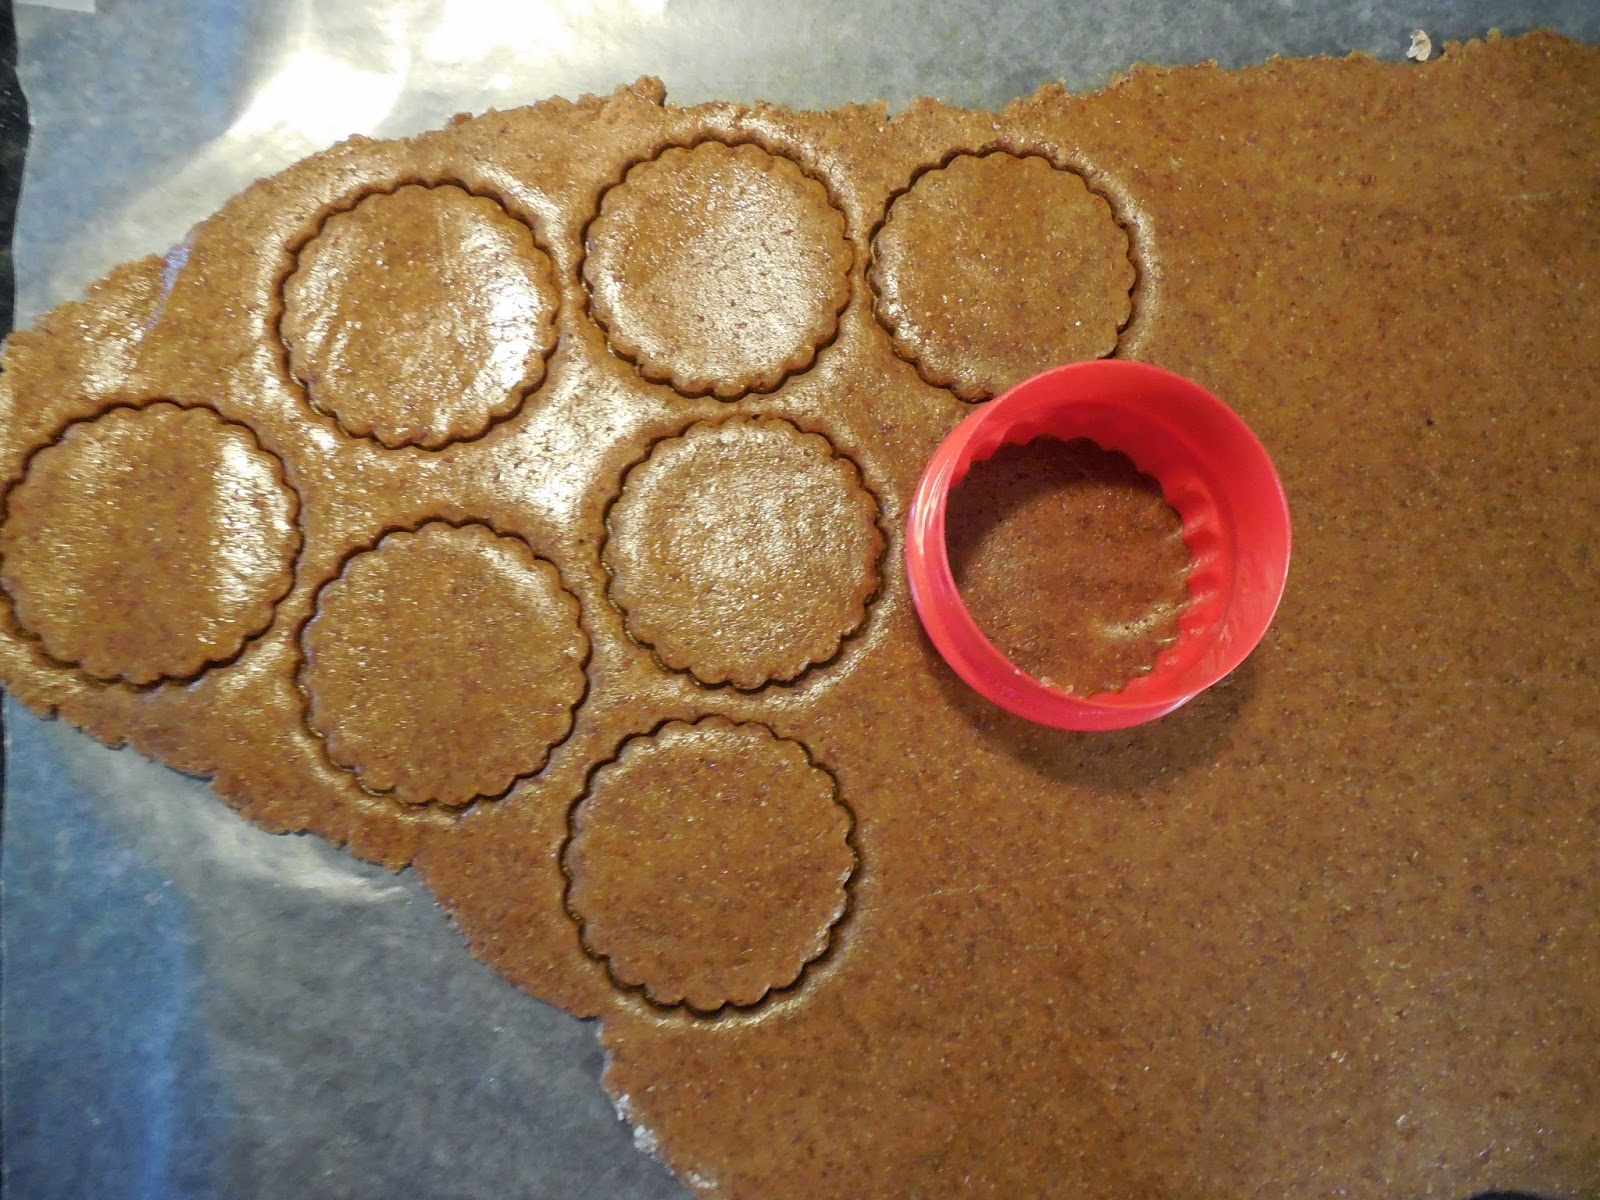
You can use any size of shape cookie cutter you want, I used a two inch circular cutter and ended up with about seventy crackers.  It was difficult to nail down a total cracker count because Jeff and the boys were eating them like they were starving.  These crackers are great, crunchy but soft, sweet but not too sweet.  Of course, being a mom, the real test is how crumbly they are.  These passed the crumb test.  A few crumbs, yes, but only when eaten by a 15 month old shoving the whole thing in his face.


When you roll out the dough separate it into two sections and roll out one at a time.  The dough is going to be tacky and firm, not too sticky.


These don't spread much at all, but force of habit made them spread them out.

Note: My graham crackers might be darker than yours because the honey I used in the recipe was chocolate infused and is a very dark brown color.


The crackers might look a little soft when the oven timer goes off, but do not overcook them.  They firm up quicker once they've cooled and set.


Let the crackers cool completely, then store in an airtight container in a dry cool place.


Don't be afraid to roll these a little thin.  They are sturdy enough that I haven't had any break yet.


Graham Cracker
makes about 70 2 1/2" crackers

Ingredients:

  • 1 cup whole wheat flour
  • 1 1/2 cups AP flour
  • 1 cup flax seed
  • 1/2 cup brown sugar, lightly packed
  • 1/2 tsp salt
  • 1 tsp cinnamon
  • 1 tsp baking soda
  • 1/2 cup butter, cold and cubed (1 stick)
  • 1/4 cup honey (I used chocolate infused honey)
  • 1/4 cup water
  • 1 tsp vanilla


Directions:

  1. Preheat the oven to 350 degrees F.  In a food processor mix both flours, flax seed, brown sugar, salt, cinnamon, and baking soda.
  2. Cube the butter while still cold and pulse until it until it looks like coarse sand.
  3. Add in the honey, water, and vanilla and mix until fully smooth and combined.
  4. In two batches roll the dough out between two pieces of wax paper until thin (about 1/4").  Cut into shapes using a knife (standard graham squares) or cookie cutters.  Continue to roll out dough until all gone.  
  5. Place the dough shapes onto parchment lined baking sheets and bake for 15 minutes.  Do not over bake.  Cool completely.

Tuesday, February 3, 2015

cheesy omelet muffins


There is a story that goes with these muffins.  Yesterday morning the boys wanted breakfast, so Liam helped me make pancakes.  I made it the cheater way with Bisquick mix, sugar, an egg, and some milk.  I make pancake batter in a large measuring cup so I can measure, mix, and easily pour all in one cup.  We ate all the pancakes, cleaned everything up, and played for a while.  The boys were happy playing by themselves so I told them to keep playing and I'd go take a quick shower.

Shortly after I finished getting ready for the day I came out to find Jack quietly playing in Liam's room (as always), and I walked out to the kitchen to find... Liam cooking.


Liam had poured all our remaining Bisquick mix into a large clean measuring cup just like I had, taken the pancake recipe out and laid it on the counter for reference (even though he can't read yet), and put the empty Bisquick container back in the pantry.  Then he had taken out the sugar and scooped some out with a large wooden spoon just like I had before putting the container away (I know because he left out the sugary spoon).

When I walked out he was in the process of adding eggs.  Yes, EGGS.  My recipe used one egg.  Liam was halfway through cracking number six!  I was actually pretty impressed how tidy his work space was.  He only spilled a tiny bit of egg white on the counter, and I had only taught him how to crack an egg recently.  I'm really glad I came into the kitchen when I did, because he had five more eggs set out, ready to crack open!  He had literally emptied the egg carton form the fridge and put it back in empty.  When he saw me he perked up and announced, "I'm making pancakes!  We ate the other ones already so we need more!"  Then he hopped off his table to go grab the milk.  Happy and totally nonchalant about the whole thing.

I was gobsmacked.  I couldn't figure out first whether to take photos, be pissed about so many eggs getting wasted, or be impressed that he took initiative, that he's a great cook, or remembered perfectly how I made pancakes (minus the number of eggs used).


Okay, I was mad impressed, and thought he was adorable, but I still made it clear that I was annoyed at how many eggs he used.  He was so cute, and I HATE wasting food, so I tried to think of some way to save the egg-y batter.


Enter in the cheesy omelet muffins.  So named because when Jeff came home from work that night and tried one, that's what he said they tasted like.  I tried my best to scoop out the small amount of sugar in them, then added some milk and a handful of shredded cheese.  They bake really well, and turned into a perfect breakfast.  Jeff never has much time in the morning, so I like to have a speedy breakfast option available.  These can be pulled from the fridge and microwaved for a minute, then eaten in the car.  Perfect.  Sometimes culinary accidents make some interesting finds!

I told Liam he was getting to be a good cook and he replied, "Grandma says when I cook at her house I am a chef."  Sounds about right.


My batch made eleven, but I could have filled them each a little less and still had twelve good sized muffins.  Just don't fill them too high, because eggs puff up quite a bit when they cook.


perfect egg-y cheesy muffins.


Cheesy Omelet Muffins
makes about 12
bake time: 20-25 minutes

ingredients:

  • 1 cup Bisquick mix
  • 6 large eggs
  • 1/2 cup milk
  • large handful of shredded cheese (cheddar or 3 cheese blend)
  • pinch of black pepper


directions:

  1. Preheat oven to 375 degrees.  Spray 12 muffin tin pan.
  2. Mix all ingredients together well and pour into muffin tins. 
  3. Bake 20-25 minutes, until golden brown on top.
  4. Remove from oven and let sit 10 minutes before removing.  Eat warm.
  5. Refrigerate to store, microwave 1 minute to reheat.