Showing posts with label roasted. Show all posts

Tuesday, August 18, 2015

Buddha bowl


Can I just say, Buddha bowls are THE BEST?!  What's a Buddha bowl you ask?  Well, its essentially a bowl full (like a Buddha belly) of veggies, greens, beans, and grains.  It is a delicious  single bowl balanced meal, full of color and flavor.  All you need mixed together in a beautiful melody of food.

If you were very lazy you could throw in some chopped raw veggies, but I like to roast as much as possible to bring out flavor and texture.

Even if you are being lazy, this recipe is so simple a monkey could make it.  Really.  Cut up some veggies, sprinkle with salt, pepper, and olive oil, and throw them in the oven.  That's the most difficult part of this whole recipe.  Seriously.

The combination shown here is my favorite, but you could easily prep tons of veggies, grains, and beans and mix n' match a week's worth of meals, easy.

Buddha bowls are great because you can make them with whatever you have on hand.  No rice?  Use quinoa, couscous, barley, etc.  So many possibilities!

There are many options for protein too.  Buddha bowls are generally plant based, so I use beans mostly.  Garbanzos, white beans, lentils.... I could go on and on.

Last on the list are the greens.  I like lettuce.  Something fresh with a nice crunch.  Broccoli, brussel sprouts, kale, etc.  all good options too.


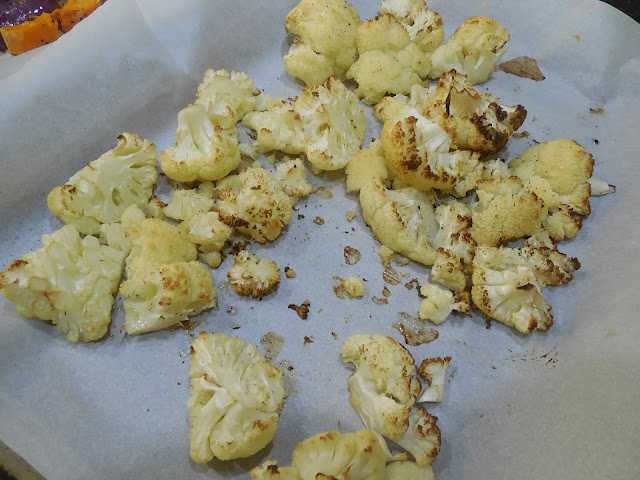
Roast some veggies.  I like to make plenty for us.  Leftovers are my friend. :)  Cauliflower is always my go-to roasted veggie.  It is so versatile and can blend in with any seasoning you choose.


Sweet potatoes, red onion, and red bell peppers.  Yum.


A batch of roasted BBQ garbanzo beans fits right in with the bowl.  A bit of heat, sweetness, and a touch of savory flavor too.


 This bowl is so chock full of yum you can't even see the rice or the red onion.

Some Buddha bowls have a gentle sauce drizzled over top.  It isn't necessary, and with all the seasonings in the garbanzos I didn't see the need for one.  A lack of sauce saves calories, and prevents everything from getting too goop-y.  IT's also tidier for kids to eat.  They make enough of a mess on their own!  :)


 Buddha bowl
serves 4

Ingredients:

  • 2 cups brown rice, cooked
  • 1 head of cauliflower, in florets
  • 1/3 red onions, chopped
  • 1 red bell pepper, chopped
  • 1 medium sweet potato, chopped
  • 1/2 small head of butter lettuce, chopped
  • salt
  • black pepper
  • 2 tsp olive oil
  • 1 batch roasted BBQ garbanzo beans

Directions:

  1. Make a batch of roasted BBQ garbanzo beans.  Set aside.
  2. Preheat the oven to 425 degrees F.  Cut up the cauliflower, red onion, bell pepper, and sweet potato and place on parchment covered baking sheets.  Sprinkle lightly with salt, black pepper, and olive oil.  Bake for 40-45 minutes, rotating the pans halfway through for even cooking.
  3. Meanwhile, make a batch of brown rice, set aside. 
  4. Chop the lettuce and set aside.
  5. When all pieces are ready, fill the bowls evenly with a little of everything.  Dig in and enjoy!
note:  If you have any leftovers, place everything but the lettuce in tupperware together and refrigerate.  Reheats really well in the microwave.

Monday, August 10, 2015

Butternut Squash Risotto


This risotto was sooo good!  I was just playing around with new ways to use butternut squash.  I love it, but I don't always want to use it in the same old recipes every time.  I love figuring out new recipes that taste good, are healthy, and that the whole family loves.  Yay!

Jeff hates white rice (too sticky and mushy) so I used brown rice.  I liked the way the risotto turned out with it.  Not complete mush, but still soft.  Healthier with brown rice too.  If you're a purist you could use the traditional arborio rice,

This dish was great for the to eat.  Liam loves rice and squash, so he had no problems eating it (although he DID freak out for a while after he dropped his plate on the way to the table), and Jack is going through a MASSIVE independent phase where he refuses help eating.  The risotto is sticky enough to stay on a spoon pretty well, but not so sticky the the kids hands were a mess.  Jack ate about half his bowl full with his spoon, then gave up and tried to drink the rest.  :)

Bonus of making risotto?  I can see the TV from my stove, and I got to binge on Netflix while making dinner.  :)  This dish really didn't need a lot of close attention, just absent mindedly stirring, so I didn't have to worry so much about messing it up.


Butternut Squash Risotto
serves 4-6

Ingredients:

  • 48 oz chicken broth
  • 1 1/2 cups brown rice
  • 1 medium butternut squash, small cubes
  • 1 medium onion, diced
  • 4 garlic cloves, diced
  • 2 tbsp olive oil, divided
  • salt
  • black pepper
  • 2 tsp thyme
  • 1 tsp cayenne pepper
  • 1 spoonful of sugar (optional)

Directions:

  1. Preheat oven to 425 degrees F.  Cover a baking pan with a piece of parchment paper and lay the cubed squash in an even layer on top.  Drizzle with 2 tsp of olive oil, and a light sprinkle of salt and pepper.  Bake for about 45 minutes, until squash is soft with lightly golden edges.
  2. Dice the onion and garlic and saute on medium heat in a large pot with the remaining olive oil, and a light sprinkle of salt and pepper.  Stir occasionally for about 5 minutes, until fragrant and soft.
  3. Add the rice and broth to the pot.  Leave the pot alone for about 20 minutes or so.  When the rice has absorbed most of the broth start stirring.  You'll be doing this pretty often from this point on.  Either stirring or watching the pot to see if it needs to be stirred.  When the squash is ready dump it into the pot.  Add the thyme and cayenne and stir everything together.  Taste and add more seasonings if needed.  When the rice is soft enough and the broth has been absorbed, the risotto is ready to remove from heat.  Serve immediately. 
note: some squash is sweeter than others.  If your squash isn't very sweet you might want to add a spoonful of sugar to your risotto.  Just stir it right in.

Friday, June 12, 2015

pasta and garbanzo bean soup


I totally love this soup!  Not only is it really easy and healthy, but its super kid friendly (Liam's favorite soups all have pasta and beans), but you can make part of it ahead of time!

I made the first half of the recipe while the kids were napping and I had some free time.  Then the boys and I went swimming, and when we got home I only had about 15 minutes of cooking before it was all ready.  No fuss, little mess, healthy and filling.  Jeff and the boys loved this soup, and one bowl (plus a few pieces of obligatory "soup bread" to dip) was very filling.

If you're looking at the soup and wondering how it could be so healthy, look no further.  The soup is full of veggies!  I roasted and pureed them before stirring them into the chicken broth (low-sodium of course).  That made the broth thick, flavorful, and creamy.


I roasted a pan of carrots, red bell pepper, and cauliflower with a bit of olive oil, salt, and pepper until the tops were golden and fragrant, then I pureed the veggies with some of the chicken broth.  I did all this ahead of time and then stuck the liquid in the fridge until I was ready the finish the soup.  You could make the soup all in one go if you want to though.


I just love the bright orange color!  The cauliflower and bit of olive oil really help thicken the soup and make the broth creamy.  I swear, it tasted so luscious, like I was eating some super fatty, but HA-HA!  I was only eating veggies. Yay for taste bud deception.  :)

I wanted a mostly pureed soup because I was going for simplicity.  A lot of my soups are massively chunky and busy, and I wanted something simple.  Plus, Liam loves veggies, but he doesn't always enjoy them in large chunks in his soup.  He'd rather have the flavor of them, and actually be able to see the pasta in the soup.

I like my soup to be pretty thick, and this soup thickens more the next day (looking almost like a very cheddar-y mac and cheese), so feel free to adjust the amount of broth used accordingly.


pasta and garbanzo bean soup
serves 6

ingredients:
  • 1 tbsp olive oil
  • 1/2 head of cauliflower, cut into pieces
  • 8 carrots, sliced
  • 1 large red bell pepper, de-seeded and cut into large pieces
  • 1/2 tsp salt
  • 1/2 tsp pepper
  • 2 cloves of garlic
  • 4 cups low-sodium chicken broth (add more if you prefer thinner soup)
  • 2 15 oz. cans garbanzo beans, rinsed and drained
  • 1 1/2 cups small pasta
  • 1/2 tsp basil
  • 1/2 tsp oregano
  • 1/2 tsp chili powder
directions:
  1. Preheat oven to 375 degrees F.  Cut up cauliflower, carrots, and bell pepper and place as flat as possible on a parchment lined baking sheet with the garlic.  Drizzle with olive oil, salt, and pepper.  Bake for 40 minutes.  
  2. Slide veggies off the parchment and into a blender.  Add chicken broth and puree.  At this point you can store the puree in the fridge for later use, or pour the puree start into a pot on the stove.
  3. Bring liquid to a boil, reduce to a simmer and add the pasta, garbanzo beans, basil, oregano, and chili powder.  Stir occasionally.  As soon as the pasta is al dente the soup is ready.  Serve with french bread to dip.
note: feel free to add more chicken broth if you prefer a thinner soup.  You might want to have some extra broth on hand for leftover soup, as it will thicken the next day in the fridge.

Wednesday, April 15, 2015

Rapunzel's favorite parsnip and hazelnut soup


With two kids I see A LOT of cartoons, especially Disney movies.  One of Liam's favorites is Tangled.  Every time I see it I wonder about Rapunzel's favorite soup, which supposedly contains parsnips and hazelnuts.  I looked around online and found a recipe to use as a starting point.

This recipe is adapted from Perrys Plate.

Don't be scared by the idea of nuts in a soup.  The whole thing is pureed so its soft, fluffy, and creamy.  The consistency is really lovely.

I'm really terrible at plating.  My pictures of this soup are especially boring, but the flavor is so good.  Even better, this soup is pretty darn healthy, and quite filling.


Start off by sauteing the veggies in olive oil with the salt.  Honestly you can chop the veggies whatever size you want, it will just take a bit longer for them to soften and cook down if you are lazy like me and cut them in huge pieces.

While the veggies are cooking, put the hazelnuts in the oven in the single layer at 350 degrees F for 10 minutes.  Wait for several minutes for the nuts to cool, then wrap them in a dish towel and rub the towel vigorously for a minute to try and get the skin off the hazelnuts.  Remaining skin is fine, but the soup might taste a bit bitter with all the skins still on.


Add the broth, nuts, chili powder, and pepper into the pot.  Bring to a boil, then simmer for about 30 minutes.


Using whatever you've got (blender, food processor, immersion blender, etc.) puree the soup.  You might have to do this in several batches.  If you've got a big vitamix like me, you can do it all in one batch.  Make sure the soup is fully pureed before adding back to the pot.


Stir on low for a minute just to make sure the soup stays hot evenly, then remove from heat and slowly stir in the milk.  Serve.  I found this soup to be filling and tasty, and to my surprise, even after I microwaved leftovers it stayed fluffy.

Rapunzel's favorite parsnip and hazelnut soup
serves 6

Ingredients:

  • 1 cup hazelnuts
  • 4 shallots, peeled and chopped
  • 2 medium leeks (whites only), chopped
  • 2 large parsnips, chopped
  • 2 tsp salt
  • 1/2 tsp pepper
  • 1 tbsp olive oil
  • 1 large potato, chopped
  • 6 cups chicken broth
  • 1 cup milk
  • 1/4 tsp chili powder


Directions:

  1. Chop up the veggies and add into a large hot pot with olive oil and salt.  Saute until softened.
  2. Heat oven to 350 degrees F and roast hazelnuts on a baking sheet for 10 minutes.  Remove from oven and let cool for several minutes.  Wrap the nuts in a towel and rub vigorously for a minute to slough the skins off.  You don't have to get all the skins off.
  3. Dump the hazelnuts into the soup pot with the chicken broth, chili powder, and pepper.  Bring to a boil, then simmer for 30 minutes.
  4. Using a blender, immersion blender, food processor, etc. puree the soup thoroughly.
  5. Return the soup to the pot, heat on medium low to make sure the soup is heated through thoroughly, then remove from heat, slowly stir in the milk, and serve.


note: This soup makes for really good leftovers, and stays fluffy even after refrigeration and being microwaved.

Tuesday, December 16, 2014

potatoes and cauliflower 3 ways


I love both potatoes and cauliflower.  I could easily find ways to cook them differently and be able to eat them happily every day.  It recently dawned on me however, that they can be enjoyed together quite easily 3 ways.  Each way is good, but they all build upon each other.

level 1: roasted cauliflower and baked steak fries
level 2: veggie hash
level 3: corn chowder

All three of those dishes are great, and come on, you know you want to surprise someone by telling them you put french fries in your chowder!  You can make one of these dishes straight through, use leftover fries and cauliflower to make hash, use leftover hash to make chowder, etc.  Make sense?


Level 1: roasted cauliflower and baked steak fries

This is great for an easy weeknight dinner.  Just add a baked chicken breast on the side, or some seasoned beans or lentils.


Preheat oven to 400 degrees F.  Cut 2 large russet potatoes into about 12 pieces each (3x4) and lay them flat on a parchment covered baking sheet.  Lightly drizzle with olive oil.  Sprinkle with black pepper and sea salt. Set aside.


Cut up a small head of cauliflower into florets.  Spread out on a parchment covered baking sheet and lightly drizzle with olive oil.  Sprinkles with black pepper and sea salt.  Pop into the oven with the potatoes and bake for 45 minutes.  Remove when fork tender.  If you prefer the potatoes and /or cauliflower to have a bit more crisp broil them for up to 2 minutes.

You can stop here and enjoy alone, or with some chicken, beans, or lentils on the side for a full meal.
OR

You can continue on to the next direction to make hash.

Level 2: hash


Chop up the steak fries and cauliflower into bite sized pieces (leave the potato skins on, it brings nutrients, flavor, and texture).


Set these pieces aside.

In a large pot on medium heat, heat 2 teaspoons of olive oil, then add a small diced yellow onion, and 4 diced garlic cloves.  Sprinkle lightly with salt and stir occasionally to prevent burning.  After about 3 minutes add a diced red bell pepper.  Once softened add the potatoes and cauliflower.


Combine well.


Add 1 1/2 cups of corn kernels and stir often for several minutes until everything has softened and warmed.  Season lightly with more salt and pepper.  Add in 1/2 teaspoon each thyme and cayenne.

You have now just made hash.  You could enjoy this now, serve with some chicken for a full meal, refrigerate it and heat it up in the morning with eggs mixed in for breakfast...

OR you could continue on and make corn chowder.

See?  So many options just from the original potatoes and cauliflower?

Level 3: corn chowder


Add three 14.5 oz cans (a little over 5 cups) of chicken broth (preferably low sodium) to your hash.  Add 1/2 teaspoon thyme and 1 1/2 teaspoon cayenne.  Mix well.  Turn the heat down to medium-low and put the lid on the pot.  Walk away.  Yup, you heard me.  Walk away.  Set a timer for 1 hour.  Come back once or twice within that hour a stir briefly.  Otherwise, leave the pot alone until that timer goes off.  When it does, stir quickly (if any skin has developed a brief stir will get rid of it) and remove from heat.  Pour in a cup of milk , stir and serve immediately.  If you didn't know better you'd think this soup was soo bad for you.  It's thick and rich and delicious.

The chowder picture above is before simmering for an hour.  You CAN eat it then if you're really hungry, or like thinner soups, but it thickened beautifully, and the flavor gets better (I swear) after the hour of simmering.  See below, so much thicker!


potatoes and cauliflower 3 ways
(roasted, hash, corn chowder)
serves 4

ingredients:

  • 2 russet potatoes
  • 1 small head of cauliflower
  • 4 tsp olive oil, divided
  • sea salt
  • pepper
  • 4 garlic cloves, diced
  • 1 small yellow onion, diced
  • 1 red bell pepper, diced
  • 1 1/2 C corn
  • 2 tsp cayenne
  • 1 tsp thyme
  • three 14.5 oz cans of chicken broth
  • 1 C milk


directions:
1.  Preheat oven to 400 degrees F.  Slice potatoes into roughly 12 long slices each (cut 3x4) and spread on a parchment lined baking sheet.  Drizzle with 1 tsp olive oil, sea salt, and pepper.  Set aside.  Cut cauliflower head into florets and spread on a parchment lined baking sheet drizzle with a teaspoon of olive oil, and sea salt and pepper.  Bake both sheets for about 45 minutes, until both vegetables are fork tender with crispy edges.  Remove from the oven.
2.  In a large pot on medium heat, heat 2 teaspoons of olive oil and add the onion and garlic.  Stir around until soft, a few minutes.  Add the bell pepper and cook until that softens as well.  Add the corn, potatoes, and cauliflower.  Mix well and season with 1/2 teaspoon each of thyme and cayenne.  Add salt and pepper to taste.
3.  Add chicken broth and remaining thyme and cayenne.  Turn out down to medium-low and pot the pot lid on.  Set a timer for one hour and stir briefly only once or twice before timer goes off.  Remove from heat and add the milk.  Serve immediately.

All three levels of this recipe store in the fridge well for up to a week, and reheat easily.

Sunday, December 14, 2014

roasted veggies with couscous and garbanzo beans


This is such a good weeknight meal.  The prep is quick, the flavor is great, and it's healthy.  Jeff likes to call this dish "middle eastern ratatouille" and that's really as accurate as any description I can think of.

I always think of meals that our whole family will like when I cook.  I don't generally remember to mention this when I blog, but about 95% of the recipes I make are approved by all of us.  That's no small task.  A vegetarian, a guy, a 3 year old who barely eats, and a 1 year old.  I try my best to make sure that dinner especially can be enjoyed by all of us, and still be healthy.


I love recipes like this where the recipe breaks down into several parts, all of which can be made simultaneously so you can enjoy it quicker.


Chop up all the veggies and roast them with some drizzled olive oil, salt and pepper over top.


All that's left now is to make the couscous and heat up a can of garbanzo beans.  Honestly, that's all there is to it.  Easy.


Once all three sections are ready, spoon the couscous into a bowl and top with the veggies and garbanzo beans.  Enjoy!


Roasted Veggies with Couscous and Garbanzo Beans
serves 3-4

ingredients:

  • 3/4 cup dry, uncooked couscous
  • a 15 oz. can garbanzo beans, drained and rinsed
  • 1 zucchini, sliced thin
  • 1 medium tomato, chopped, 
  • 1 yellow bell pepper, chopped
  • 1 small yellow onion, chopped
  • 3 cloves garlic, chopped
  • 1 tbsp olive oil, divided
  • sea salt (to taste)
  • black pepper (to taste)
  • 1 tsp oregano
  • 1/2 tsp cayenne 
  • 1/4 tsp garlic powder


directions:
1.  Preheat oven to 400 degrees F.  Chop the veggies and spread them evenly on a foil lined lipped baking sheet.  Drizzle lightly with 2 teaspoons olive oil, sea salt, and pepper.  Bake for 25-30 minutes, until veggies are fork tender.
2.  Once the veggies are roasting, start the couscous.  Boil 1 1/2 cups of water in a medium sized pot.  Take off heat and pour in the couscous.  Place a lid over the pot and let sit for 10 minutes, until the couscous has absorbed all the liquid.  Fluff with a fork and mix in a teaspoon of olive oil, the oregano, cayenne, and garlic.  Add salt and pepper to taste.
3.  Drain and rinse a can of garbanzo beans and heat in the microwave for 2 minutes, or until warmed evenly.
4.  Plate the couscous, lay the veggies and garbanzo beans over top.  Enjoy.

This is a very simple dish.  It doesn't require many ingredients, and if you prefer to change up the spices or veggies, that's just fine.   I love having the option to make easy variations on a good dish!

Monday, October 27, 2014

basic spaghetti squash with marinara


I wasn't very familiar with spaghetti squash until recently.  I had seen the occasional recipe using it on Pinterest, but that was about it.  Last week we got one in our produce box and I was pretty excited to try it.
Random tangent: We get a produce box delivered to us every other week and it is my favorite thing ever!  It is fresh, local, and has a good mix of basics (carrots and celery) and new or more exciting items (spaghetti squash and pomegranates).  I'd been wanting to try spaghetti squash in particular for a while, but I probably would have taken longer to remember to get one if one wasn't literally dropped at my doorstep.


First step is to cut the spaghetti squash in half long wise and scrap out in seeds and gunk in the middle.  Season lightly with olive oil, salt and pepper.  Pop them in the oven at 350 degrees  F for 45 minutes.  For ease of cleanup place them on a lipped baking pan lined with parchment paper.

Remove from the oven when the squash is fork tender.

Note:  I only used half of the squash for this recipe because it was a huge one.  A single half still ended up being enough for four large servings.  I roasted and scraped both halves, but put half in a freezer bag in the freezer (duh) for later use.


In the meantime start the marinara.  Frankly, if you are in a rush or short on ingredients you can use store bought marinara, but I like this version better.  I wanted marinara that was loaded with garlic, something that wouldn't be too thick and chunky to overpower the squash.


Dice the garlic and saute it in a bit of olive oil for a few minutes.  Add 3 cups (fresh or canned) of diced tomato, and season to taste with basil, oregano, salt, pepper, and a dash of chili powder.  Cook on medium heat until the tomato juice has cooked down a bit and thickened.  If the sauce is done before the squash has finished cooking take it off heat and set it to the side.


When the squash is done take it out and let it cool to the touch.   Then grab a fork and gently scrape out the squash.  It should be very easy.  All that should be left is the hard outer edge.  Add the squash into the sauce and heat until warm.  Mix well to incorporate the sauce.


Sprinkle with parmesan cheese if desired.  I recommend having some crusty bread with this too.  Use it to soak up sauce.  So good!


As much as I love this recipe I would never lie and say that this tastes EXACTLY like pasta.  It is totally different but still amazing.  I feel like I had to say that because of my experience with tofu.  I might have liked tofu but I was told it tasted JUST like vanilla ice cream, so of course I took a huge bite of it and have hated it ever since.  So here it is again.  Spaghetti squash does not taste or feel like pasta, but still goes well with marinara and is delicious.


This dish also reheats really well.  You'd never know it was reheated in the microwave by the taste.


print recipe

basic spaghetti squash with marinara
like spaghetti but with way less calories
Ingredients
  • 1/2 large spaghetti squash (or 1 whole small squash)
  • 1 tbsp olive oil, divided
  • pinch salt and pepper to taste
  • 4 cloves garlic, diced
  • 3 cups tomatoes, diced (canned or fresh)
  • 2 tsp basil
  • 1 tsp oregano
  • pinch chili powder
  • 1 tsp sugar (optional)
Instructions
1. Preheat oven to 350 degrees F. Cut squash in half length wise. Drizzle each half with 1 tsp olive oil, and sprinkle lightly with salt and pepper. Place on parchment paper on a lipped baking pan. Roast for 45 minutes or until fork tender.
2. While the squash is roasting start the sauce. Heat the diced garlic in a pan with the remaining 1 tsp olive oil. Cook on medium heat for several minutes until fragrant. Add the diced tomatoes and seasonings. If the sauce needs it, add the optional 1 tsp of sugar. Keep on medium heat, stirring occasionally until the liquid begins to evaporate and the sauce thickens. If the sauce is ready before the squash take it off heat and set to the side.
3. When the squash is done take it out of the oven and let it sit for a few minutes until it is cool enough to touch. If the squash is small use the whole thing, if it is large, set half aside to use later. Using a fork scrape the inside of the squash until all that is left is the hard outer part. The scraped squash should resemble spaghetti. Add this part in with the sauce and mix together well. When this is mixed well and heated to your liking, remove from heat and serve. Pairs well with parmesan and crusty bread. 
4. If you are only using half the squash for the recipe scrape the other half into a freezer bag and store in the freezer to use later.

Details
Prep time:
Cook time:
Total time:
Yield: 4 large servings

Wednesday, October 15, 2014

roasted garbanzo beans


This is my all time favorite snack.  I takes a while to make, bu most of that is idle oven time.  These roasted garbanzo beans are crunchy, chewy, and salty.  I love this dish for many reasons.

  • tastes delicious
  • healthy
  • doesn't require many ingredients
  • so easy
  • easy to eat
  • great source of protein (okay, a bit repetitive, but important!)


Start with two standard 15.5 oz cans of garbanzo beans.  Drain, rinse them, and try to get out as much extra water as possible.

If you see typos, I've tried to find them all.  I had A LOT.  Many of my letters stick.  That's what happens I guess when you have a really old laptop, and you find things like peanut butter stuck to the keys...  Ah, the perks of having kids(?).


Dump the garbanzo beans into a freezer bag along with 2 tablespoons of red wine vinegar, one tablespoon each of olive oil and dijon mustard, and a teaspoon of sea salt.  Remove any excess air and seal it shut.


This is Liam's favorite part.  I asked him if he wanted to help me shake it all up to combine everything well.  Well, as you can probably tell from he crazy blurry picture, he's doing a bang up job.  Although, he's always a blur anyway.


Then he thought it would be awesome if I had to chase him to get he bag back...


Yup, looks good.


Empty the bag out onto a lipped baking sheet lined with parchment paper and shake gently.  Strive for a single layer, if your pan is too small for this, that's okay.


Strangely I took a picture of the garbanzo beans before I shook them instead of after.  Aim for them to be spread out more than this.

Stick them in the oven at 400 degrees F for 30 minutes.  Then stir with a wooden spoon and rotate the pan.  Set a timer for another 30 minutes, then remove.


The garbanzo beans should be crunchy, chewy, salty, and delicious.  They shouldn't be hard or burned.  They can be enjoyed warm or room temperature.


I recommend eating them the same day they are roasted, or the next day at the latest.  They will technically last for at least a week in an airtight container on the counter, but they quickly loose the crunch (my favorite part).


I pour the garbanzo beans straight into a bowl and eat them like popcorn.  They make such a yummy, easy, and protein rich healthy snack!


These don't last very long at our house.  There are so many flavor combinations possible when roasting these.  This one is my favorite, but Jeff is pushing for a BBQ variety.  I'll try to work out the kinks and post that one.


If you want, toss another small pinch of sea salt on top after they come out of the oven.


print recipe

roasted garbanzo beans
crunchy, chewy, salty, and delicious
Ingredients
  • 2 15.5 oz cans garbanzo beans, drained and rinsed
  • 2 tbsp red wine vinegar
  • 1 tbsp dijon mustard
  • 1 tbsp olive oil
  • 1 tsp sea salt
Instructions
1. Preheat the oven to 400 degrees F. Place the drained and rinsed garbanzo beans in a freezer bag along with the red wine vinegar, olive oil, dijon mustard, and sea salt. Remove excess air and seal closed. Shake vigorously to mix. Dump the freezer bag contents out onto a lipped baking sheet lined with parchment paper. Try to spread the garbanzo beans out in a single layer. If your sheet is not quite big enough for that, no problem. 
2. Slide the baking sheet onto the middle oven rack and set a timer for 30 minutes. When the timer goes off gently stir the garbanzo beans around with a wooden spoon and rotate the pan. Set the timer for another 30 minutes. When the timer goes off remove the pan from the oven. Pour he garbanzo beans out into a bowl and enjoy! I like them both warm and room temperature. I recommend eating them the same day they are roasted, or the next day a the latest. After that they lose the crunch and are just chewy (which is good too).

Details
Prep time:
Cook time:
Total time:
Yield: a cereal bowlful