Showing posts with label frosting. Show all posts

Monday, May 4, 2015

strawberry lemonade cake


I was already planning on making a chocolate cake for Mupma's birthday, so I wanted the second cake I made to be the total opposite.  Light and fruity.  What could be better than a strawberry lemonade cake?  Sweet, tart, light, fluffy.  Total heaven.

Have I mentioned already that I'm POSITIVE there is nothing scarier in the entire world then transporting cakes?  Just imagine trying to drive somewhere with a big gift, two wiggly boys, and TWO cakes?  One of which was on a pedestal?  Completely terrifying.  Luckily Jeff is awesome.  He put one cake at his feet (with a cover over it just in case!) and held onto the pedestal cake while I drove like two miles an hour.  Or, at least it felt like it.  It was the biggest relief ever to get to my parent's house and set the cakes down.


Once the cake has been made and cooled completely, frost the bottom layer and lay thinly sliced strawberries over the top and tightly as possible.  You want to get a good strawberry chunk in every bite.  Make sure the strawberry slices have been washed and dried thoroughly before slicing.


There is nothing better than a nice fresh strawberry!


Place the second layer of cake over the strawberry slices and finish frosting the cake.  This cake came out of the oven with fairly flat tops so I didn't need to slice off any puffy tops.  I just left them as-is.  If you want to place strawberries like this around the edges of the cake, just make sure they have been stemmed and thoroughly rinsed and dried.  Also, you might want to do this part as close to serving as possible.  You really don't want to deal with the possibility of them dripping juice down the side of the cake, or sliding around on top.  No thank you!  Also, this cake should be refrigerated as soon as you finish frosting.


I just love a nice fluffy fruity cake.  It is just such a classic look.


The worst part about there being two cakes at a party is that you feel like you need to try both of them!  I love my chocolate cake, so I needed a sliver, but I was trying out new recipes with this strawberry lemonade cake, so OF COURSE I needed a little piece of it too.  *sigh*  I suppose this is a great example of first world problems?  :)


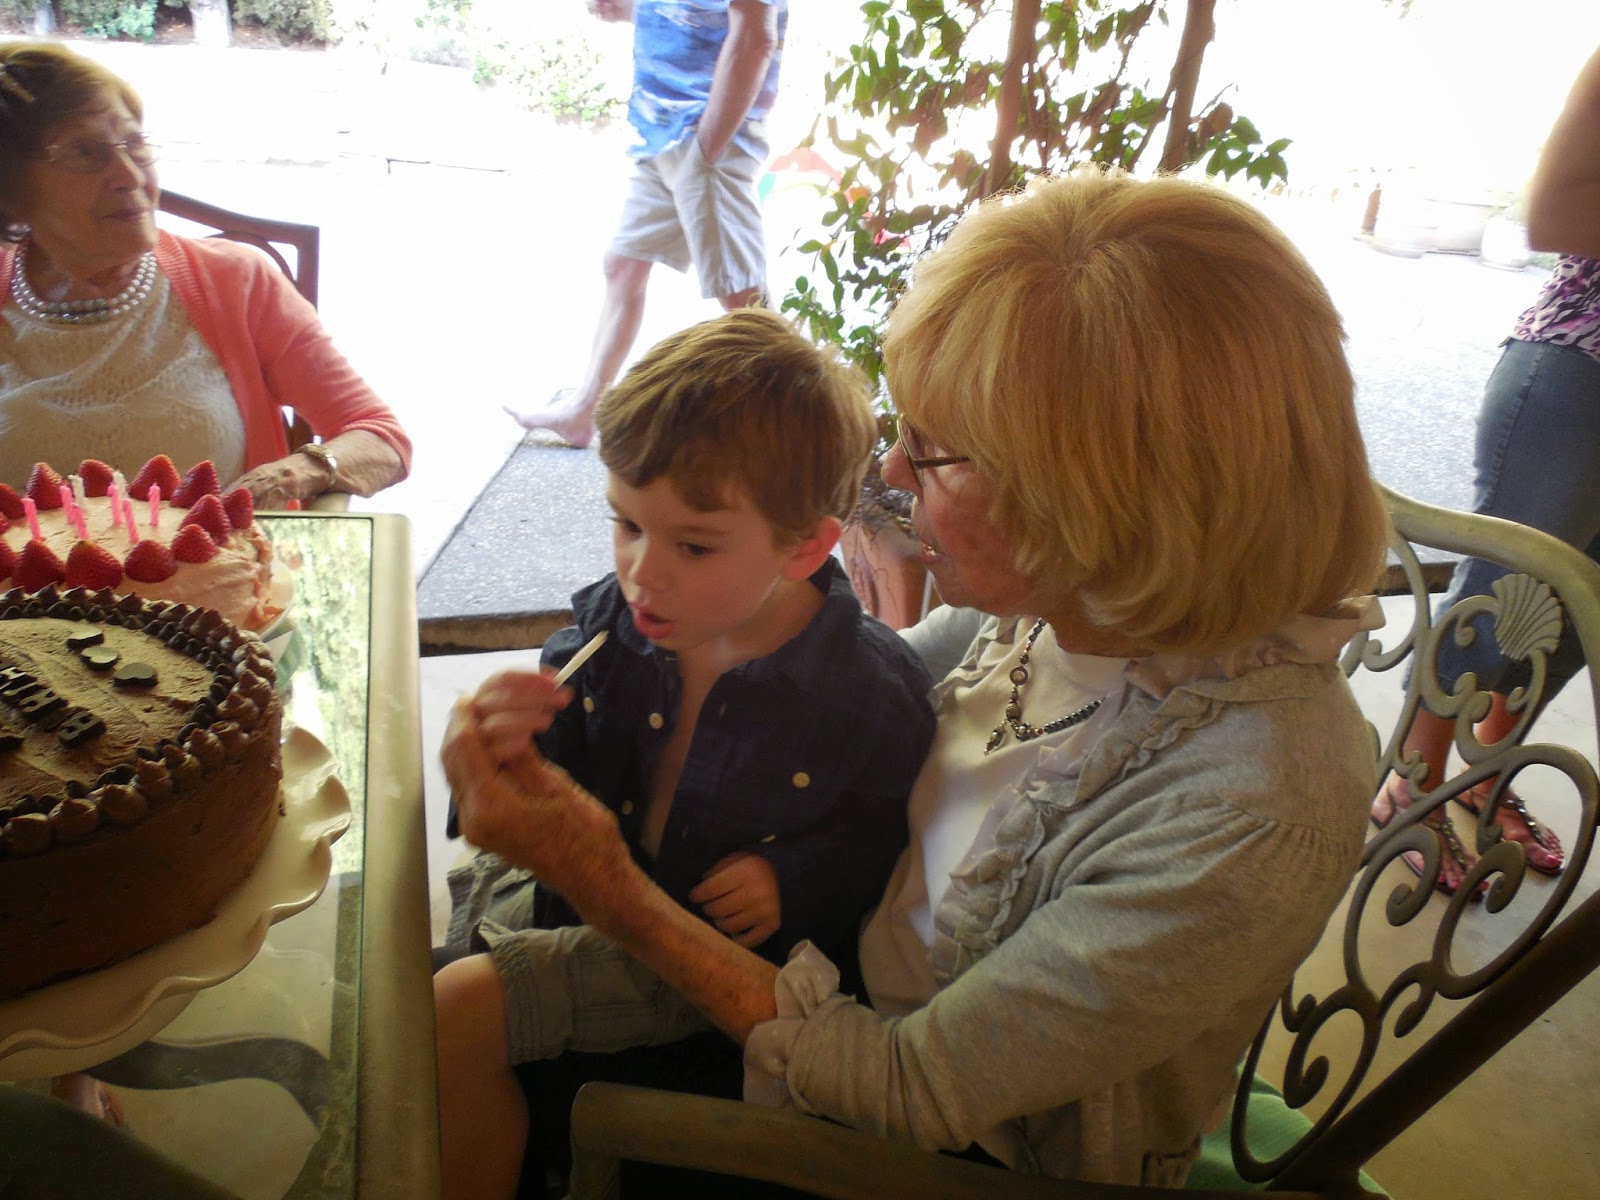
If you saw my previous post you've already seen this photo.  I made both cakes for my Mupma's birthday party.  Because you need options when it comes to cakes.

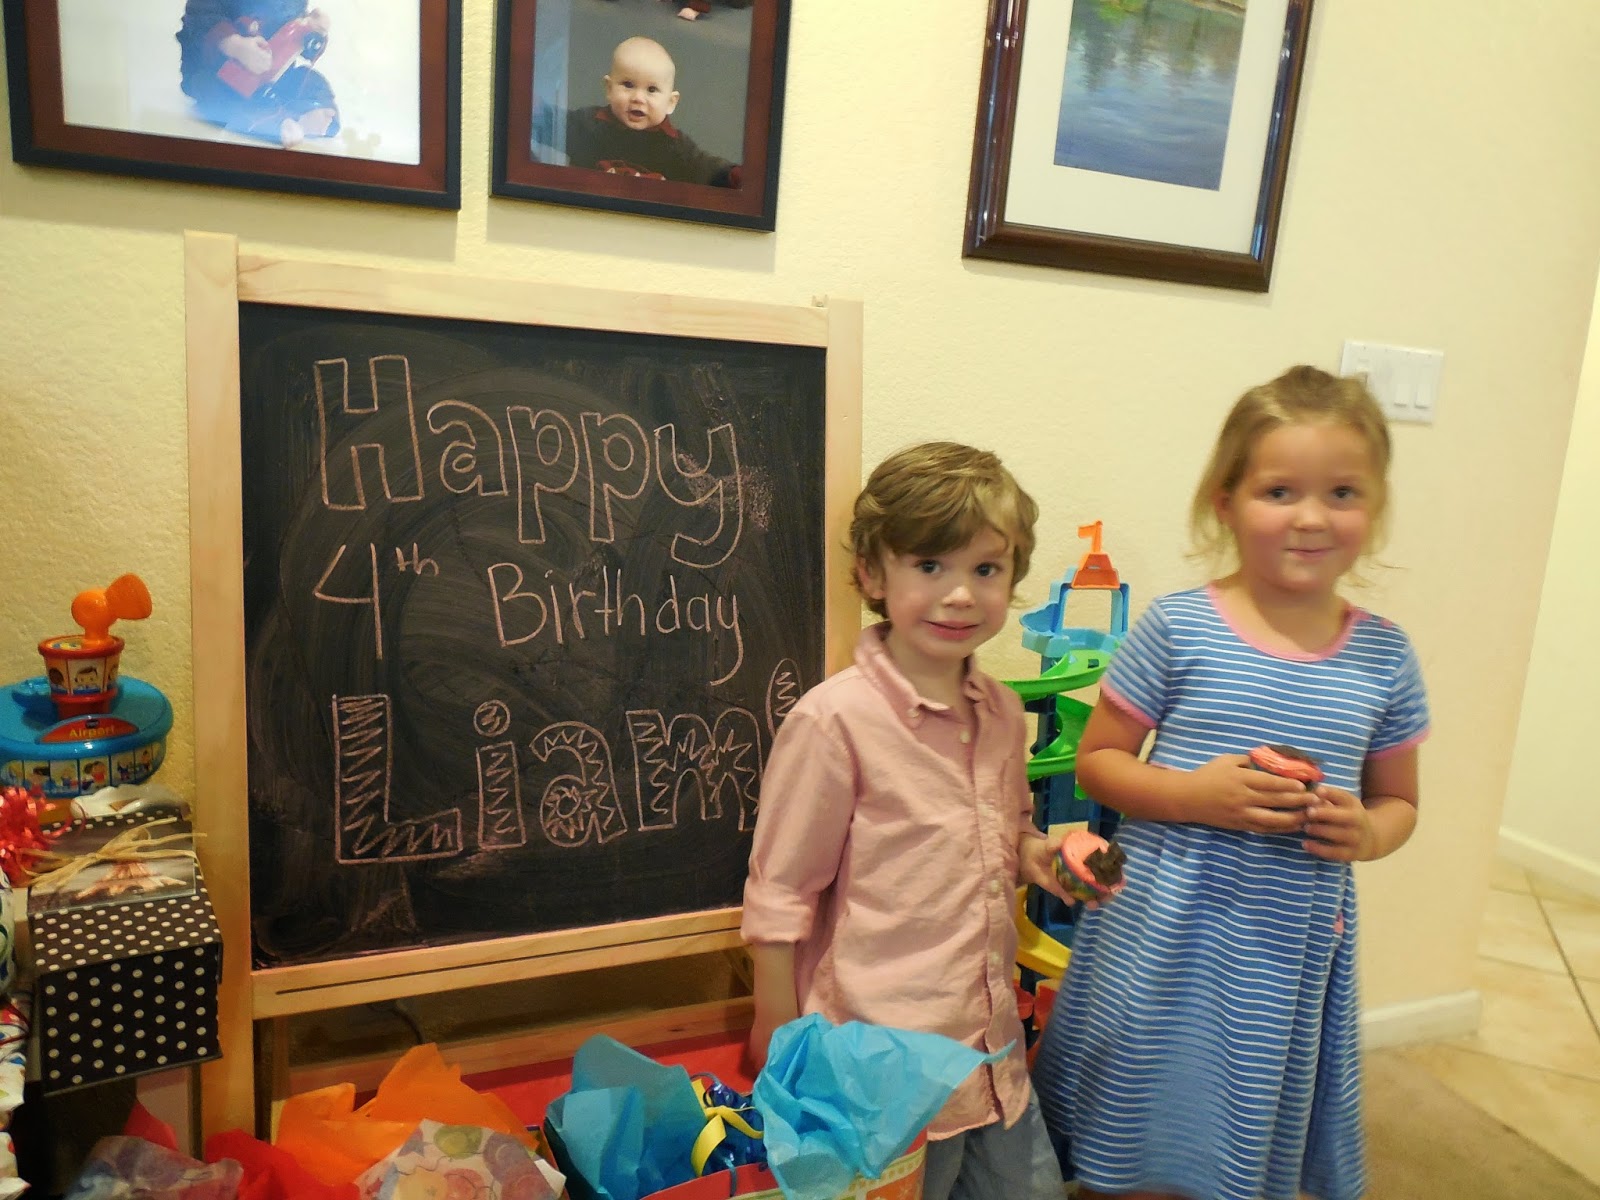
Also, I don't believe there is a four year old alive who doesn't try to help blow out birthday candles when the chance presents itself.  Am I right?


Lemon Velvet Cake
recipe from Rock Recipes
http://www.rockrecipes.com/lemon-velvet-cake/
Prep time
Cook time
Total time
Developed from an outstanding Red Velvet Cake recipe, this lemon cake is a perfectly moist and tender crumbed cake with a lemony buttercream frosting. An ideal birthday cake for the lemon lover in your life.
Ingredients
  • 1¼ cups sifted all purpose flour
  • 1½ cups sifted cake flour
  • ½ teaspoon baking soda
  • 1½ tsp baking powder
  • 1 teaspoon salt
  • 1½ cups sugar
  • ⅔ cup vegetable oil
  • ⅓ cup vegetable shortening at room temperature
  • 1 tsp good quality vanilla extract
  • 2 tsp pure lemon extract
  • 3 large eggs
  • 1½ cups buttermilk
  • zest of two small or one large lemons, grated and finely chopped
Instructions
  1. Grease and flour 2 nine inch round cake pans and line the bottom with 2 circles of parchment paper. Sift together both flours, baking soda. baking powder, salt and sugar, Set aside.
  2. In the bowl of an electric mixer beat together the vegetable oil, shortening, vanilla and lemon extract. Beat well at high speed with whisk attachment until light and fluffy
  3. Beat the eggs in one at a time.
  4. Fold in the lemon zest.
  5. Fold in the dry ingredients alternately with the buttermilk.
  6. I always add dry ingredients in three divisions and liquid ingredients in 2 divisions. It is very important to begin and end the additions with the dry ingredients. Do not over mix the batter. As soon as it has no lumps in the batter, pour into the two prepared 9 inch cake pans.
  7. Bake at 325 degrees F for 30-35 minutes or until a wooden toothpick inserted in the center comes out clean. Allow the cake to cool in the pans for 10 minutes before turning out onto wire racks to cool completely.


Fresh Strawberry Frosting
(I kinda made this recipe up, and it worked fine, but frosted cake should be refrigerated until ready to serve, and if you want the frosting to be extra stiff add an extra 1/2 to 1 cup of powdered sugar)

Ingredients:
  • 2/3 cup fresh strawberried, stemmed and sliced
  • 1 cup butter, room temperature
  • 4 1/2 cups powdered sugar (add 1/2 to 1 cup more for firmer frosting)
  • 2 tsp vanilla extract
Directions:
  1. Puree the strawberries.  Set aside.
  2. Add butter to stand mixer and beat several minutes until white and creamy, stopping to scrape down the sides as needed.
  3. Add 1 cup of powdered sugar to the butter and beat until creamy.
  4. Add 1 more cup of powdered sugar and beat again until creamy.  
  5. Add the strawberry puree and beat.
  6. Add remaining powdered sugar and vanilla and beat until fluffy.  
  7. For extra thick frosting add in additional powdered sugar, otherwise, frost the cake.  
note: There will be about 2 cups leftover frosting unless you frost very thickly.  If desired add stemmed strawberries in a ring around the top edges like I did.  If you are planning on doing that, wait until the last second and make sure the strawberries are very well dried.  Otherwise strawberry juice might start dripping down the side of you cake.

Sunday, May 3, 2015

chocolate chocolate cake


Okay, neither the recipe for the cake or the frosting belong to me, but they are so good together.  This is my go to chocolate cake.  The cake is dark, moist, and not overly sweet.  The frosting is fluffy, super chocolaty, easy to apply, and makes plenty extra.  I personally like to make sandwich cookies with the extra chocolate frosting spread thick between two graham crackers.  So good!  My parents used to make them with extra frosting when I was little.  Keep the extras in the fridge to help firm them up.


Last week was a milestone birthday for my Mupma.  She'd totally kill me if I said the exact age.


I wanted to make the cake a bit fancier for her birthday and I had plenty of extra frosting, so after frosting the cake I put some in a piping bag and piped the edges, then lined it with chocolate chips.  I still have about 2 ups of frosting left so I foresee some graham cracker sandwiches in my near future.  :)


I ordered a small silicone alphabet mold a while ago from amazon (I heart amazon!) and used it to make the "Happy Birthday" and the hearts.  It set pretty quickly, but just to be safe, I made the letters ahead of time.  This was the first time I'd used the mold, so next time I know I need to tap it more after I've poured the chocolate in to try and get rid of the dreaded air bubbles.


Liam LOVES his Mupma.  He kept jumping into her lap all evening, and helped blow out the candles.  Ignore the candle covered cake for the moment, that's all for the next post.


Liam immediately pulled the blown out candles out of the cake and insisted that everyone needed to eat the frosting off of them.  "Because that's what you do!"


Someone was pretty excited to officially get his own piece of chocolate cake.  He ate the whole piece (inhaled actually) and ran around like crazy the rest of the evening with a chocolate fu manchu.


Chocolate Cake
recipe by Betty Crocker
prep: 20 min
bake: 35 min
cool: 1 hr
12 servings

Ingredients:

  • 2 1/4 cups AP flour
  • 1 2/3 cups sugar
  • 3/4 cup unsalted butter, softened
  • 2/3 cup cocoa powder
  • 1 1/4 cups water
  • 1 1/4 tsp baking soda
  • 1 tsp salt
  • 1 tsp vanilla
  • 1/4 tsp baking powder
  • 2 large eggs
Directions:
  1. Heat oven to 350 degrees F.  Grease bottom and sides of two 9 inch pans.
  2. In large bowl, beat all ingredients with electric mixer on low speed 30 seconds, scraping bowl.  Beat on high speed 3 minutes, scraping bowl occasionally.  Pour equally into pans.
  3. Bake 30 to 35 minutes, or until toothpick comes out clean.  Cool in pan 10 minutes, remove from pans and cool completely on wire racks for 1 hour.  Frost.
note: the cake puffs up, so you might want to trim the tops off.  For this cake I only trimmed the top off the top layer, just because I wanted the top to be flat for the birthday message.  It's really up to you.


My Favorite Chocolate Buttercream Frosting
recipe by Cooking Classy
Ingredients
  • 1 1/2 cups butter, at room temperature (I like to use 1 cup unsalted and 1/2 cup salted)
  • 3 3/4 cups powdered sugar
  • 3/4 cup cocoa powder*
  • 3 - 4 Tbsp heavy cream or half-&-half
  • 1 1/2 tsp vanilla extract
Directions
  • In a the bowl of an electric stand mixer, fitted with whisk attachment (paddle attachment works too. Whichever you use just pay attention the the shade of the butter), whip butter on moderately high speed until very pale and fluffy (nearly white in color), about 6 - 8 minutes, occasionally scraping down sides of the bowl. Sift in cocoa powder then add in powdered sugar, 3 Tbsp heavy cream and vanilla and mix on low speed until combine, scrapping down the sides of the bowl as needed and adding up to 1 tbsp additional cream to thin if desired. Increase mixer to medium-high speed and whip mixture until pale and very fluffy about 4 - 5 minutes, occasionally scraping down sides of the bowl.
  • Note that similar to whipped cream the frosting will lose some of its "fluff" after a few hours, it will still taste the same it just loses some of the air that was whipped into it (similar to whipped cream how it loses it's stabilization after a few hours). It is best to prepare and use within a few hours for best (fluffiest) results.
  • Recipe Source: Cooking Classy

Monday, April 20, 2015

Mickey Mouse birthday treats


I'm still in denial that my baby is already 4.  I seriously don't know how that happened so fast!  This kiddo is a total Disney fanatic.  Wonder why with parents like us?  :)  This is the second time he's insisted on a Mickey Mouse themed birthday party.  I already had most of the decorations, so I thought, why not?

Throwing a birthday party so close to Easter always messes me up because there is just so much going on every spring!  As usual, I realized at the last second that I had not a clue what to make (food wise) for Liam's birthday party.  Liam requested Mickey Mouse cupcakes.  Other than get Mickey patterned cupcake wrappers I couldn't think of how to make a Mickey cupcake.  Finally I decided on Mickey head toppers over the frosting.  They turned out okay too.


These were really easy and quick to make.  I printed out a sheet of paper with 15 Mickey head outlines on it and covered the paper with a large piece of wax paper. I filled a freezer bag with half a bag brown melting candy. I know they don't taste as good as real chocolate, but they are so much easier to melt, and keep at the desired consistency.  I microwaved the bag for a few minutes (checking and squishing occasionally), then took it out, cut a tiny very small hole in one corner, and used the bag like a piping bag.  I just traced the Mickey outline and filled it in.

I filled in the first 15 Mickeys and just slid the bottom outlines over to an empty section of wax paper and made more.

Note:  The melting candy should be easy to handle, and be warm, not too hot.  You need to keep moving and fill in the Mickeys quickly because the candy will want to keep coming out.  Also, you don't want to wait too long and have it firm up too much before you finish.  It is really easy if you get a good rhythm going.


Let the Mickey heads cool.  It shouldn't take long if you're in a hurry.  Pick them up off the wax paper and stick them on top of the cupcake frosting.  Unless you've made your Mickeys crazy thin they should pop off the wax paper very easily.


I thought I had a Mickey Mouse cookie cutter until the day before the party.  Oops!  Instead of Mickey shapes I decided to go super simple and make round Mickey cookies.  They're a bit sloppy, but I made about a million of them and started to get really tired.  They are yummy though, so I really don't mind the leftovers.  :)  The royal icing recipe is available here.  I wrapped these cookies up in stead of giving out goodie bags.  No one ever seems to play with goodie bag contents anyway, and who doesn't love cookies?


Liam was so excited by all the Mickey things around our house, and playing with friends.


Last year I stumbled across a site that had a great idea.  Every year starting at about age 3 give your child a questionnaire.  The same questions every year, and you can compare the answers.  Such a great idea!  Last year Liam refused to answer at least half of the questions, but this year he actually responded to all of them.  I was pretty amazed.  His answers were pretty cute too.

I got this idea from reaves party of three if anyone wants to check it out.  He are Liam's responses:

1. What is your favorite color? red
2. What is your favorite toy? trains
3. What is your favorite fruit? strawberries
4. What is your favorite tv show? Phineas & Ferb
5. What is your favorite thing to eat for lunch? Preschool lunch
6. What is your favorite outfit? My red shirt
7. What is your favorite game? Candyland
8. What is your favorite snack? Fig bars
9. What is your favorite animal? platypus
10. What is your favorite song? Twinkle twinkle little star
11. What is your favorite book? Goodnight moon & Biscuit series
12. Who is your best friend? Preschool friends
13. What is your favorite cereal? Daddy's cereal (whatever he's eating, mostly wheat bran)
14. What is your favorite thing to do outside? Play games
15. What is your favorite drink? Boy soda ( the only “soda” I give him is carbonated water with a bit of lemon juice in it, but I can't think of what else he's talking about.)
16. What is your favorite holiday? Christmas!
17. What do you like to take to bed with you at night? My blankets and a book
18. What is your favorite thing to eat for breakfast? A fig bar (wishful thinking!)
19. What do you want for dinner on your birthday? cupcakes
20. What do you want to be when you grow up? A Daddy!


Yes, even our hard hats are Mickey!

Sunday, April 5, 2015

Happy Easter!


Happy Easter everyone!  Yes, I've been crazy busy lately, and Easter is almost over... but I made it.  We're still good.  I swear, between spring cleaning, everyday stuff, Easter, and getting ready for Liam's 4th birthday(!) my schedule has been packed.  No time for blogging... sad.  I've got some good recipes coming up soon though, no worries.

Easter is such a fun holiday.  I love watching the boys hunt for eggs.  They are both pros now.  Even Jack, and he's not quite a year and a half!  I love any holiday that gives me an excuse to bake.  I used to hate making cupcakes.  They NEVER turned out right.  Thanks to the awesome Carra though, we got my problem figured out and fixed.  I used to fill the cups 3/4 full instead of 2/3.  Laugh all you want, but just changing that one tiny thing made all the difference.


This isn't my chocolate cupcake recipe.  I used the cupcake portion of this recipe from Sally's Baking Addiction.  Her recipes are great and I trust they will come out perfect on the first try.  I doubled the recipe and made 24 cupcakes PLUS I had enough to make a nice 9x9 cake with the leftover batter!


For the vanilla buttercream frosting I used this recipe from Cooking Classy.  I added a bit of green gel coloring, and piped it on the cooled cupcakes.


The second I saw this bag of Cadbury mini eggs at the store last week I knew exactly how I wanted to decorate the cupcakes.  The eggs are cute toppers, and more chocolate never hurts!  I think the kids ate the equivalent to about 4 of these cupcakes each in sugar today.  Literally, they are bouncing off the walls.  Oh well,   At least they don't eat like this every day.,.

Happy Easter!

Tuesday, November 25, 2014

pepparkakor sandwich cookies


What are pepparkakor cookies?  If you are Scandinavian you've probably heard of them.  They are very popular around Christmas and in the winter, and they are often compared with gingerbread cookies.  Mostly I think because they are often cut out with person shaped cookie cutters and have a pleasant spicy flavor.  These don't have molasses in them like gingerbread, just some good spice.  

I will tell you this straight off the bat.  DO NOT make theses cookies unless you plan to have company over, or you feel like being a big fatty.  These are the perfect two bite cookie and it is very easy to accidentally eat too many if you aren't paying close attention.  These are actually quite good plain if you don't want to make sandwich cookies.  

I will continue explaining the cookies in just a bit, but first I want to thank the probably half a dozen people or so who read this blog because this is my 100th post!  Yay!  I can't wait to hit 200.  :)

And hey, let's have three points to this post because , hey, why not?  Last week my mom and I went to see Ina Garten talk.  It was totally awesome!  I'm a huge fan, so it was really neat to see her in person.  She looks the same as on her show, and my camera tried to get a decent photo...


I didn't really know what to expect going in, and I really enjoyed it.  She talked about her new cookbook, how she got started, her life, etc.  and then she answered some audience questions.  It would have been great to speak with her, but the line was huge, and the only thing I could think of to ask her help on was in regards to my horrible cupcakes.  They taste great, but come out hideous every time.  Aargh.


One of the best things about hearing her speak was how excited I was to hear that she does some of the same kitchen related things I do (always a plus!), like freezing extra parsley in ziploc bags, and roasting vegetables before putting them in lasagna.  Little things, but it still made me feel good.  :)


Because if you were planning on getting a copy anyway, it might as well be a signed copy.  Right?
No, I didn't personally have her sign it.  I didn't get that close!  It was pre-signed.  Still cool.


The kitchen nerd in me is still geeking out.


End of tangent.  Back to cookies!  I love these cookies, frosted or not.  They are soft, a bit chewy, and hold together well.  They will last at least a week in an airtight container on the counter plain, but if you frost them ahead of time you should store them in the fridge.  Also, these cookies have a decent amount of cardamom in them which gives a nice kick.  If you DO NOT frost them, remove half the cardamom.  They will be overpowering.  With the creamy caramel vanilla-y frosting the larger amount of cardamom is great.


I always seem to have random bits of frosting in the fridge.  Oh darn, right?  This frosting is left over from the caramel apple cake.  It uses about 1/4-1/3 of the frosting recipe.  If you don't want to cut the recipe down, make a frosting recipe that isn't fully utilized, or make several batches of cookies to use up all the frosting that's fine.  This works best, but you can always use store bought.  Vanilla is fine, but vanilla with some caramel swirled in is even better.  Goes without saying, yeah?


pepparkakor sandwich cookies
makes 80-100 cookies (before sandwiching)
Ingredients:
pepparkakor:


  • 1/4 cup heavy cream
  • 2/3 cup light syrup* (or corn syrup, or molasses)
  • 1 cup sugar
  • 2 tbsp butter, softened
  • 1 tbsp ginger
  • 1 tbsp cloves
  • 2 tsp cinnamon
  • 1 tbsp cardamom (1/2 if not frosting)
  • 1 tsp baking soda
  • 3 cups flour
frosting:


  • 1 1/2 cups sugar
  • 1/3 cup AP flour
  • 1 1/2 milk
  • 1/3 cup heavy cream
  • 1 1/2 cups unsalted butter, cubed
  • 2 tsp vanilla
  • 1/2 caramel sauce

*light syrup is widely used in Europe (think treacle tart), and is most commonly found in the US in the "foreign foods" aisle.


directions:
1.  Preheat the oven for 375 degrees F.  Add all ingredients together in the bowl of a stand mixer and mix well.  Dough should not be overly sticky, and should cleanly come together away from the bowl sides.
2.  In sections the size of  fist roll out by hand into a long rope the thickness of a finger.  Slice into 1-1 1/2" sections and place 2" apart on a parchment lined baking sheet.  Bake for 6-8 minutes.  Do not over bake.  Unless you prefer crunchy cookies do not allow to brown.  Remove from oven and let cool completely before frosting.
3.  Prep the frosting.  In a medium pot on the stove whisk the sugar, flour, milk, and cream together.  Whisk occasionally until the mixture boils and thickens. 
9.  Pour the mixture into a stand mixer bowl with a paddle attachment and beat on high until cool.  Turn down to low and add in cubed soft butter and vanilla.  When smooth turn mixer to to medium-high until the frosting is fluffy.  Add in the second container of caramel and mix well.  When the frosting is the desired consistency turn the mixer off and spread the frosting on a cookie and sandwich.

Monday, November 10, 2014

caramel apple cake


I know caramel apple isn't a traditional choice for a birthday cake, but I really wanted to try something new (and if I make a cake when people are coming over anyway it means Jeff and I don't end up eating the whole thing by ourselves!).  So for Jack's first birthday I made this...


Start off by peeling and shredding two Granny Smith apples.  Set them aside.


Cream together the butter and brown sugar.


Beat in the eggs one at a time until fluffy.


Alternate mixing in the remaining wet and dry ingredients (minus the grated apples) until smooth and creamy.


Add in the apples.  The batter WILL be lumpy due to the apples.  It's fine.


Thoroughly prep your pans with cake release because this is a very moist cake and will otherwise try to stick to the pan.  When you pour the cake into your two 9" pans be sure to smooth out the tops.


The cakes will come out of the oven fairly flat (which makes frosting so much simpler).  Let them cool before removing them from the pans.


The cakes will shrink a bit while they cool.  This is normal.  At this point turn the cakes out onto cooling racks and set aside to let cool completely.


In the meantime you can make the caramel sauce.  If you have store bought caramel sauce, that's fine.  I prefer to make my own.  This version is by The Pioneer Woman and is great because it is quick and easy.The recipe can be found here.


It takes about ten minutes to make and tastes delicious.  Let it cool a bit and set half of it aside.


Cut one of the cakes in half.  Place one half on a cake plate.  Spread out half a container of caramel sauce (1/4 the total sauce) over top of the cake.  Try to spread it evenly.


Place the other half of the cut cake on top.  Sorry, mine looks a bit ugly.  I'm much better at taste than appearance.  Not so great for photos...  :)


Spread a thick even layer of apple butter on the top of the cake.  I bought mine at a farmer's market.  If you want to make your own I'm sure a great recipe can be found somewhere.  But I don't have one.


Cut the second cake in half and place half on top of the apple butter.


Spread the remaining first half of the caramel sauce over top the cake.


Place the last cake half on top.


Honestly, it really is okay that this looks crazy messy.  Frosting covers all.  I just wanted to show all four cake layers plus the two layers of caramel sauce, and the layer of apple butter.


The cake is now done.  Just leave it alone.  Begin the frosting.  The CARAMEL BUTTER CREAM FROSTING.  Yeah, that's right.  Caramel butter cream.

Begin by whisking sugar, flour, milk, and cream on the stove until it is smooth and thick.  Remove from heat and add into the bowl of a stand mixer.


Mix on hight until the frosting has cooled.


Add in cubed butter and vanilla and mix on low until fluffy and smooth.


Like this.


Remember the other half of the caramel sauce you set aside.  Yeah, add it in to the frosting and mix it in well.


You cake is ready to frost.  If the frosting is too soft, place it in the fridge for a few minutes to firm up.  If it is too firm, place it somewhere warm to soften for a few minutes.  Otherwise, frost away.  You should have more than enough frosting to cover the cake.


The best part about this cake (besides the taste!) is that you can make it the day before.  It will firm up a bit making it easier to cut, and the cake is so moist you don't have to worry about it drying up too much.  There is nothing worse than stressing out because you are running behind and need to finish your cake, clean up, finish getting ready for whatever, etc.


As soon as he saw the flame Jack became totally slack-jawed.  I guess I have another fire loving boy.


I gave him a tiny sliver of a piece because of all the sugar, but I know he liked it because for the first time ever, he picked his plate up and licked it spotlessly clean!


Caramel Apple Cake
makes two 9" cake pans

Ingredients:
Cake:

  • 1 cup of unsalted butter, softened
  • 2 cups brown sugar, packed
  • 3 eggs
  • 3 cups AP flour
  • 3 tsp baking powder
  • 1/4 tsp salt
  • 1 tsp cinnamon
  • 1/4 tsp allspice
  • 1/2 tsp ginger
  • 1/2 tsp nutmeg
  • 2 granny smith apples, peeled and grated
  • 2 tsp vanilla
  • 1 cup milk
  • 1 c heavy whipping cream
  • 1 tsp lemon juice


caramel sauce:

  • 1 cup brown sugar
  • 1/2 cup half and half
  • 4 tbsp butter, unsalted
  • pinch salt
  • 1 tbsp vanilla


apple butter

frosting:

  • 1 1/2 cups sugar
  • 1/3 cup AP flour
  • 1 1/2 milk
  • 1/3 cup heavy cream
  • 1 1/2 cups unsalted butter, cubed
  • 2 tsp vanilla
  • 1/2 caramel sauce


Directions:
1.  Preheat the oven to 350 degrees F.  Peel and grate the apples and set aside.  Cream together butter and sugar.
2.  Mix in the eggs one at a time until fluffy and smooth.
3.  In a bowl add in the dry ingredients (flour, baking powder, salt, cinnamon, allspice, ginger, and nutmeg).  Pour the milk, vanilla, and cream into a cup together.  Alternate mixing in the wet and dry ingredients into the batter.
4.  When the batter is smooth and creamy mix in the grated apples and lemon juice.
5.  Grease two 9" cake pans thoroughly.  Pour batter out into the pans and smooth the tops.  Place in oven for 45-50 minutes, or until a toothpick comes out clean.  Take the cakes out and let them cool.  They will shrink a bit when they cool.  Remove them from the pans onto cooling racks.  Set aside.
6.  Start making the caramel sauce.  Put all the caramel ingredients except the vanilla in a small pot on the stove.  Over medium-low heat whisk until combine, then continue to whisk gently until mixture thickens.  Add the vanilla and stir for another minute.  Take off heat and evenly pour into two small containers.  Allow to cool.
7.  Begin cake assembly.  Cut the two cakes in half.  Place on half on a cake stand and smooth on half a container of cooled caramel sauce.  Top with another cake half.  Thickly coat with a layer of apple butter.  Top with another cake layer.  Smooth on the remainder of the first caramel sauce container.  Top with the last cake half.  Set the cake aside to make the frosting.
8.  In a medium pot on the stove whisk the sugar, flour, milk, and cream together.  Whisk occasionally until the mixture boils and thickens.
9.  Pour the mixture into a stand mixer bowl with a paddle attachment and beat on high until cool.  Turn down to low and add in cubed soft butter and vanilla.  When smooth turn mixer to to medium-high until the frosting is fluffy.  Add in the second container of caramel and mix well.  When the frosting is the desired consistency turn the mixer off and frost your cake.