Showing posts with label real food. Show all posts

Thursday, March 24, 2016

Garlic Rosemary Chicken Bake


I love one dish dinners.  They look fancy, they're so easy to make, and less dishes for me to wash!

This one was a big hit with my boys.  They love anything chicken or bacon, and this has both!
The best part was that I only needed about 5 minutes of prep before I had the whole dish finished and stuck in the oven, but the boys still thought it looked fancy and impressive.  

I don't have a million photos of this like some other dishes, but I'm probably going to make it again pretty soon, and I'll add more photos then, okay?  :)

Garlic Rosemary Chicken Bake
serves 3

Ingredients:
  • 3 whole chicken breasts (I used frozen ones, no thawing needed!)
  • 3 russet potatoes
  • 1/4 Cup garlic cloves, peeled
  • 3 branches rosemary
  • 3 strips bacon
  • 2 teaspoons olive oil
  • 1/2 teaspoon salt
  • 1/4 teaspoon black pepper
  • 1/2 teaspoon garlic powder
Directions:
  1. Preheat the oven to 375 degrees F.  Drizzle 1 teaspoon olive oil onto the bottom of a 9x13 inch casserole dish.  
  2. Slice the potatoes into medallions and lay them flat in the dish.  Lay the chicken breasts on top of the potatoes.  Slice the bacon into 1" pieces and lay the pieces on top of the chicken and potatoes.  Sprinkle the garlic cloves over the bacon, and lay the rosemary branches down as well.  Season with the remaining 1 teaspoon olive oil, salt, pepper, and garlic powder and slide into the oven.  
  3. Bake for 60 minutes, or until the bacon and chicken are fully cooked.  


Tuesday, February 23, 2016

Peach Crisp Overnight Oats


I think I've made it pretty clear how much I like a sweet breakfast, especially one I can grab as I'm running out the door in the morning.  This peach crisp overnight oats recipe is my new favorite.  Its perfect for this gorgeous early spring weather and makes me so happy when I eat it!  

I love the serious peachy flavor from the oats and at less than 300 calories per serving, plus 14 grams of protein this little jar will keep me going all morning.  It tastes like dessert, makes me happy, and doesn't make me hangry halfway through the morning like some other quick breakfast can.  

I like putting my overnight oats in cute jars so they're easy to grab the next morning, but it also helps with portion control.  Yeah, I'd probable eat more of it because its so good, but its really the kids I portion it for. They can be little rage monsters if I don't give them the right amount, but if its already in a little jar?  Crisis averted.  Yay!

I love making overnight oats because it takes ingredients I keep in stock anyway, one big bowl, and 5 minutes the night before to make.  You can't beat it.  Sometimes I'll double the batch or make single batches of different flavors.  My other favorite is chocolate.  


Peach Crisp Overnight Oats
serves 3

Ingredients:
  • 1/2 Cup unsweetened apple sauce
  • 6 oz. peach yogurt (1 yoplait container)
  • 1/2 Cup vanilla whey protein powder
  • 1 1/3 Cups old-fashioned oats, uncooked
  • 1 teaspoon cinnamon
  • 1/2 Cup unsweetened vanilla almond milk
  • 1-3 teaspoons sugar (optional)
Directions:
  1. Mix all ingredients in a large bowl until fully incorporated. 
  2. Portion into 3 airtight containers (mason jars, tupperware, etc.)
  3. Refrigerate overnight.  Enjoy cold.  
Note: These containers last at least a week in the fridge so don't worry if you want to make several batches at a time.


Tuesday, August 18, 2015

Buddha bowl


Can I just say, Buddha bowls are THE BEST?!  What's a Buddha bowl you ask?  Well, its essentially a bowl full (like a Buddha belly) of veggies, greens, beans, and grains.  It is a delicious  single bowl balanced meal, full of color and flavor.  All you need mixed together in a beautiful melody of food.

If you were very lazy you could throw in some chopped raw veggies, but I like to roast as much as possible to bring out flavor and texture.

Even if you are being lazy, this recipe is so simple a monkey could make it.  Really.  Cut up some veggies, sprinkle with salt, pepper, and olive oil, and throw them in the oven.  That's the most difficult part of this whole recipe.  Seriously.

The combination shown here is my favorite, but you could easily prep tons of veggies, grains, and beans and mix n' match a week's worth of meals, easy.

Buddha bowls are great because you can make them with whatever you have on hand.  No rice?  Use quinoa, couscous, barley, etc.  So many possibilities!

There are many options for protein too.  Buddha bowls are generally plant based, so I use beans mostly.  Garbanzos, white beans, lentils.... I could go on and on.

Last on the list are the greens.  I like lettuce.  Something fresh with a nice crunch.  Broccoli, brussel sprouts, kale, etc.  all good options too.


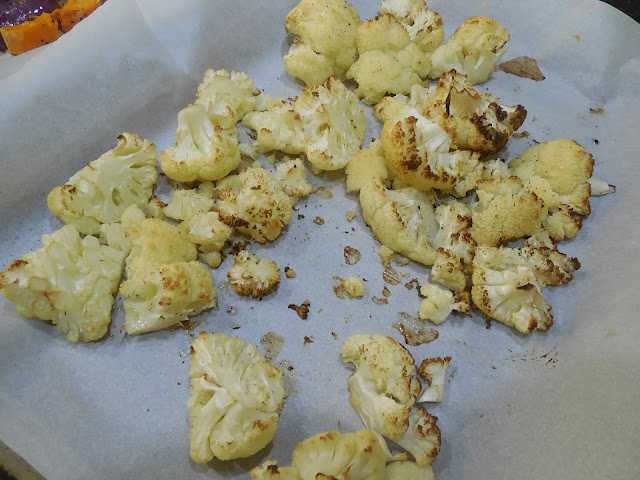
Roast some veggies.  I like to make plenty for us.  Leftovers are my friend. :)  Cauliflower is always my go-to roasted veggie.  It is so versatile and can blend in with any seasoning you choose.


Sweet potatoes, red onion, and red bell peppers.  Yum.


A batch of roasted BBQ garbanzo beans fits right in with the bowl.  A bit of heat, sweetness, and a touch of savory flavor too.


 This bowl is so chock full of yum you can't even see the rice or the red onion.

Some Buddha bowls have a gentle sauce drizzled over top.  It isn't necessary, and with all the seasonings in the garbanzos I didn't see the need for one.  A lack of sauce saves calories, and prevents everything from getting too goop-y.  IT's also tidier for kids to eat.  They make enough of a mess on their own!  :)


 Buddha bowl
serves 4

Ingredients:

  • 2 cups brown rice, cooked
  • 1 head of cauliflower, in florets
  • 1/3 red onions, chopped
  • 1 red bell pepper, chopped
  • 1 medium sweet potato, chopped
  • 1/2 small head of butter lettuce, chopped
  • salt
  • black pepper
  • 2 tsp olive oil
  • 1 batch roasted BBQ garbanzo beans

Directions:

  1. Make a batch of roasted BBQ garbanzo beans.  Set aside.
  2. Preheat the oven to 425 degrees F.  Cut up the cauliflower, red onion, bell pepper, and sweet potato and place on parchment covered baking sheets.  Sprinkle lightly with salt, black pepper, and olive oil.  Bake for 40-45 minutes, rotating the pans halfway through for even cooking.
  3. Meanwhile, make a batch of brown rice, set aside. 
  4. Chop the lettuce and set aside.
  5. When all pieces are ready, fill the bowls evenly with a little of everything.  Dig in and enjoy!
note:  If you have any leftovers, place everything but the lettuce in tupperware together and refrigerate.  Reheats really well in the microwave.

Thursday, August 6, 2015

chocolate protein smoothie


I NEVER remember to eat breakfast.  I make it for everyone else, but mornings are when I wander around the house getting everything done.  It's gotten to the point where I had to put a sticky note on top of the coffee maker reminding me to eat breakfast.  Because of course I would never forget my morning coffee.

My best bet for breakfast is a grab and go option.  I love things like cinnamon rolls (obviously), but I'm either busy or I don't want anything too filling.  This drink is perfect.  Filling, easy to grab, and delicious.


To make this drink even easier and quicker in the morning I dump all the ingredients into tupperware in the fridge the night before.  That way the chia is easier to blend (having had all night to plump up), and all I have to do in the morning is dump one container's contents in the blender.  Simple.

I normally end up making a double batch though.  Everyone always asks for "just a few sips", and that adds up quickly!

I love having a super thick smoothie that fills me up and gives me hours of energy, especially when it feels and tastes like I'm drinking a chocolate shake (for breakfast.  Yay!)


This is the average meal for Jack and me on days when Liam is at preschool and Jeff is at work.  They almost always end up with bits of sandwich, plus a train (or two) and a cat on the table with us.  Plus Jack always decides that whatever I'm eating is what he wants.  We'll be eating THE SAME THING, but mine is in a different container than his, so...


If I'm using a cup, plate, bowl, etc. that looks like he could easily break it then Jack wants it even more.  And heaven forbid I try to help him hold it.  Nope.


He stills makes me a little nervous, but he hasn't broken any dinnerware yet *sigh of relief*.  I'm happy to share.  :)


Chocolate Protein Smoothie
makes 1 large or 2 small servings

Ingredients:

  • 2 cups unsweetened vanilla almond milk
  • 3 tbsp chia seeds
  • 1 heaping tbsp cocoa powder
  • 1 scoop protein powder (I prefer vanilla flavored whey)
  • sugar to taste
  • 1 banana, frozen
  • ice (optional)
Directions:
  1. For best results combine all ingredients overnight in the fridge.  In the morning pour out into a blender.  Blend thoroughly.  Enjoy immediately.
note: Ice is only needed if you do not use a frozen banana, or if you want an extra cold and icy smoothie.

If you make the smoothie entirely in the morning it might take a little more blender time to break up the chia seeds.

Friday, June 12, 2015

pasta and garbanzo bean soup


I totally love this soup!  Not only is it really easy and healthy, but its super kid friendly (Liam's favorite soups all have pasta and beans), but you can make part of it ahead of time!

I made the first half of the recipe while the kids were napping and I had some free time.  Then the boys and I went swimming, and when we got home I only had about 15 minutes of cooking before it was all ready.  No fuss, little mess, healthy and filling.  Jeff and the boys loved this soup, and one bowl (plus a few pieces of obligatory "soup bread" to dip) was very filling.

If you're looking at the soup and wondering how it could be so healthy, look no further.  The soup is full of veggies!  I roasted and pureed them before stirring them into the chicken broth (low-sodium of course).  That made the broth thick, flavorful, and creamy.


I roasted a pan of carrots, red bell pepper, and cauliflower with a bit of olive oil, salt, and pepper until the tops were golden and fragrant, then I pureed the veggies with some of the chicken broth.  I did all this ahead of time and then stuck the liquid in the fridge until I was ready the finish the soup.  You could make the soup all in one go if you want to though.


I just love the bright orange color!  The cauliflower and bit of olive oil really help thicken the soup and make the broth creamy.  I swear, it tasted so luscious, like I was eating some super fatty, but HA-HA!  I was only eating veggies. Yay for taste bud deception.  :)

I wanted a mostly pureed soup because I was going for simplicity.  A lot of my soups are massively chunky and busy, and I wanted something simple.  Plus, Liam loves veggies, but he doesn't always enjoy them in large chunks in his soup.  He'd rather have the flavor of them, and actually be able to see the pasta in the soup.

I like my soup to be pretty thick, and this soup thickens more the next day (looking almost like a very cheddar-y mac and cheese), so feel free to adjust the amount of broth used accordingly.


pasta and garbanzo bean soup
serves 6

ingredients:
  • 1 tbsp olive oil
  • 1/2 head of cauliflower, cut into pieces
  • 8 carrots, sliced
  • 1 large red bell pepper, de-seeded and cut into large pieces
  • 1/2 tsp salt
  • 1/2 tsp pepper
  • 2 cloves of garlic
  • 4 cups low-sodium chicken broth (add more if you prefer thinner soup)
  • 2 15 oz. cans garbanzo beans, rinsed and drained
  • 1 1/2 cups small pasta
  • 1/2 tsp basil
  • 1/2 tsp oregano
  • 1/2 tsp chili powder
directions:
  1. Preheat oven to 375 degrees F.  Cut up cauliflower, carrots, and bell pepper and place as flat as possible on a parchment lined baking sheet with the garlic.  Drizzle with olive oil, salt, and pepper.  Bake for 40 minutes.  
  2. Slide veggies off the parchment and into a blender.  Add chicken broth and puree.  At this point you can store the puree in the fridge for later use, or pour the puree start into a pot on the stove.
  3. Bring liquid to a boil, reduce to a simmer and add the pasta, garbanzo beans, basil, oregano, and chili powder.  Stir occasionally.  As soon as the pasta is al dente the soup is ready.  Serve with french bread to dip.
note: feel free to add more chicken broth if you prefer a thinner soup.  You might want to have some extra broth on hand for leftover soup, as it will thicken the next day in the fridge.

Friday, June 5, 2015

white bean chicken chili soup


I kind of love those nights where I realize I have an hour or less until dinner needs to be ready, and I'm in need of a grocery store trip.  I almost always end up figuring out a new recipe that I really like.  If the perimeters change, I get too comfortable and lazy and tend to stick with what I know.

The goal was to make something for dinner that would be large enough to last for Jeff's lunch the next day.  If I could make it healthy and protein-rich too, then bonus!

This turned out perfectly and I wouldn't change a thing.  My house smelled amazing!  Jeff commented that it was delicious, he was just confused eating it because "it tasted like chili, but acted like soup".  I'll take it.


white bean chicken chili soup

serves 3-4

ingredients:

  • 1 tbsp olive oil
  • 4 cloves garlic, diced
  • 1 small yellow onion, diced
  • 1/2 tsp salt, plus more to taste
  • pepper to taste
  • 2 chicken breasts
  • 4 cups chicken broth (preferably low-sodium)
  • 2 15 oz. cans white beans, drained and rinsed
  • 1 4 oz. can diced green chilies
  • 1 1/2 tsp cumin
  • 1/4 tsp chili powder
directions:
  1. Add olive oil, garlic, onion, and salt to pot on medium heat.  Stir often and cook for several minutes until soft.
  2. Add in chicken breasts.  Flip occasionally and let cook for about 5 minutes.
  3. Add the remaining ingredients and bring to a boil.
  4. Reduce heat and simmer for 15-30 minutes.  
  5. Remove chicken and cut up, return to the pot.
  6. Taste, adjust seasonings if needed, and enjoy!

Tuesday, June 2, 2015

southwestern pizza


I love pizza.  Jeff disagrees with me.  He says that since my pizza is cheese-less (lactose intolerant & personal choice) its technically a flatbread.  Whatever.  I love flatbread.  :)

This version was just for me, so no cheese.  It tastes great this way, but I have included cheese in the accompanying recipe.


I love how versatile pizza is.  I generally make an uber veggie one for myself, and pepperoni or BBQ chicken for Jeff.  It is a great source of happiness for me that the boys also prefer my veggie filled pizza.  For the win!

I wanted to try some new pizza flavors, and southwestern seemed like a good place to start.  If all goes well, look for another new flavor coming soon.


This pizza is so good!  Tons of fresh veggies, lots of flavor, and refried beans?  Yes please!


Sorry, not much more to say, I just couldn't stop taking photos...


southwestern pizza
makes 1 large pizza

ingredients:

  • 2/3 can of refried beans (I used vegetarian beans, waaay less sodium)
  • 4 garlic cloves, diced
  • 1/3 large green bell pepper, sliced thin
  • 1/2 yellow onion, sliced thin
  • 2 tsp olive oil
  • 1/2 cup corn
  • handful of tomatoes (your choice which veriety, I used sun gold), sliced
  • 1/2 small can sliced black olives
  • 2 tsp cumin
  • 1 tsp chili powder
  • fresh cilantro for garnishing (optional)
  • your favorite pizza dough (I love the Pioneer Woman's recipe)
directions:
  1. Preheat the oven to 375 degrees F.  In a small oven safe pan roast the garlic, bell pepper, onion, and corn in the olive oil for 30 minutes.  Take out and set aside.
  2. Set oven to 500 degrees F.  Lightly spray a baking sheet with cooking spray and lay down rolled out pizza dough.  Spread evenly with refried beans.  Top with the roasted veggies, tomato slices, olives, and seasonings.  Bake for 11-12 minutes.  
  3. Remove form oven, cool for several minutes.  Top with optional cilantro and serve.
note: This pizza is almost better the next day.  I usually love cold pizza, but not one with beans on it.  To reheat bake on a baking sheet at 375 degrees F for 6 minutes.  Delicious!

Friday, May 29, 2015

homemade healthy fast food


We don't eat fast food very often.  It's usually a special treat, or a "well, we're already out of the house, starving, and have no food at home".  Of course you wouldn't know it by talking to Liam.  He acts like we go all the time, and will point out every "Donald's" location he sees.

I'm not really a fan of fried foods, and I try to make everyone happy with their food, so I thought I'd make some healthy versions of fast food instead.  I came up with


  • baked chicken nuggets
  • baked fries
  • chocolate covered strawberry shake (smoothie)

I used sweet potatoes for this recipe, they're just what I had on hand.  Russet potatoes or yams could be used instead.  Whatever you prefer.

Peel the potatoes and slice them up.  I like mine like steak fries.  Bonus if you cut them like steak fries because they take the same cooking time as the chicken so you can bake them for the same time.


Once the potatoes have been cut stick them into a freezer bag and season.  This makes the seasoning distribution so much more even.


I always let the kids shake the bag.  Next time I might have to video it.  They get really into it!


Classic breading station for the chicken.  Get a bowl each for flour, beaten egg, and seasoned breadcrumbs.  Work left to right covering fresh defrosted chicken pieces one at a time in the contents of each bowl.  Try to keep your fingers out of the contents as much as possible or you'll end up with "monster hands".  Liam thinks that part is hilarious.  Place the chicken pieces on a parchment covered baking sheet when they are ready.


 Once the potatoes and chicken are prepped, bake together at 375 degrees for 30 minutes.  If you want to you can broil them for 2 minutes at the end for extra crispiness.


This is one of Liam's favorite ways to have chicken.  I only make it this way occasionally.  I don't want him to get too used to the idea of "fast food style".  :)

You know how people say that a great way to get kids to eat healthy is for them to cook their own food?  Liam's hands down favorite chicken is when I give him carte blanche of my spice drawer and let him season a whole chicken breast for himself.  My little string bean will inhale the whole thing that way!  Crazy.


This meal all came about from a few days ago when we had NO groceries at home, we were doing a million errands around town, and Liam was being an angel (I know, right?).  I promised him I'd split a milkshake with him on our way home, but the closet McDonald's milkshake machine was broken.  Liam was devastated, so I told him I'd make him one at home.  He had his heart set on strawberry, and I figured that would be the easiest flavor to make healthy anyway... 


baked fries

ingredients:
  • 4 medium potatoes (russets, yams, or sweet potatoes)
  • 1 tbsp olive oil
  • 1/2 tsp salt
  • 1/4 tsp black pepper
  • 1/4 tsp garlic powder
  • 1/4 tsp oregano
directions:
  1. Preheat oven to 375 degrees F.  Peel potatoes and slice steak fry style
  2. place potatoes slices in freezer bag with oil and seasonings. Shake well.
  3. Place on a parchment lined baking sheet.  Bake 30 minutes.
  4. (optional) broil for 2 extra minutes for crispiness.

baked chicken nuggets

ingredients:
  • 3 defrosted chicken breasts, cut into pieces
  • 1 1/2 cups AP flour
  • 2 eggs, well whisked
  • 1 1/2 cups seasoned breadcrumbs (I like Italian seasonings)
  • 2 tbsp parmesan
  • 2 tbsp olive oil
  • garlic, salt, pepper, basil, chili powder to taste
directions:
  1. Preheat oven to 375 degrees F.  Set out 3 bowls in a row.  Left to right fill with flour, whisked eggs, and breadcrumbs with seasonings and olive oil.
  2. Have a parchment covered baking sheet set out in easy reach of the bowls.
  3. Quickly dredge chicken in the bowl contents left to right, keeping your fingers as clean as possible.  Place finished chicken on baking sheet.
  4. Bake for 30 minutes.  Outside should be golden.

chocolate covered strawberry "shake"

ingredients:
  • 12 oz. strawberry Greek yogurt
  • 3 tbsp unsweetened cocoa powder
  • 2 cups frozen strawberries
  • 1 cup milk
  • 1 tbsp honey (optional)
directions:
  1. Place all ingredients in blender and blend!  Pour and drink. Depending on the sweetness of the strawberries, honey may or may not be utilized.


Tuesday, May 19, 2015

cheater's pasta


This is not a recipe.  More of a good idea.  Everyone has times now and then where you need dinner fast, and you want it to be filling and look nice.

I love keeping a few frozen items from Trader Joe's around for what I've dubbed "backup meals".  I don't use them all the time because Hello high sodium content! but sometimes I'm so busy and distracted that I completely forget about making dinner until, well, dinner time.

Frozen meals are great too if you have a hastily planned date, if you want to impress someone but your cooking skills are sub-par.  I see it as a halfway point between a home cooked meal and putting a store bought cake on your plate and calling it your own.


My favorite backup meal is the "penne arrabbiata" frozen pasta from Trader Joe's.  The pasta and sauce are frozen in  bag together and all you have to do is throw them in a pan for about 7 minutes and stir occasionally.  So easy!  All I do to make the meal more well rounded and filling is add a can of drained and rinsed garbanzo beans into the pan for the last few minutes of cooking.  Done!  If you want to get really fancy and make it your own you could even go one step further and cut up some fresh basil to sprinkle over top.

That's it.  You can now fake you way through a pretty, healthy (enough), and filling meal for two in under ten minutes, and for less than $5.  How's that for date night?


Monday, April 27, 2015

peanut butter cup chia pudding


Nothing makes you feel more like a hippie than looking at the huge jar of chia seeds in your pantry.  I mocked chia for the longest time, remembering it as the dreaded chia pets my friends would tease me that they'd get me for my birthdays.  Oh, the horror.

 During a shopping trip to Winco recently I bought a tiny amount of chia seeds to try out.  I found them in the huge bulk section (which is mostly the reason why I love shopping there).  I loved how versatile chia is, how easy they are to add to a recipe, or just store, and if you can find them in bulk they are dirt cheap.  For reference, I got several cups at Winco for like $2, but a barely one cup pouch of them at Trader Joe's cost $4! No thank you.

My favorite use for chia seeds currently is chia pudding, ever popular on places like Pinterest.  It takes about two minutes to make at night, then all you have to do is let it sit overnight in the fridge.  Done.  Chia pudding is the perfect breakfast for busy chaotic mornings.  Plus, it tastes like dessert, is crazy delicious and filling, and doesn't kill all my allotted calories for the day.


All you need for the chia pudding is cocoa powder, sugar, PB2 powder, chia seeds, and milk.


Add all the ingredients into a cereal bowl and whisk well.  Then place in the fridge for at least one hour, or overnight.


I like using cashew milk because it makes the chia pudding really rich and creamy with only 60 calories a cup!  That's 30 less calories a cup than the watery skim milk I used to use.


I love having chia seeds on hand now because I know I can always make this for breakfast (or a snack!), or I can toss a tablespoon or two in with a bunch of other recipes.  And how cute to the chia seeds look in this cute jar?  I find that I eat healthier when my options are visible and pretty in my pantry.


If you really dislike the tapioca like bumps in the pudding (I know some people just despise that texture, and that's okay) just can stick the chilled pudding in the blender for a minute to smooth it all out.

Also, this chia pudding keeps me super happy full and energetic all morning.


peanut butter cup chia pudding
makes 1 large bowl (but feel free to share!)

ingredients:

  • 4 tbsp chia seeds
  • 1 tbsp granulated sugar
  • 2 tbsp PB2 powder
  • 1 tbsp unsweetened cocoa powder
  • 1 cup milk
Directions:
  1. Add all ingredients into a large cereal bowl and whisk well.  Refrigerate overnight for a quick breakfast.  Refrigerate at least 1 hour if you want to eat sooner.  Stir well, enjoy!  Feel free to puree if you want a smooth texture.

Note: I used cashew milk for this recipe because got a free carton of it from Bzzagent and I wanted an excuse to try it out.  I love it!  I'm lactose intolerant so I like alternative diary options.  The cashew milk is delicious!  Its so rich and creamy.  IT makes this pudding taste so much more fattening than it really is.  That's fine with me.  :)


Nutrition Facts

User Entered Recipe
  1 Serving
Amount Per Serving
  Calories370.4
  Total Fat22.2 g
     Saturated Fat2.4 g
     Polyunsaturated Fat0.0 g
     Monounsaturated Fat1.2 g
  Cholesterol0.0 mg
  Sodium255.1 mg
  Potassium147.3 mg
  Total Carbohydrate41.5 g
     Dietary Fiber23.8 g
     Sugars13.7 g
  Protein18.1 g
  Vitamin A11.0 %
  Vitamin B-1250.0 %
  Vitamin B-60.3 %
  Vitamin C0.0 %
  Vitamin D25.0 %
  Vitamin E50.1 %
  Calcium70.7 %
  Copper10.2 %
  Folate0.4 %
  Iron22.2 %
  Magnesium10.7 %
  Manganese10.4 %
  Niacin0.6 %
  Pantothenic Acid    0.1 %
  Phosphorus    8.0 %
  Riboflavin30.8 %
  Selenium1.1 %
  Thiamin0.3 %
  Zinc10.5 %


*Percent Daily Values are based on a 2,000 calorie diet. Your daily values may be higher or lower depending on your calorie needs.