Showing posts with label tutorial. Show all posts

Tuesday, October 20, 2015

DIY "The Incredibles" family costumes


Okay, this photo is a little fuzzy (camera phone), and we aren't all wearing our cool masks, but this is probably the best full shot of all of us.  Gotta love family costumes.  Plus, come on, it's cute when the 3 year old is the one picking out our costume theme.


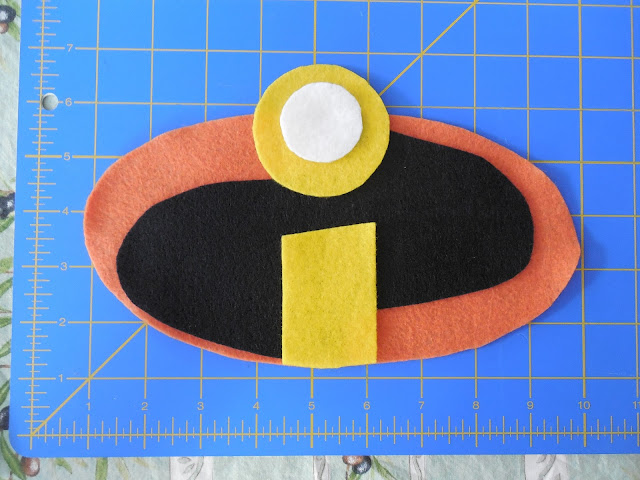
This was an easy ensemble to make.  I bought Liam's full costume and Jeff's shirt because they were easy to find and super cheap on sale (whoop whoop!).  I bought a red shirt for me and a red onesie for Jack and made the two necessary logos in felt, then hand stitched them on.


Not bad for eyeballing a logo and cutting it out in felt.  I found all the colors of felt I needed easily at Joann fabric.


Find a picture of the logo and eyeball it, cut out all your pieces, then stitch together.  It didn't take very long.


Step one: the large orange oval.


Step two: add the black over top and center.


Step three: add the yellow portion of the "I".


Step four: add the white portion of the "I".


Repeat as needed for multiple logos.  Stitch individual logo sections on in matching colored thread.


Sew the logo onto the top (onesie).


If sewing onto a women's top, keep in mind any stretch needed.  You might want to pin the logo onto the shirt while on a dress form (large pillow, etc.) to keep the correct stretch before sewing.


Grab the rest of your costume.  I used my newly logo-ed shirt, red leggings, black bike shorts, an orange spandex belt (I made this quickly with some fabric I bought), and a black mask.


Jack's hair had started going crazy by this picture (obviously), but we just had to be the Incredibles while our Jack Jack was still a baby.


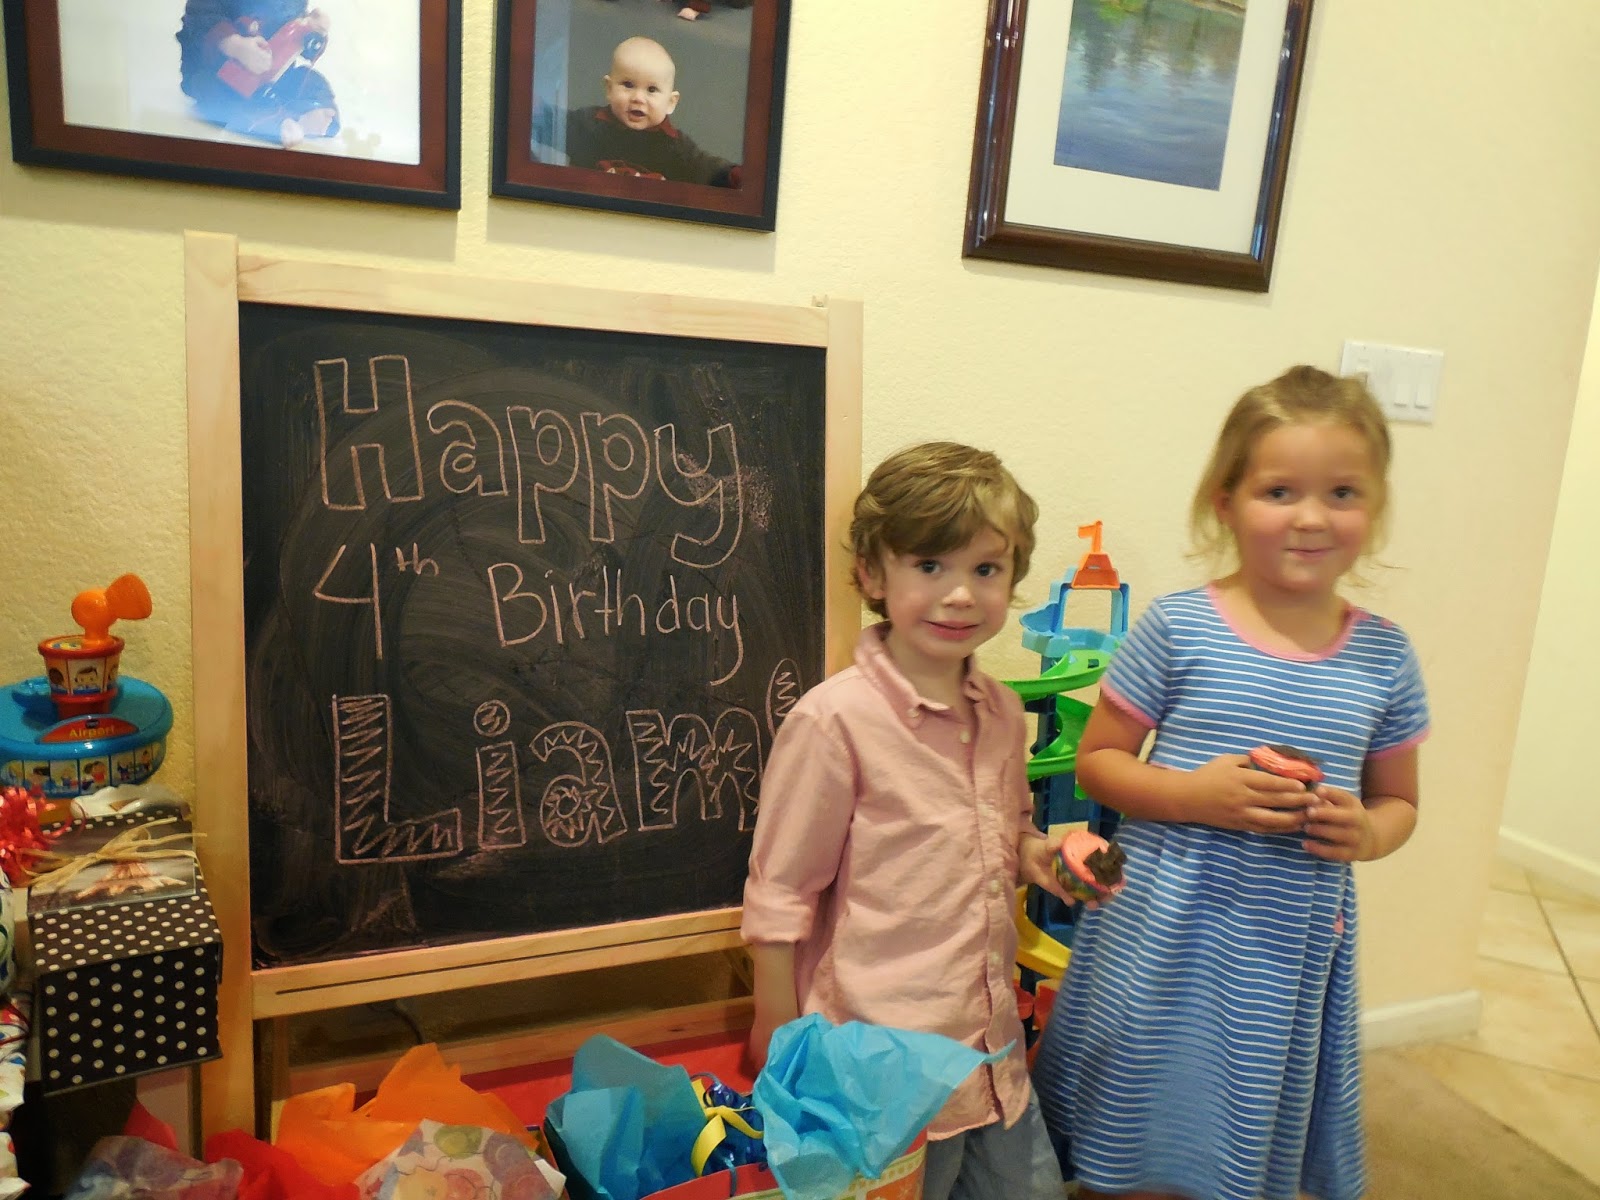
This is the miracle photo, Liam actually posing!  This NEVER happens. He was just so happy to be The Incredibles, probably because he's the human embodiment of Dash.


This was a fun family costume to do, quick, easy, and cheap to make, and made it very easy to keep track of each other trick or treating (RED!).  Hopefully this can be of help to you.

Happy Halloween and costuming making!

Monday, July 6, 2015

mini tart cups


These mini tart cups are so cute and easy.  They are the perfect snack size, and can be made in so many flavors and varieties!  All you need is any sugar cookie, cracker, or shortbread dough that can be rolled out.  I used a biscuit cutter with a scalloped edge because it makes the tart edges prettier.


Gather up your favorite dough recipe (that can be rolled out), a muffin tin, and a biscuit cutter slightly bigger than the muffin tin base.

Roll out your dough fairly thin because it will puff up a bit when it bakes, and you want plenty of room for tart filling!  I should have rolled this batch a bit thinner, but they still worked fine.  Just don't roll your dough CRAZY thin, because you want the tart crust sturdy enough to support the weight of your filling.


Use your biscuit cutter and cut out the dough in slightly bigger circles than the bottom of the muffin tin openings.  Spray the muffin tin well with cooking spray before you lightly press the dough in and they'll pop out easily after they're baked.  Grab a fork and poke 3-4 times on the tart bottoms to prevent them from puffing up too much.


I baked this batch for 18 minutes, then let them sit for about 2 minutes before I removed the tart cups to a wire rack to cool completely.

You can easily make these a day before you need them if you store them in a cool dry place.  I made these ahead of time, and I made the custard filling the day before as well.  I piped the custard into the cups right before I needed them and topped them with strawberries and blueberries.  So easy!  I love these tarts.  They taste yummy (seriously, I need an intervention to stop eating them all!), they were really easy, you can make them in advance, and they look super fancy.


Tarts are great for parties because you can just grab them and you don't need a fork or even a plate.  I love grab and go foods!  I've already got a bunch of tart variations I want to make too.  One the top of my list?

  • shortbread cup + chocolate pudding + whipped cream dollop
  • graham cracker cup + chocolate ganache or pudding + toasted marshmallow
  • chocolate sugar cookie cup + strawberry Greek yogurt
  • sugar cookie cup + strawberries + whipped cream dollop
  • peanut butter cookie cup + Reese's peanut butter cup


mini tart cups

ingredients:

  • 2 cups AP flour
  • 2 tbsp sugar
  • 1 tsp salt
  • 1/2 butter, cut into small pieces
  • 1 egg
  • 3 tsp milk

directions:

  1. In a food processor, blend the flour, sugar, salt, and butter until it resembles coarse sand.   Pulse in the egg, then add in the milk and pulse until the dough comes together.
  2. Wrap the dough in plastic wrap and refrigerate for 30 minutes.
  3. Preheat the oven to 350 degrees F.  Flour you counter and roll on the dough fairly thin.  Use a biscuit cutter slightly larger than the muffin tin base and cut out your dough.  Gently press into the greased muffin tin and lightly stab 3-4 times with a fork.
  4. Bake for 18 minutes, until the edges are lightly golden.  Remove from the oven and let sit for 2 minutes before removing the cups onto a wire rack to cool completely.
  5. Once cooled, fill cups and serve, or set unfilled cups aside in airtight container in a cool dry area.  Cups can always be filled and served the next day.  Once filled try to consume the cups within 3 days or the cups will start becoming soggy on the inside.

Tuesday, May 19, 2015

cheater's pasta


This is not a recipe.  More of a good idea.  Everyone has times now and then where you need dinner fast, and you want it to be filling and look nice.

I love keeping a few frozen items from Trader Joe's around for what I've dubbed "backup meals".  I don't use them all the time because Hello high sodium content! but sometimes I'm so busy and distracted that I completely forget about making dinner until, well, dinner time.

Frozen meals are great too if you have a hastily planned date, if you want to impress someone but your cooking skills are sub-par.  I see it as a halfway point between a home cooked meal and putting a store bought cake on your plate and calling it your own.


My favorite backup meal is the "penne arrabbiata" frozen pasta from Trader Joe's.  The pasta and sauce are frozen in  bag together and all you have to do is throw them in a pan for about 7 minutes and stir occasionally.  So easy!  All I do to make the meal more well rounded and filling is add a can of drained and rinsed garbanzo beans into the pan for the last few minutes of cooking.  Done!  If you want to get really fancy and make it your own you could even go one step further and cut up some fresh basil to sprinkle over top.

That's it.  You can now fake you way through a pretty, healthy (enough), and filling meal for two in under ten minutes, and for less than $5.  How's that for date night?


Monday, April 20, 2015

Mickey Mouse birthday treats


I'm still in denial that my baby is already 4.  I seriously don't know how that happened so fast!  This kiddo is a total Disney fanatic.  Wonder why with parents like us?  :)  This is the second time he's insisted on a Mickey Mouse themed birthday party.  I already had most of the decorations, so I thought, why not?

Throwing a birthday party so close to Easter always messes me up because there is just so much going on every spring!  As usual, I realized at the last second that I had not a clue what to make (food wise) for Liam's birthday party.  Liam requested Mickey Mouse cupcakes.  Other than get Mickey patterned cupcake wrappers I couldn't think of how to make a Mickey cupcake.  Finally I decided on Mickey head toppers over the frosting.  They turned out okay too.


These were really easy and quick to make.  I printed out a sheet of paper with 15 Mickey head outlines on it and covered the paper with a large piece of wax paper. I filled a freezer bag with half a bag brown melting candy. I know they don't taste as good as real chocolate, but they are so much easier to melt, and keep at the desired consistency.  I microwaved the bag for a few minutes (checking and squishing occasionally), then took it out, cut a tiny very small hole in one corner, and used the bag like a piping bag.  I just traced the Mickey outline and filled it in.

I filled in the first 15 Mickeys and just slid the bottom outlines over to an empty section of wax paper and made more.

Note:  The melting candy should be easy to handle, and be warm, not too hot.  You need to keep moving and fill in the Mickeys quickly because the candy will want to keep coming out.  Also, you don't want to wait too long and have it firm up too much before you finish.  It is really easy if you get a good rhythm going.


Let the Mickey heads cool.  It shouldn't take long if you're in a hurry.  Pick them up off the wax paper and stick them on top of the cupcake frosting.  Unless you've made your Mickeys crazy thin they should pop off the wax paper very easily.


I thought I had a Mickey Mouse cookie cutter until the day before the party.  Oops!  Instead of Mickey shapes I decided to go super simple and make round Mickey cookies.  They're a bit sloppy, but I made about a million of them and started to get really tired.  They are yummy though, so I really don't mind the leftovers.  :)  The royal icing recipe is available here.  I wrapped these cookies up in stead of giving out goodie bags.  No one ever seems to play with goodie bag contents anyway, and who doesn't love cookies?


Liam was so excited by all the Mickey things around our house, and playing with friends.


Last year I stumbled across a site that had a great idea.  Every year starting at about age 3 give your child a questionnaire.  The same questions every year, and you can compare the answers.  Such a great idea!  Last year Liam refused to answer at least half of the questions, but this year he actually responded to all of them.  I was pretty amazed.  His answers were pretty cute too.

I got this idea from reaves party of three if anyone wants to check it out.  He are Liam's responses:

1. What is your favorite color? red
2. What is your favorite toy? trains
3. What is your favorite fruit? strawberries
4. What is your favorite tv show? Phineas & Ferb
5. What is your favorite thing to eat for lunch? Preschool lunch
6. What is your favorite outfit? My red shirt
7. What is your favorite game? Candyland
8. What is your favorite snack? Fig bars
9. What is your favorite animal? platypus
10. What is your favorite song? Twinkle twinkle little star
11. What is your favorite book? Goodnight moon & Biscuit series
12. Who is your best friend? Preschool friends
13. What is your favorite cereal? Daddy's cereal (whatever he's eating, mostly wheat bran)
14. What is your favorite thing to do outside? Play games
15. What is your favorite drink? Boy soda ( the only “soda” I give him is carbonated water with a bit of lemon juice in it, but I can't think of what else he's talking about.)
16. What is your favorite holiday? Christmas!
17. What do you like to take to bed with you at night? My blankets and a book
18. What is your favorite thing to eat for breakfast? A fig bar (wishful thinking!)
19. What do you want for dinner on your birthday? cupcakes
20. What do you want to be when you grow up? A Daddy!


Yes, even our hard hats are Mickey!

Tuesday, February 3, 2015

cheesy omelet muffins


There is a story that goes with these muffins.  Yesterday morning the boys wanted breakfast, so Liam helped me make pancakes.  I made it the cheater way with Bisquick mix, sugar, an egg, and some milk.  I make pancake batter in a large measuring cup so I can measure, mix, and easily pour all in one cup.  We ate all the pancakes, cleaned everything up, and played for a while.  The boys were happy playing by themselves so I told them to keep playing and I'd go take a quick shower.

Shortly after I finished getting ready for the day I came out to find Jack quietly playing in Liam's room (as always), and I walked out to the kitchen to find... Liam cooking.


Liam had poured all our remaining Bisquick mix into a large clean measuring cup just like I had, taken the pancake recipe out and laid it on the counter for reference (even though he can't read yet), and put the empty Bisquick container back in the pantry.  Then he had taken out the sugar and scooped some out with a large wooden spoon just like I had before putting the container away (I know because he left out the sugary spoon).

When I walked out he was in the process of adding eggs.  Yes, EGGS.  My recipe used one egg.  Liam was halfway through cracking number six!  I was actually pretty impressed how tidy his work space was.  He only spilled a tiny bit of egg white on the counter, and I had only taught him how to crack an egg recently.  I'm really glad I came into the kitchen when I did, because he had five more eggs set out, ready to crack open!  He had literally emptied the egg carton form the fridge and put it back in empty.  When he saw me he perked up and announced, "I'm making pancakes!  We ate the other ones already so we need more!"  Then he hopped off his table to go grab the milk.  Happy and totally nonchalant about the whole thing.

I was gobsmacked.  I couldn't figure out first whether to take photos, be pissed about so many eggs getting wasted, or be impressed that he took initiative, that he's a great cook, or remembered perfectly how I made pancakes (minus the number of eggs used).


Okay, I was mad impressed, and thought he was adorable, but I still made it clear that I was annoyed at how many eggs he used.  He was so cute, and I HATE wasting food, so I tried to think of some way to save the egg-y batter.


Enter in the cheesy omelet muffins.  So named because when Jeff came home from work that night and tried one, that's what he said they tasted like.  I tried my best to scoop out the small amount of sugar in them, then added some milk and a handful of shredded cheese.  They bake really well, and turned into a perfect breakfast.  Jeff never has much time in the morning, so I like to have a speedy breakfast option available.  These can be pulled from the fridge and microwaved for a minute, then eaten in the car.  Perfect.  Sometimes culinary accidents make some interesting finds!

I told Liam he was getting to be a good cook and he replied, "Grandma says when I cook at her house I am a chef."  Sounds about right.


My batch made eleven, but I could have filled them each a little less and still had twelve good sized muffins.  Just don't fill them too high, because eggs puff up quite a bit when they cook.


perfect egg-y cheesy muffins.


Cheesy Omelet Muffins
makes about 12
bake time: 20-25 minutes

ingredients:

  • 1 cup Bisquick mix
  • 6 large eggs
  • 1/2 cup milk
  • large handful of shredded cheese (cheddar or 3 cheese blend)
  • pinch of black pepper


directions:

  1. Preheat oven to 375 degrees.  Spray 12 muffin tin pan.
  2. Mix all ingredients together well and pour into muffin tins. 
  3. Bake 20-25 minutes, until golden brown on top.
  4. Remove from oven and let sit 10 minutes before removing.  Eat warm.
  5. Refrigerate to store, microwave 1 minute to reheat.

Wednesday, November 5, 2014

surprise! cookies


If you are reading this and it isn't currently Fall, ignore the pumpkin shape.  These cookies are awesome.  They can be made in any shape: pumpkin, star, Christmas tree, heart, circle, etc.  Really, when isn't it a great time to make a cookie that is essentially 2 1/2 cookies stuck together with mini m&ms in the middle?


Use your favorite sugar cookie dough.  I added orange gel color into my cookie dough to make pumpkin cookies.  Roll the dough out thick enough for the cookie to stay together, but thin enough so three cookies stacked will fit into your mouth!

Count how many cut cookies you have and use a pairing knife (or other sharp kitchen tool) to cut out the center of 1/3 of them.  Bake them according to your recipe.


I like my sugar cookies nice and soft, but I kept these in the oven some additional minutes to make sure they were firm enough.  Keep an eye on them.  You don't want them too crunchy.


Once the cookies are out and cooled use royal icing (with optional gel coloring mixed in to match the color of the cookies).  I love this royal icing recipe.  Just pipe out a thin line of icing along the middle of where the cut-out cookie will go over it.

Translation:  Don't pipe icing too close to the edge of the cookie.  When you press the cut-out cookie on top you don't want icing leaking out the sides.


Press the cut-out cookie over the icing on the bottom cookie and fill the hole with mini m&ms.  Don't fill too full though, the top cookie still has to fit on!


Pipe a second line along to top of this cookie and press the top cookie on.  Make sure you are doing this whole process fairly quickly because royal icing hardens quickly.  No worries though, as long as you set up everything you need ahead of time, this entire process should only take minutes.  Easy.


Once the cookies are complete allow them to sit out and harden for a few minutes.  Decide how or if you want to decorate them.  They don't need much because they are already 2 1/2 cookies with candy inside.


I opted for just a basic pumpkin top made with a large dot of green buttercream (I was already using it for another recipe, so it worked out great for me).  My recipe made a dozen cookies.


Enjoy!


My favorite part (or two) about these cookies?  Watching someone bite into it and get a surprise, and the fact that you can easily make them a day in advance.  That just makes parties sooo much easier.


These will last for several days in an airtight container on the counter.