Showing posts with label pumpkin. Show all posts

Friday, October 30, 2015

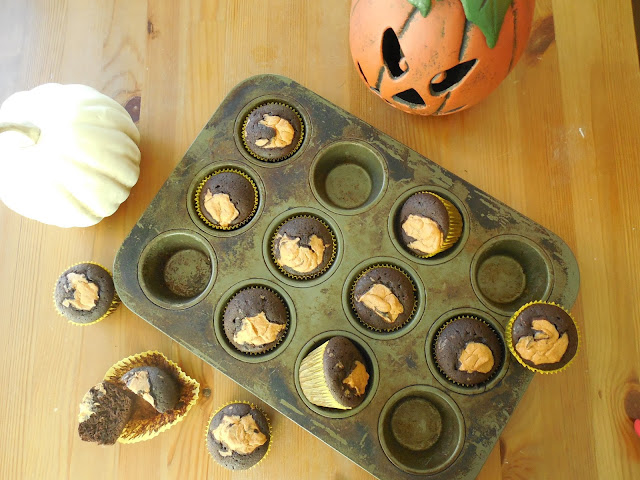
pumpkin black bottomed muffins


These muffins make me so happy.   Fudgy chocolate muffins topped with pumpkin goodness just can't be beat.

One of my favorite fall recipes is a cream cheese based dip (perfect for ginger snaps or apple slices).  I love it sooo much, and I wanted to find other uses for it to spread the joy when I remembered how awesome classic black bottomed muffins are.  I switched out the plain cream cheese for my dip and I really love the result.  The orange color is such a cheerful addition to the muffins, but the real treat is the pumpkin and orange flavors added.  Seriously, I want to eat the whole batch.  Luckily I've got three built in taste testers at home to eat them all for me.

I even have a clean up crew for the kitchen (in the fall at least).  It's amazing how quickly you can get a kid to help you sweep the kitchen when they realize they have a perfect witch broom to ride on already in their hands.  I kid you not.  My kitchen floors have never been cleaned than they are today.


I could have eaten this entire batch of muffin batter raw.  It looked and tasted just like fudge.  *Insert drool here*.  If you already have a well-loved chocolate muffin recipe, feel free to use it.  Just swirl a spoonful of pumpkin dip on top and bake according to your regular directions.


Seriously though, doesn't this just look like truffle filling or fudge?


I used a small spoonful over each muffin because I didn't want the entire top covered in orange, but how much you use is really up to you, as long as you don't overfill your cups.


Note: the chocolate will bake quicker than the pumpkin dip, so if the pumpkin topping still looks a bit undercooked when the muffins have finished baking, don't fret.  They firm up nicely once they've set.

 I like they messy, natural style of the orange tops, but after I made these Jeff had a great idea if you crave more structure and theme.  Pipe a large circle of pumpkin topping onto the center of the muffins and bake.  Once they've baked and set, use black frosting with a small piping tip to draw a Jack o' lantern face into the center of the orange.  Cute!


Okay, these are just gratuitous muffin shots.  I just couldn't decide which ones to post, so I posted most of them...  :)


I've had this pumpkin dip recipe for ages, and I can't for the life of me remember where I found it.  Let me know if you know who created it so I can give credit.  I love it, but it's not mine.


Pumpkin Dip

Ingredients:

  • 8 oz. cream cheese
  • 14 oz. marshmallow creme
  • 15 oz. pumpkin puree
  • 1 tsp cinnamon
  • 1 tsp orange zest
Directions:
  1. Whip the cream cheese using a stand or hand mixer for about 3 minutes, or until fluffy.
  2. Add in the pumpkin puree and blend thoroughly.
  3. Add in the marshmallow creme and blend thoroughly.
  4. Add in the cinnamon and orange zest and mix until just combined.
  5. Serve immediately or refrigerate in an airtight container until ready to serve.  
uses: 
  • dip for ginger snaps or apples
  • top chocolate muffins just before baking
  • spread between cake layers
  • etc.
note: I LOVE orange, so sometimes I like to add an extra teaspoon of orange zest.


Chocolate Muffins
makes about 12

Ingredients:
  • 3/4 cup cocoa powder
  • 1 tsp baking powder
  • 1/2 cup boiling water
  • 3/4 cup melted butter
  • 1 tbsp vanilla extract
  • 1 1/4 cups granulated sugar
  • 2 eggs
  • 1 1/3 cups AP flour
  • 1/4 tsp salt
Directions:
  1. Preheat oven to 350 degrees F, and line a muffin tin with wrappers.
  2. In a medium bowl, combine the cocoa and baking powder.
  3. Whisk in the boiling water.  Once smooth whisk in butter and vanilla.
  4. Whisk in sugar, then whisk in the eggs one at a time
  5. Whisk in the salt and flour and stir until smooth.  The batter should look like thin fudge.
  6. Use a scoop to evenly distribute the batter into the muffin cups.
  7. Spoon a small spoon of pumpkin dip over the tops of the muffins.
  8. Bake for 25-30 minutes, or until an inserted toothpick comes out clean.  Remove from the oven and let sit on the counter for 10 minutes.  Enjoy!
Note: make sure the toothpick is inserted into the chocolate and not the pumpkin, as the chocolate part cooks faster and is more accurate.

Thursday, August 27, 2015

pumpkin carrot cake


This cake is awesome.  Do you like carrots, coconut, walnuts, pumpkin, vanilla, and pineapple?  Even if you only like one of those things you'll probably still love this cake.  It stays moist and delicious several days later (I'm really amazed we still have any left).  I love the flavor, it's a lovely mix of everything.  Jeff hates carrot cake, and nuts in baked goods and even he really liked this cake.  I love cakes like this.  It needs minimal hardware to make, and is so easy to make, it's almost impossible to screw it up.  Who doesn't love an easy cake?

Even with whole wheat flour, cornmeal, and protein powder in the batter this cake stays soft and sweet.  Yes, there is a lot of sugar, it is a cake after all.  But pretty much everything else in the cake has decent nutrients.  This is probably the most nutrient dense cake that you'll ever taste (and enjoy).  

This recipe is definitely a keeper.  I plan on making again soon.  It isn't sickeningly sweet, but is sweet enough to make the though of frosting completely unnecessary. 

Disclaimer: This is not my original recipe.  I tweaked it a bit from the original recipe found here at the Gold Medal flour site.
Pumpkin Carrot cake
 Ingredients:

  • 1 1/2 cups whole wheat flour
  • 1/2 cup vanilla whey protein powder
  • 1/4 cup yellow cornmeal
  • 2 cups sugar
  • 1 tsp salt
  • 3 tsp baking soda
  • 1 tsp baking powder
  • 1 tbsp cinnamon
  • 3 large eggs
  • 1/2 cup coconut oil
  • 2 tsp vanilla extract
  • 2 cups grated fresh carrots
  • 1 cup crushed pineapple
  • 1 cup pure pumpkin
  • 1/2 cup chopped walnuts
  • 1-1/2 cups flaked coconut
 Directions:
1. Preheat oven to 350°F. Grease a bundt pan. Set aside.
2. In a medium bowl, combine the flour, protein powder, cornmeal, sugar, salt, baking soda, baking powder and cinnamon.
3. In a large bowl, beat together the eggs, oil and vanilla until smooth. Gradually add the dry ingredients to the egg mixture. The dough will be very thick at this point.
4. Fold in the pineapple and pumpkin until well combined. Fold in the carrots and then the nuts and coconut until just combined.
5. Pour batter into the prepared cake pan and bake for 50-60 minutes until the cake is browned on top and a toothpick inserted in the center comes out clean.
6. Let the cake cool in the pan on a wire rack for 30 minutes. Turn it out onto the wire rack and let cool completely.
  
Notes:
Keep leftover cake refrigerated.

Thursday, November 13, 2014

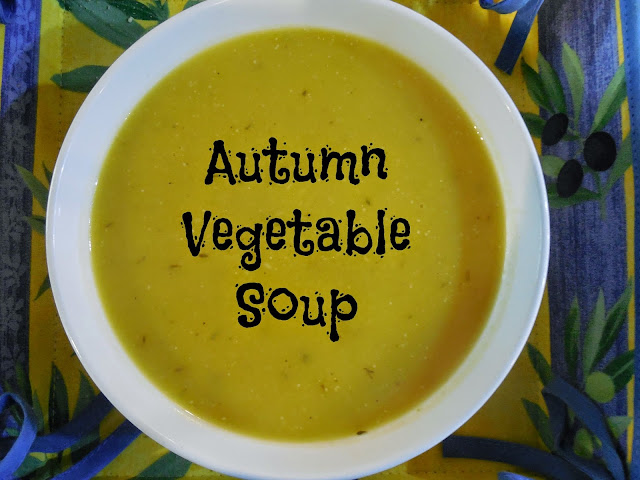
Autumn vegetable soup


Have I mentioned before how much I love soup?  It's the best.  Soup can easily be both healthy and delicious, this recipe is both.  This recipe in particular is great because you can make it from fresh produce, cans, or frozen.  Or a combination.  It honestly doesn't even matter.  It will still be delicious.


Start by dicing two shallots in some olive oil.

Sorry about you having to look at the horribly awful pot by the way.


These are your main ingredients.  Notice I'm using a mixture of fresh produce (pumpkin and potatoes), prepackaged (thyme and chicken broth), and frozen (parsnip grated and frozen from earlier).  Obviously the wine is prepackaged too.  Me making wine would no doubt be really gross.


Canned pumpkin works just fine, but if you want to use fresh pumpkin use an entire small pumpkin.  These will about equal a can of pumpkin puree.  Use a vegetable peeler to peel the skin off, quarter, and scoop out the goop with an ice cream scoop.  This is actually quick, easy work.


When the pumpkin is prepped, cut up into chunks and toss into the pot with the shallots, which should be very fragrant.


Toss in the parsnips and potato chunks and stir to combine.


Stir in the thyme, white wine, and chicken broth.  Stir occasionally.  Keep the soup on medium heat until the vegetables are very fork tender.  Use an immersion blender to puree.


Add in salt, pepper, and brown sugar.  Adjust to taste.  When the soup has thickened a little more, take it off heat and mix in the milk.  Serve immediately.


I love having this soup simmering on the stove on cold days.  The veggies and milk make it filling, it smells like Autumn, it pairs well with crusty bread and (more) wine, and c'mon, who doesn't love a soup that is sweet, savory, creamy, and healthy all in one bowl?

Autumn Vegetable Soup
serves 4

ingredients:
2 shallots, diced
1 tbsp olive oil
1 1/2 tsp thyme
2 small yukon gold potatoes
1 parsnip
1 small pumpkin
6 cups chicken broth
3/4 cup white wine
salt and pepper
1 1/2 tbsp brown sugar
1 cup milk

directions:
1.  Dice the shallots and saute in a medium pot with the olive oil on medium heat.
2.  Cut the pumpkin, potatoes, and parsnip into chunks and toss them into the pot.  Stir a bit and let them soften for a few minutes.
3.  Add the thyme, white wine, and chicken broth.  Stir occasionally.  When vegetables are very fork tender use an immersion blender until smooth.
4.  Add salt and pepper to taste, and the brown sugar.  Soup should begin to thicken a bit more.  Take soup off heat and mix the milk in well.

Wednesday, November 5, 2014

surprise! cookies


If you are reading this and it isn't currently Fall, ignore the pumpkin shape.  These cookies are awesome.  They can be made in any shape: pumpkin, star, Christmas tree, heart, circle, etc.  Really, when isn't it a great time to make a cookie that is essentially 2 1/2 cookies stuck together with mini m&ms in the middle?


Use your favorite sugar cookie dough.  I added orange gel color into my cookie dough to make pumpkin cookies.  Roll the dough out thick enough for the cookie to stay together, but thin enough so three cookies stacked will fit into your mouth!

Count how many cut cookies you have and use a pairing knife (or other sharp kitchen tool) to cut out the center of 1/3 of them.  Bake them according to your recipe.


I like my sugar cookies nice and soft, but I kept these in the oven some additional minutes to make sure they were firm enough.  Keep an eye on them.  You don't want them too crunchy.


Once the cookies are out and cooled use royal icing (with optional gel coloring mixed in to match the color of the cookies).  I love this royal icing recipe.  Just pipe out a thin line of icing along the middle of where the cut-out cookie will go over it.

Translation:  Don't pipe icing too close to the edge of the cookie.  When you press the cut-out cookie on top you don't want icing leaking out the sides.


Press the cut-out cookie over the icing on the bottom cookie and fill the hole with mini m&ms.  Don't fill too full though, the top cookie still has to fit on!


Pipe a second line along to top of this cookie and press the top cookie on.  Make sure you are doing this whole process fairly quickly because royal icing hardens quickly.  No worries though, as long as you set up everything you need ahead of time, this entire process should only take minutes.  Easy.


Once the cookies are complete allow them to sit out and harden for a few minutes.  Decide how or if you want to decorate them.  They don't need much because they are already 2 1/2 cookies with candy inside.


I opted for just a basic pumpkin top made with a large dot of green buttercream (I was already using it for another recipe, so it worked out great for me).  My recipe made a dozen cookies.


Enjoy!


My favorite part (or two) about these cookies?  Watching someone bite into it and get a surprise, and the fact that you can easily make them a day in advance.  That just makes parties sooo much easier.


These will last for several days in an airtight container on the counter.


Friday, October 24, 2014

pumpkin cinnamon rolls


It is amazing how difficult it is to get a new blog post out when half the house has colds, one is teething, and you are trying to finish up Halloween related everything!  I honestly can't remember the last time I had more than 10 minutes to myself, or enough sleep to not make me crave a portable IV drip (someone get one that design please.  Stat!).

Last night I finally had a few minutes when the kids were happily playing together and I was able to whip up some overnight pumpkin cinnamon rolls.  As you might notice from my other two cinnamon roll recipes on this blog, I really like sweet breakfast foods.  I got a bit bored with the plethora of pumpkin recipes currently all over Pinterest, but I wanted to try a new recipe for cinnamon rolls, and not only is this one great for Fall, but its not quite as bad for you as other cinnamon rolls.  I could had said they are healthy, but that would just be a flat out lie.


Combine softened butter, milk, pumpkin, brown sugar, cinnamon, nutmeg, and salt in a mixer until smooth.


Add the egg and yeast and mix well again.


Combine the AP and whole wheat flours into a small bowl and add slowly until the dough is soft, pillow-y, and not sticky.


Knead for several minutes, then place a towel over the bowl and let it rest for at least an hour, until the dough has inflated.


Drop the dough out onto a floured surface.


Roll the dough out into a rectangle.


Evenly spread the filling, starting with the melted butter over the dough, trying to leave the bottom 1/2" or so bare.


Roll the dough into a roll starting with the side furthest from you.  Pinch the ends into the roll to seal.


Cut the roll into 12 even pieces.


Place the rolls 3x4 in a prepped casserole dish.


I'm terrible at rolling out a perfect rectangle shape, so I always have one roll that is smaller and uglier than all the others.  No worries.


Bake the rolls at 350 degrees F for 25 minutes.  Check them halfway through.  If they look almost done but still feel very soft, loosely drape a sheet of foil over top.


The rolls are done when they are solid but still soft.  As soon as the rolls are out of the oven set them aside and begin work on the icing.


Mix the softened cream cheese, milk, powdered sugar, and cinnamon together until smooth.


Pour the icing out onto the now warm cinnamon rolls.  If you haven't done it evenly enough, use a spatula to help cover the rolls better.


Enjoy these rolls warm or cool.  They still taste nice and cinnamon-y as cinnamon rolls should, but the pumpkin is so nice for the fall.  The use of some whole wheat flour makes them a mite healthier too.


Store covered in the fridge for up to several days.


print recipe

pumpkin cinnamon rolls
easy and delicious overnight pumpkin cinnamon rolls with cream cheese frosting

Ingredients for dough
  • 2 tbsp unsalted butter, softened
  • 1/3 cup milk
  • 2/3 cup pumpkin puree
  • 1/3 cup brown sugar, not packed
  • 1/2 tsp cinnamon
  • 1/4 tsp grated nutmeg
  • pinch salt
  • 1 large egg
  • 2 1/4 tsp yeast
  • 1 1/2 cup AP flour
  • 1 3/4 cup whole wheat flour

Ingredients for filling
  • 2 tbsp unsalted butter, melted
  • 1 cup brown sugar, unpacked
  • 2 tbsp cinnamon
  • 1 tsp grated nutmeg
  • 1/4 tsp allspice
  • 1/4 tsp cloves

Ingredients for icing
  • 2 tbsp cream cheese, softened
  • 3 tbsp milk
  • 1 cup powdered sugar
  • 1 tsp cinnamon
Instructions
1. Mix the softened butter with the milk, pumpkin, brown sugar, cinnamon, nutmeg, and salt. When it is well mixed add in the egg and yeast and mix again. In a small bowl mix the AP and the whole wheat flours together and slowly add into the other ingredients. The dough should end up very soft and pillow-y, but should not be sticky.
2. Cover the bowl and let it sit for an hour. It should puff a bit. After an hour has passed knead the dough for a minute and lay out on a lightly floured counter. Roll the dough out into a rectangle and brush with melted butter. Evenly distribute the brown sugar, cinnamon, nutmeg, allspice and cloves over the dough, leaving the bottom 1/2" of dough empty. Roll the dough up starting with the edge furthest from you. Pinch the end of the dough into the roll to help secure it. Cut the roll into 12 even pieces and place 3x4 on a prepped casserole dish. Cover with plastic wrap and place into the fridge overnight.
3. In the morning place the cinnamon rolls on the cover uncovered for an hour. Bake at 350 degrees F for 25 minutes. Check on them halfway through, and if they look almost done on the top, but are still obviously not done, cover loosely with foil until finished. Remove from the oven and let cool on the counter while you make the icing. Ice while warm and enjoy warm or cool.
4. To make the icing mix softened cream cheese, milk, powdered sugar, and cinnamon until smooth. Pour out over the cinnamon rolls.

Details
Prep time:
Cook time:
Total time:
Yield: 12 rolls