Showing posts with label candy. Show all posts

Sunday, March 27, 2016

Happy Easter!


Happy Easter everyone!  I know, I know, this post is super late.  I totally lost track of time this morning and forgot to post.

The boys had sooo much sugar today.  They were totally bouncing and vibrating everywhere.  Luckily the Easter Bunny set an alarm and woke up really early to set out the eggs because the kids woke up early too.  They had already finished their egg hunt (and half their candy) by 8am.  Yikes.


I color coded the toys that the Easter Bunny left out so the boys would know what got what.  Lima was so cute.  He helped Jack find some of his things and made sure to share some eggs with Jack.


They still needed help reaching the odd egg.


My favorite part about the photo above is that it is not posed in any way.  Aren't they so cute?!


I couldn't really get any pictures today of both kiddos looking at the camera or smiling.  They were too distracted with all the sugar.

Saturday, February 13, 2016

nothing says Valentine's Day like bacon and chocolate!


Yeah, that's right.  A chocolate bacon bar.  What says's "I love you" like chocolate and bacon?  

If you need last minute ideas for Valentine's Day, or just really want to keep these all to yourself, this recipe is easy and yummy.  Being a vegetarian I haven't tried them myself, but Jeff ate half the batch in a day, so they must be good!


Be prepared for gratuitous chocolate photos.  They were just so pretty!  I couldn't narrow it down.  :)


 These chocolates are great.  All you really need is bacon and chocolate chips.


Start by laying 5 strips of bacon on a foil lined lipped baking sheet.  If you want to infuse some extra sweetness you can brush two teaspoons of maple syrup over the bacon.  Bake at 400 degrees F for 10-15 minutes until cooked but not crispy.  I baked mine for 12.  Take the bacon out and let it cool for a few minutes.  Dice the bacon as small as you can and place it on clean foil on the same baking sheet.  Bake for 2-5 minutes until its a bit crispy.  Remove from the baking sheet and place on a plate lined with paper towels.


While the bacon is cooling get out a small double boiler and slowly melt 2 cups of chocolate chips until smooth and shiny.  You can use whatever shape molds you want (these are silicone cupcake sized molds).  Make sure the mold interiors are clean and completely dry.  Spread a thin layer of chocolate on the mold bottoms to insure the candy tops are flat and clean when they're finished.


Mix the bacon into the melted chocolate and evenly pour into the molds.  I filled my molds 1/3 of the way up and they were pretty thick.  I made 9 chocolates, but you could make up to 12 without them being too thin.  Firmly tap the molds on the counter a few times to get rid of any possible air bubbles and to make sure the chocolates lay flat.  Let the chocolate sit out for a few hours to harden completely.  


When the chocolate is firm gently remove them from the molds.  They could be finished at this point, or you could decorate them like I did.  I used 1/4 cup of red candy melts to decorate.  These are pretty easy to use.  Put your candy melts into an uncut piping bag, or a sandwich bag and microwave upright in a plastic cup for 30 seconds at a time until evenly melted.  Snip a small hole in the bag tip.

Lay the chocolates out on parchment paper and very quickly create a pattern on the chocolates.  Let them dry.

Once the candy melt decorations have dried pick up the chocolate and snap off any small pieces hanging off.

Enjoy! Try not to eat them all in one day.


Chocolate Bacon Bars

Ingredients:

  • 5 strips of bacon
  • 2 teaspoons maple syrup (optional)
  • 2 Cups semi-sweet chocolate chips
  • 1/4 Cup red candy melts (optional)
Directions:
  1. Preheat oven to 400 degrees F. Lay bacon out on foil lined lipped baking sheet.  Optionally brush bacon with maple syrup. Bake for 10-15 minutes until bacon is cooked but not crispy.
  2. Dice bacon finely and return to oven on clean foil lined baking sheet for 2-5 minutes, until crispy but not burnt.
  3. Let bacon cool on paper towel covered plate.
  4. Prep a double boiler and slowly melt the chocolate chips until smooth and shiny.
  5. Spread a thin layer of chocolate on the mold bottoms, then mix the bacon into the chocolate mix and evenly pour into the molds, about 1/3 of the way to the tops.
  6. Tap the molds on the counter to remove possible air bubbles and flatten the chocolate.  Let dry completely. 
  7. Optional decoration: lay solid chocolate on parchment paper.  Put the candy melts into an uncut piping bag or sandwich bag and microwave upright in a plastic cup for 30 second intervals until melted evenly.  Snip a small hole in the bag tip and very quickly drizzle a pattern onto the chocolates.  Let dry.  Pick off any small bits of candy hanging off the chocolate bars.  Enjoy!


Tuesday, November 24, 2015

reusable advent calendar


I LOVE looking at cute new Christmas ideas on Pinterest every year.  It's so addicting.  I'd seen a really cute reusable advent calendar for the last year or two, but didn't have time and figured it'd be expensive and time consuming to make.  I was wrong.  Between a few supplies I already had and the few I bought, plus the time to make this... would you believe I spent $12 and easily made it in an afternoon?  And everything I needed to buy for this I was about to find easily at Joann and Home Depot.

For all those interested, the original blog I got the idea off of can be found here.

Did you notice Luna?  She blends in a bit, but the only reason she seems to be in EVERY photo is because I told her to go away so I could take photos, and this was her way of demanding to be pet.  She eventually won.


Sorry about the glare.  It's really dark today, so it was either freakishly dark photo, or flash glare.

Here's what you'll need to make this calendar:

  • a 12x12 or 13x13 inch frame (this is a 13x13 shadow box frame with the glass removed)
  • 25 2" metal tins (Wilton's set of 25 can be found at craft stores in the wedding section)
  • cute paper (enough to back the frame, and cut out 50 circles, 2 per tin)
  • stickers, die cuts, or a pen for the numbers
  • metal sheets (I used two 7"x12" metal sheets with a bit of overlap, easy to find near lumber at home depot, cheap too!)
  • magnets
  • mod podge and small paint bush
  • glue gun
  • candy (I am using Hershey Kisses)


Start off by placing your metal sheet(s) and cute paper in your frame and get rid of the glass that came with the frame.  Hot glue the magnets to the back of each tin, making sure the magnet is strong enough first.  Cut out 50 circles to just fit inside your tins (I have an awesome hole punch that was the perfect size for this).  Split the circles in half.  Put the numbers 1-25 on half using stickers, die cuts, a pen, etc. Paint the mod podge over the numbered circles and put them into the lids.  They'll look ugly at first, but the mod podge dries clear, so no worries.  This next part is optional.  The Wilton tins set comes with 25 small round sticker labels.  Stick on in the center of each remaining circle and write an activity on it.  Place candy in each tin, put the lids on, and attach all the tins to the frame.  Done!


Two tips:

  1. an easy way to make sure your papers are festival and match is to use a stack of scrapbook paper.  I used a Christmas stack of 6"x6" paper and was able to cut 4 circles out of each page.  
  2. Make sure whatever activities you plan will work for each day.  For instance, I checked which days in December were weekends and put the significantly more involved things there.


I like that every year I can mix and match what things go on each day.  Over the years my kids will know what fun things are coming up in December, but never which day they'll be on.


I understand if you want all the numbers to match.  I didn't want to use a pen and my mom had the cricut at her house, so I used stickers.  I figured since the paper was all different the numbers should be as well.  I like the crazy hodge podge look I ended up with.


Some magnets list their strength or the amount of weight they can handle.  Aim for at least "medium", and make sure when you test your magnets (I taped mine onto a tin and stuck in on the frame) you do so with the candy you plan on using to make sure it's as strong as you need it!


That's it.  It's really easy to make and I love the end result!  It's exactly what I was hoping for.  If you want to include activities for each day but have NO idea what to put, here are some suggestions:

  • write letter to Santa
  • make Christmas cookies
  • look at Christmas lights
  • watch a Christmas movie
  • make fancy hot chocolate
  • make a gingerbread house
  • read The Night Before Christmas
  • make Christmas decorations
  • donate gifts
  • take a family Christmas photo
  • leave milk and cookies for Santa
  • discover new Christmas music
  • make paper snowflakes
  • sing carols
  • shop for sibling gifts
  • have a fireside picnic
  • build a massive fort
  • see a Christmas parade
  • read a new holiday story
  • game night
  • make peppermint playdough
  • make a red and green meal
  • family walk
  • make homemade hot apple cider
  • decorate the house
  • bring cookies to Shriner's hospital
  • make flavored caramel corn

I've seen other awesome ideas, but alas, most others need snow.  No such luck in California.

Let me know if you require help making your own, I hope you have lots of fun with this calendar!

Monday, April 20, 2015

Mickey Mouse birthday treats


I'm still in denial that my baby is already 4.  I seriously don't know how that happened so fast!  This kiddo is a total Disney fanatic.  Wonder why with parents like us?  :)  This is the second time he's insisted on a Mickey Mouse themed birthday party.  I already had most of the decorations, so I thought, why not?

Throwing a birthday party so close to Easter always messes me up because there is just so much going on every spring!  As usual, I realized at the last second that I had not a clue what to make (food wise) for Liam's birthday party.  Liam requested Mickey Mouse cupcakes.  Other than get Mickey patterned cupcake wrappers I couldn't think of how to make a Mickey cupcake.  Finally I decided on Mickey head toppers over the frosting.  They turned out okay too.


These were really easy and quick to make.  I printed out a sheet of paper with 15 Mickey head outlines on it and covered the paper with a large piece of wax paper. I filled a freezer bag with half a bag brown melting candy. I know they don't taste as good as real chocolate, but they are so much easier to melt, and keep at the desired consistency.  I microwaved the bag for a few minutes (checking and squishing occasionally), then took it out, cut a tiny very small hole in one corner, and used the bag like a piping bag.  I just traced the Mickey outline and filled it in.

I filled in the first 15 Mickeys and just slid the bottom outlines over to an empty section of wax paper and made more.

Note:  The melting candy should be easy to handle, and be warm, not too hot.  You need to keep moving and fill in the Mickeys quickly because the candy will want to keep coming out.  Also, you don't want to wait too long and have it firm up too much before you finish.  It is really easy if you get a good rhythm going.


Let the Mickey heads cool.  It shouldn't take long if you're in a hurry.  Pick them up off the wax paper and stick them on top of the cupcake frosting.  Unless you've made your Mickeys crazy thin they should pop off the wax paper very easily.


I thought I had a Mickey Mouse cookie cutter until the day before the party.  Oops!  Instead of Mickey shapes I decided to go super simple and make round Mickey cookies.  They're a bit sloppy, but I made about a million of them and started to get really tired.  They are yummy though, so I really don't mind the leftovers.  :)  The royal icing recipe is available here.  I wrapped these cookies up in stead of giving out goodie bags.  No one ever seems to play with goodie bag contents anyway, and who doesn't love cookies?


Liam was so excited by all the Mickey things around our house, and playing with friends.


Last year I stumbled across a site that had a great idea.  Every year starting at about age 3 give your child a questionnaire.  The same questions every year, and you can compare the answers.  Such a great idea!  Last year Liam refused to answer at least half of the questions, but this year he actually responded to all of them.  I was pretty amazed.  His answers were pretty cute too.

I got this idea from reaves party of three if anyone wants to check it out.  He are Liam's responses:

1. What is your favorite color? red
2. What is your favorite toy? trains
3. What is your favorite fruit? strawberries
4. What is your favorite tv show? Phineas & Ferb
5. What is your favorite thing to eat for lunch? Preschool lunch
6. What is your favorite outfit? My red shirt
7. What is your favorite game? Candyland
8. What is your favorite snack? Fig bars
9. What is your favorite animal? platypus
10. What is your favorite song? Twinkle twinkle little star
11. What is your favorite book? Goodnight moon & Biscuit series
12. Who is your best friend? Preschool friends
13. What is your favorite cereal? Daddy's cereal (whatever he's eating, mostly wheat bran)
14. What is your favorite thing to do outside? Play games
15. What is your favorite drink? Boy soda ( the only “soda” I give him is carbonated water with a bit of lemon juice in it, but I can't think of what else he's talking about.)
16. What is your favorite holiday? Christmas!
17. What do you like to take to bed with you at night? My blankets and a book
18. What is your favorite thing to eat for breakfast? A fig bar (wishful thinking!)
19. What do you want for dinner on your birthday? cupcakes
20. What do you want to be when you grow up? A Daddy!


Yes, even our hard hats are Mickey!

Sunday, April 5, 2015

Happy Easter!


Happy Easter everyone!  Yes, I've been crazy busy lately, and Easter is almost over... but I made it.  We're still good.  I swear, between spring cleaning, everyday stuff, Easter, and getting ready for Liam's 4th birthday(!) my schedule has been packed.  No time for blogging... sad.  I've got some good recipes coming up soon though, no worries.

Easter is such a fun holiday.  I love watching the boys hunt for eggs.  They are both pros now.  Even Jack, and he's not quite a year and a half!  I love any holiday that gives me an excuse to bake.  I used to hate making cupcakes.  They NEVER turned out right.  Thanks to the awesome Carra though, we got my problem figured out and fixed.  I used to fill the cups 3/4 full instead of 2/3.  Laugh all you want, but just changing that one tiny thing made all the difference.


This isn't my chocolate cupcake recipe.  I used the cupcake portion of this recipe from Sally's Baking Addiction.  Her recipes are great and I trust they will come out perfect on the first try.  I doubled the recipe and made 24 cupcakes PLUS I had enough to make a nice 9x9 cake with the leftover batter!


For the vanilla buttercream frosting I used this recipe from Cooking Classy.  I added a bit of green gel coloring, and piped it on the cooled cupcakes.


The second I saw this bag of Cadbury mini eggs at the store last week I knew exactly how I wanted to decorate the cupcakes.  The eggs are cute toppers, and more chocolate never hurts!  I think the kids ate the equivalent to about 4 of these cupcakes each in sugar today.  Literally, they are bouncing off the walls.  Oh well,   At least they don't eat like this every day.,.

Happy Easter!

Thursday, January 29, 2015

chocolate truffles


Truffles are awesome.  Valentine's Day and Christmas are such great excuses to make them.  I would make them much more often then that because they are yummy and super easy, but I'd rather not keep something that tempting in the house.  I like making them and giving them out instead.


Butter!  Okay, this picture is kind of scary, but all my photos depict a DOUBLE batch of truffles, and a single batch is plenty for a normal person.  I often make a double batch of truffles (because I'm crazy), which makes at least 100 truffles, plus more to keep in a bowl in the fridge for Jeff to eat with a spoon for the next few months.  Oh, does no one else do that?  So yes, you will get plenty of truffles, and they last for a long time.


Grab a double boiler.  If you don't have one then do what I do and fake it.  Find a metal bowl that completely covers the pot beneath it (you DO NOT want any water boiling up and hitting the contents of the bowl or your truffles will be ruined.  Seriously though, this recipe is very easy.  If heat weren't an issue, I'd let my 3 year old make them.

Make sure to only fill up your bottom pot 1/2 full with water.  Enough to boil quickly and stay boiling without worrying about evaporation, but low enough to keep the water from spilling out.


Put the butter and heavy cream in the double boiler and stir occasionally until fully liquefied and incorporated.  I don't usually keep the butter in one block like this, it is quicker to cut the butter into dice sized cubes before adding, I just wanted to better illustrate the crazy amount of butter here.  This is a Costco sized stick btw.  Crazy.  Can you see why I don't eat these everyday?  :)


Once the butter and cream have mixed keep stirring, turn the heat off and slowly stir in the chocolate chips.  Make sure you keep stirring until every chip has melted.


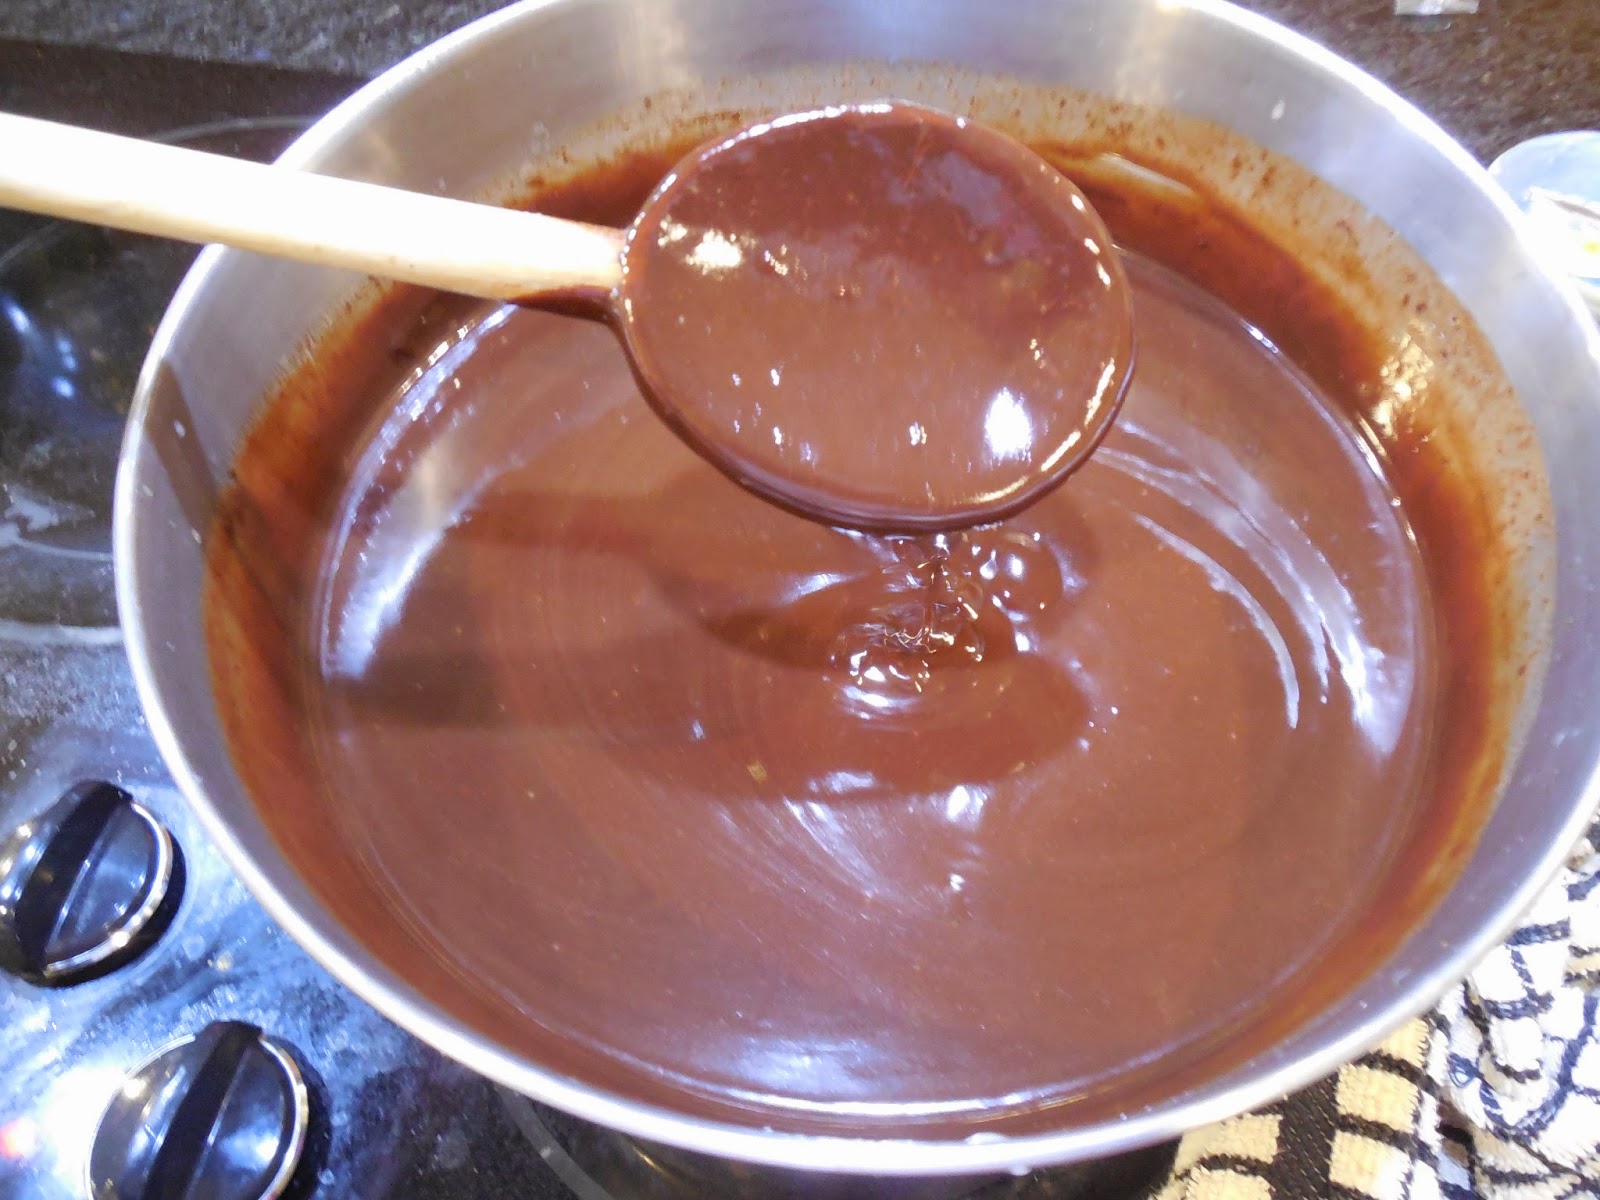
I'm always amazed how lightly colored the chocolate starts out.  This is with about half the chocolate stirred in.  The filling doesn't look like chocolate syrup until all the chocolate is mixed in.


Perfect.  Getting to this step only takes a few minutes.  What a big difference.


Stir briefly to make sure all the chocolate is fully melted.  Then cover the bowl (or top half of your double boiler.  If you have a huge double boiler then pour the chocolate into a smaller bowl.) tightly with plastic wrap and refrigerate until firm.

There is no rush moving to the next step.  If you want to do the next step tomorrow or later, or just keep some of this filling in the bowl in the fridge, that's fine.  It lasts a long time.  We still have some in our fridge that Jeff snacks on a spoonful at a time.


This is where you can go two ways.

  1. roll truffles in cocoa powder, crushed nuts, coconut shavings, etc. in store in a very cool place like the fridge.
  2. roll truffles into balls and dip them in melted chocolate.  Store in dry, cool place like the counter.
Either way, they taste great and last for a while.  You can easily make them a week or so in advance and give them out on Valentine's Day, Christmas, etc.  Perfect for if you're totally swamped the day before.


I prefer to dip the truffles in chocolate.  If I'm giving these as gifts I don't want to worry about them melting.  Jeff is our resident chocolate dipper (seriously), and we use a little candy melting pot that I got on amazon.  They seriously do sell everything.  I love it because it's the perfect size for this.  No waste.  I know most people probably don't own one of these, so other good options include a small double boiler, a fondue pot, or the tricky melting chocolate to the perfect temperature in the microwave many times.


In addition to a bouble boiler, fondue pot, etc. you'll need a plate or parchment paper to set the finished truffles on, a spatula to stir the chocolate, a fork for dipping the chocolate, and a toothpick.

Start the whole process by melting chocolate chips, stirring often to help regulate the temperature and melt quicker.  Have a plate of pre-balled truffles waiting in the fridge.  You can roll the truffles into any size, but I prefer large bite size.  Bring the plate out and one at a time place a truffle on your fork and drop it into the melted chocolate.  Immediately scoop it up and check to make sure it is entirely coated in chocolate.  Use the toothppick to help nudge the truffle off teh fork and onto the waiting plate or parchment paper.  Allow the truffle to dry and move on the the next ball.  Try to do this quickly.  The un-dipped balls of truffle filling will melt out of the fridge, so start by only bringing out a few at a time.  Once the truffles have been dipped in chocolate DO NOT put them in the fridge!  If you do they will sweat and become sticky.  Let them sit out on the counter until they have dried.  It shouldn't take long.

This process is very simple, especially if you are making truffles in a cool, dry environment.  Humidity, moisture, water drops, heat, none of these are good when working with chocolate.  Try to make sure your kitchen is dry and cool please.


Quick note:  when you've removed the chocolate from the pot give the truffles on the fork a firm tap or two on hte edge of the pot to get rid of any extra chocolate.  Otherwise you might have some chocolate dripping off.


That's it!  You've made truffles.  Good thing you'll have a lot, because you'll want to eat them all.  I like to decorate mine with chocolate jimmies.  If you want to as well, sprinkle them on immediately after dipping them in chocolate.  The truffles dry quickly and you want the jimmies to stick.  Another decorating option is drizzling chocolate (either lighter or darker) over top.


Once the truffles dry you can break off any excess chocolate drips attached to the bottoms.  Place the truffles in mini muffin wrappers and store in an airtight container on the counter.  The truffles will last for several months.

Chocolate Truffles:

ingredients:

  • 16 oz. chocolate chips (extra if dipping)
  • 3/4 cup heavy cream
  • 1/2 lb. unsalted butter
  • cocoa powder (optional, for rolling)
directions:
1. In a double boiler melt butter and heavy cream, stirring occasionally until fully mixed.  Turn heat off and slowly stir in chocolate chips until smooth.  Pour mixture into bowl and seal with plastic wrap.  Refrigerate until firm.
2.  Roll chocolate mixture into large bite sized ball and place on a plate.  Store the plate in the fridge.
3.  Roll the chocolate balls around in cocoa powder, crushed nuts, coconut shavings, etc. OR
4.  In a candy melting pot, small double boiler, fondue pot, etc. melt chocolate chips until they fill the pot at least 2" deep.  Prep by setting out a fork, toothpick, and sheet of parchment paper, or a large plate.
5.  One at a time drop a chocolate ball into the pot.  Quickly scoop up the the fork, making sure ball is coated fully.  Tap the fork firmly once or twice on the edge of the pot to remove any excess chocolate.  Use the toothpick to help nudge the truffle off the fork and onto the parchment or plate. Sprinkle with jimmies immediately (if using). Continue until the chocolate in the pot needs to be filled more and melted, or until you run out of chocolate balls.
6.  Allow truffles to dry on the counter.  Do not put them in the the fridge once dipped.  Once dry they should be shiny and firm.  Break off any excess chocolate attached the the base and place in a mini muffin wrapper.  Store in an airtight container on the container in a cool, dry spot.  The truffles will last for several months.